Learn how to make several sets of layered junk journal pockets that are ideal for holding small to medium size clipart and ephemera.
If you love adding unique elements to your junk journals, then these easy layered junk journal pockets are sure to inspire.
These pockets provide a fun and easy way to infuse your junk journals with personality and flair. With just a few simple materials and some creativity, you can easily create pockets that are perfectly suited to your junk journal style.
These types of junk journal pockets can be used as embellishments for the pages in your journals, or as a way to provide storage space into your journals for small to medium size clipart and ephemera.
DIY Easy Layered Junk Journal Pockets
In this tutorial I’m sharing several different ways to make layered junk journal pockets.
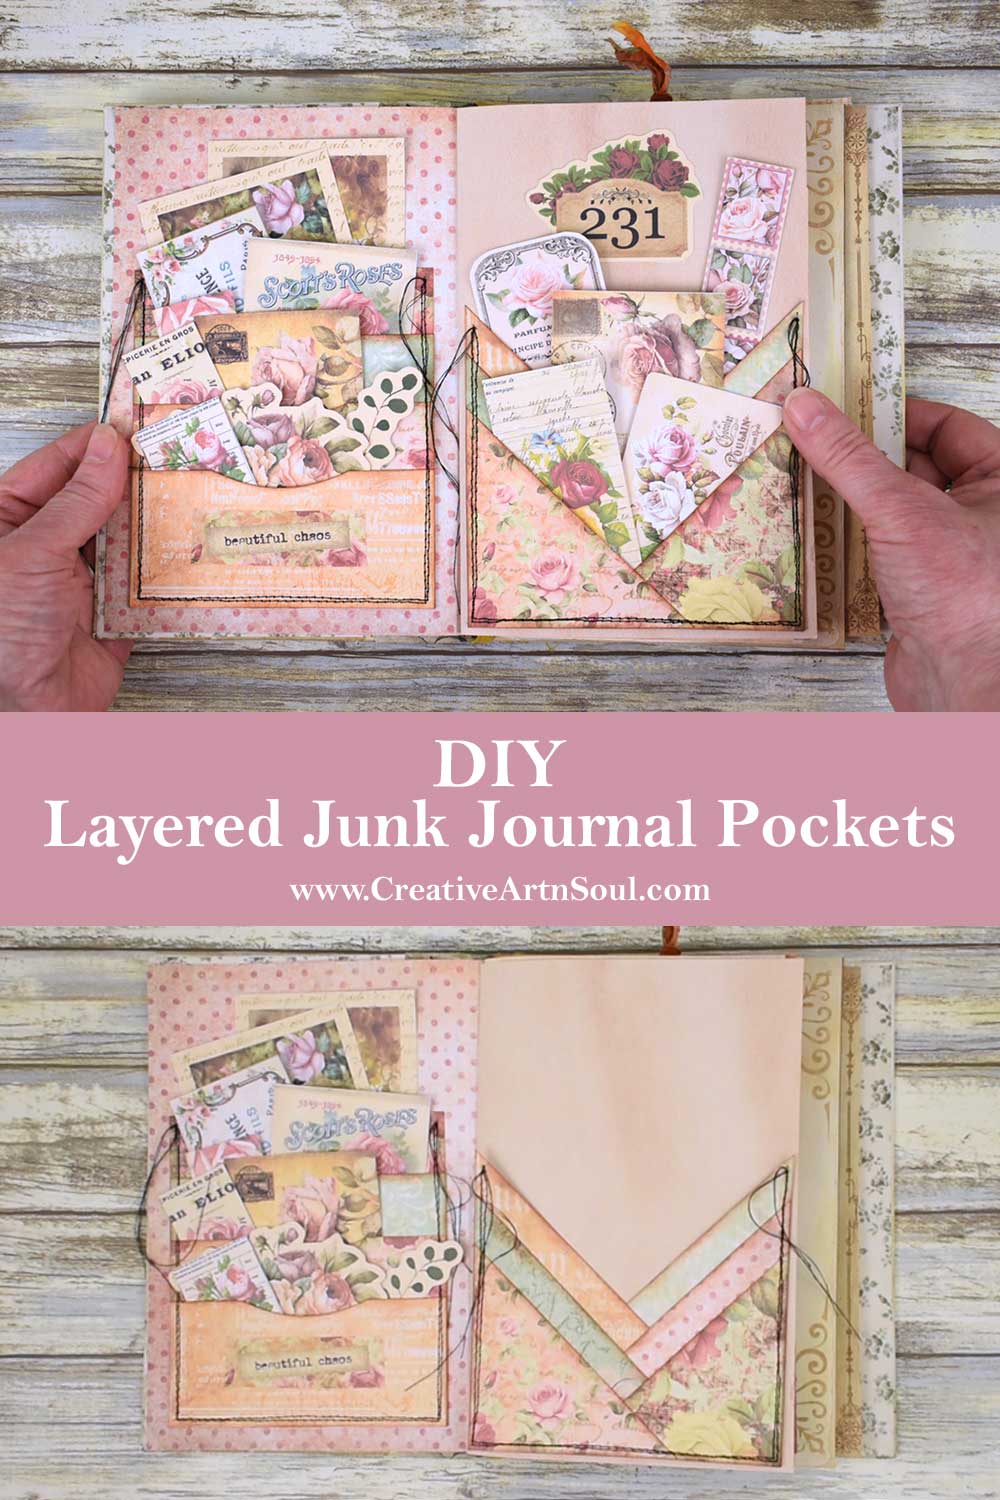
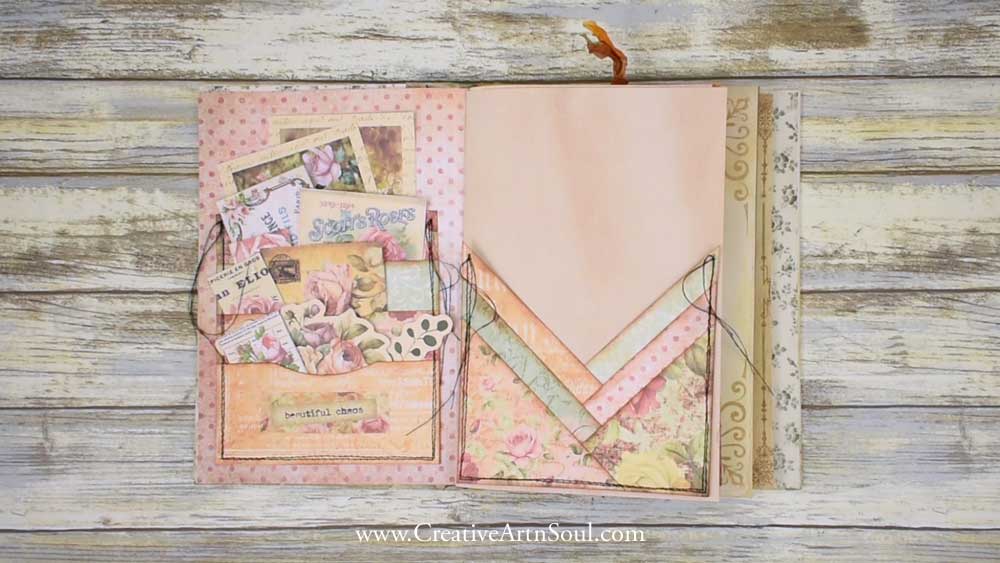
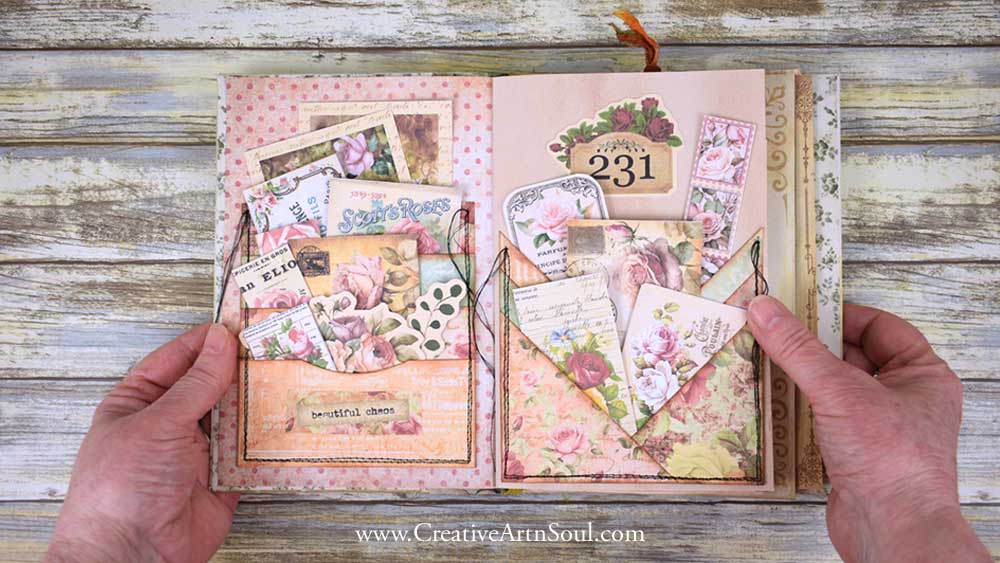
Rectangular pockets are ideal for stacking vertically. You can add as many layers of pockets as will fit on the page.
Corner pockets can be stacked at an angle in either one corner at the bottom of the page, or both corners.
You can further personalize them with embellishments such as ribbons, lace trims, buttons, or even hand-stitching for that extra special touch.
Supplies
- junk journal printables
- printable word sentiments
- Epson EcoTank Printer
- cardstock
- cutting mat
- ruler
- rotary cutter
- ink pad
- ink pad applicator
- binder clips
To make these layered pockets I’m using these printable papers, but you could use any other type of printable papers or even scrapbook papers.
The journal I’m working with is my large no sew junk journal.
Layered Rectangular Junk Journal Pockets
To get started with the layered pockets print out some printable papers onto cardstock.

To begin making the layered pockets, first measure the width of the journal page where you’ll be placing your pockets.

It’s easier to cut the width of the pockets slightly smaller than the width of the page, then you don’t have to worry about trying to make the edges align.

Cut out the individual pockets. I’ve cut the front pocket at 2″ high, and then the other pockets at 3″, 4″ and 5″ high, so there is a 1″ overlap on each of the pockets.

I’ve made a set of four layered pockets but you could make more if you wanted to. Just make sure to cut each of them with a 1″ overlap at the top.
To cut out a curve along the top of each pocket you will need something circular to use as a template. I’m using a roll of double sided tape. Make sure the edge of your circular object is centered along the top of the pocket, then use a pencil to mark the shape.

Cut out the shape using a small pair of scissors. Once you have one pocket cut out you can then use it as a template to cut out the others.

With the cut out pocket on top, stack the other pockets underneath and attach them together using some paper clips or binder clips so they don’t shift while you cut them out.

Once cut, you can color the edges with an ink pad and applicator. This helps to make the top of the pockets stand out better against the background.

To attach all the pockets together, you can either run a line of glue down the sides and bottom edges of each individual pocket and glue them together, or you can sew them together on your sewing machine as I’ve done.
If you’re going to sew them, use some paper clips or binder clips to hold all the pockets together so they don’t move around while you sew.

Once the pockets are all attached, run some glue around the sides and bottom edges and glue the assembly to the page.

To finish off you, glue a word sentiment to the bottom pocket.


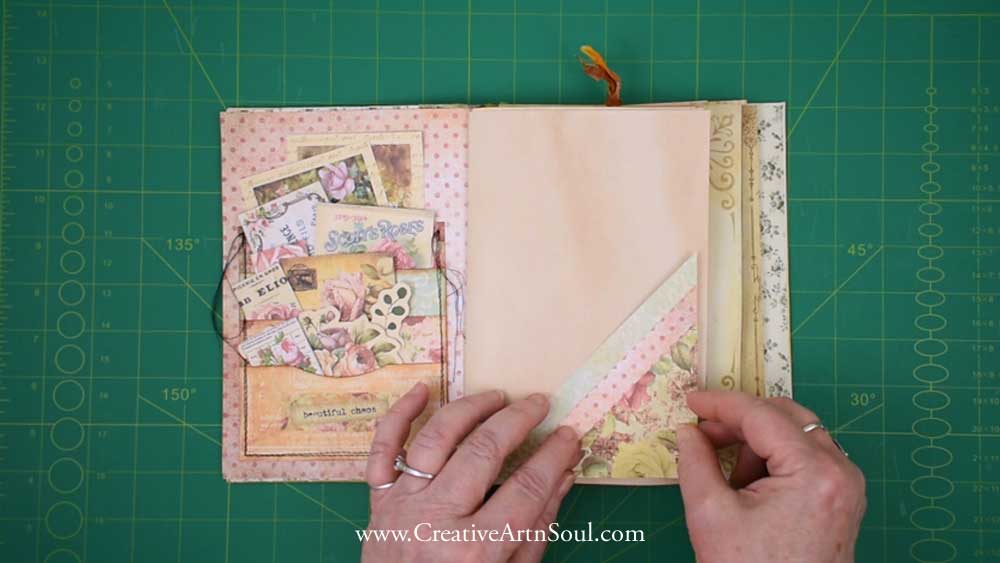
Layered Corner Junk Journal Pockets
In a similar way to the rectangular pockets, you can also make layered corner junk journal pockets. This particular set of pockets comprises two sets of corner pockets; one set inset along the bottom left, and one set inset along the bottom right of the page.
To make the pockets I’ve selected six different printable papers that are printed on cardstock; a different paper for each pocket.
This journal page is 5″ wide so I’m going to cut the back pocket 4-3/4″ wide so it fits on the page without having to align the edges. I’m cutting the middle pocket 4″ wide, and the top pocket 3-1/4″ wide. All pockets are cut into a right angle triangle shape.


Once cut, color the edges with an ink pad and applicator so that the top of the pockets stand out better against the background.

Layer the pockets right side then left side, one on top of the other.

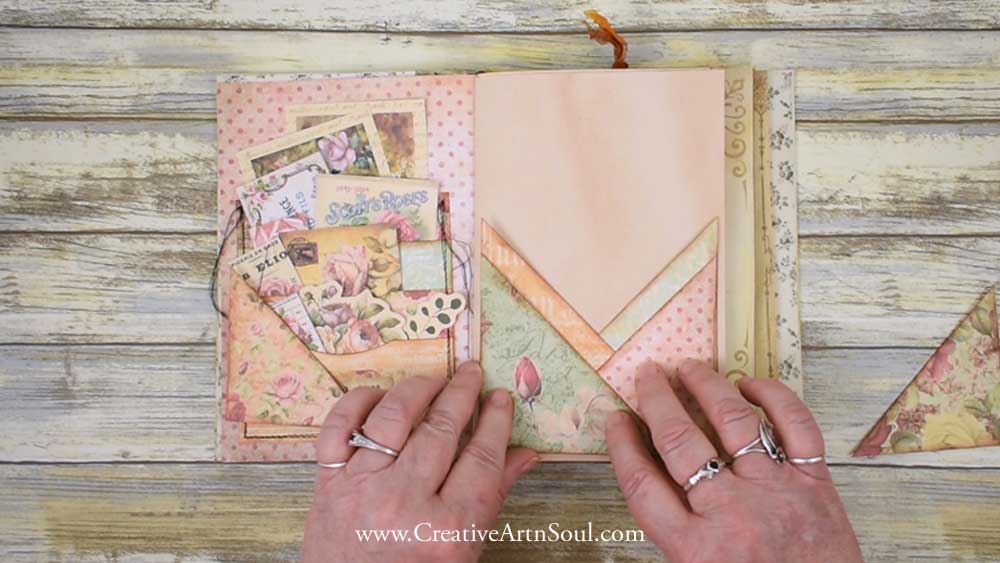

To assemble the layers, you can glue each of the pockets down the sides and bottom, one on top of the next, or you can assemble them and sew them together as I have done.
Once the pocket set is assembled, apply some glue down the sides and bottom and press it onto the journal page.
Save this pin to your favorite Pinterest board!