Learn how easy it is to print and cut your junk journal printables in both US letter size paper and A4 size paper using a Silhouette Cameo cutting machine.
If you make and sell handmade journals and have pages of junk journal printables that you tend to print repeatedly, or if you have pages with lots of printable clipart, it saves a huge amount of time and convenience to be able to print and cut your junk journal printables using a cutting machine, instead of by hand using scissors.
Once you’ve set up and saved a cutting file, you can use it over and over again quickly and easily. And it’s easy to do this using the Silhouette Cameo cutting machine.

How to Print and Cut Junk Journal Printables Using Silhouette Cameo
Convert the Files for your Junk Journal Printables
Junk Journal Printables are generally available in either pdf, jpg or png format.
In the basic version of Silhouette Studio software you can import jpg and png files but not pdf files. If you have upgraded to the designer edition or the business edition of the software, you have the option to import pdf files as well as other file formats.
However if you don’t have the upgraded software installed and you have pdf files that you want to cut and print, you can use a free online file converter such as pdftoimage.com to convert your pdf files to jpg or png format and then import them into the software.
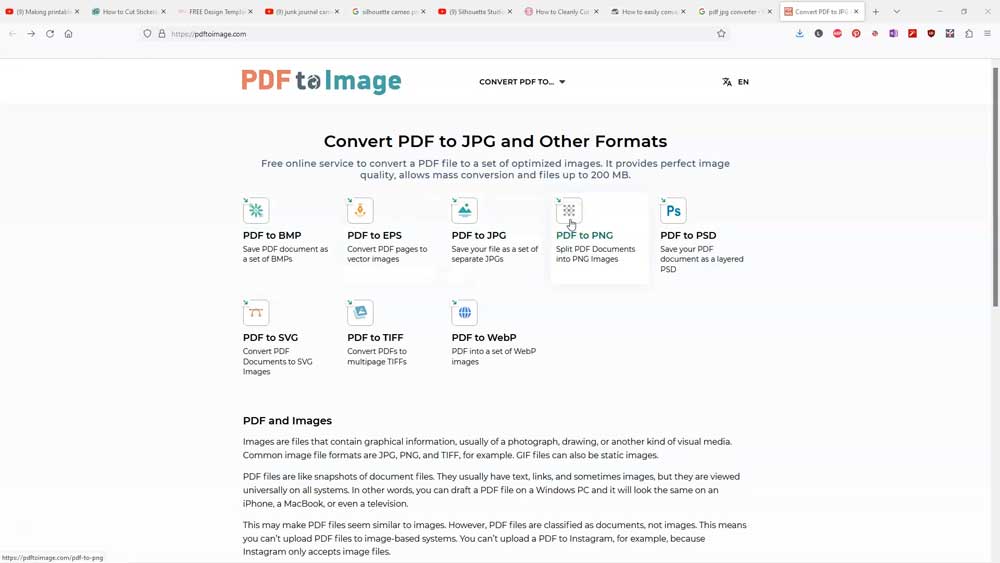
The best file format to use for print and cut printables is png format as this will give you a smoother edge around your printable images, as opposed to jpg format which may end up with pixelated edges.
Once you’ve converted the files to the correct format, you can then download and import them into the cameo software and get them ready to print a cut.
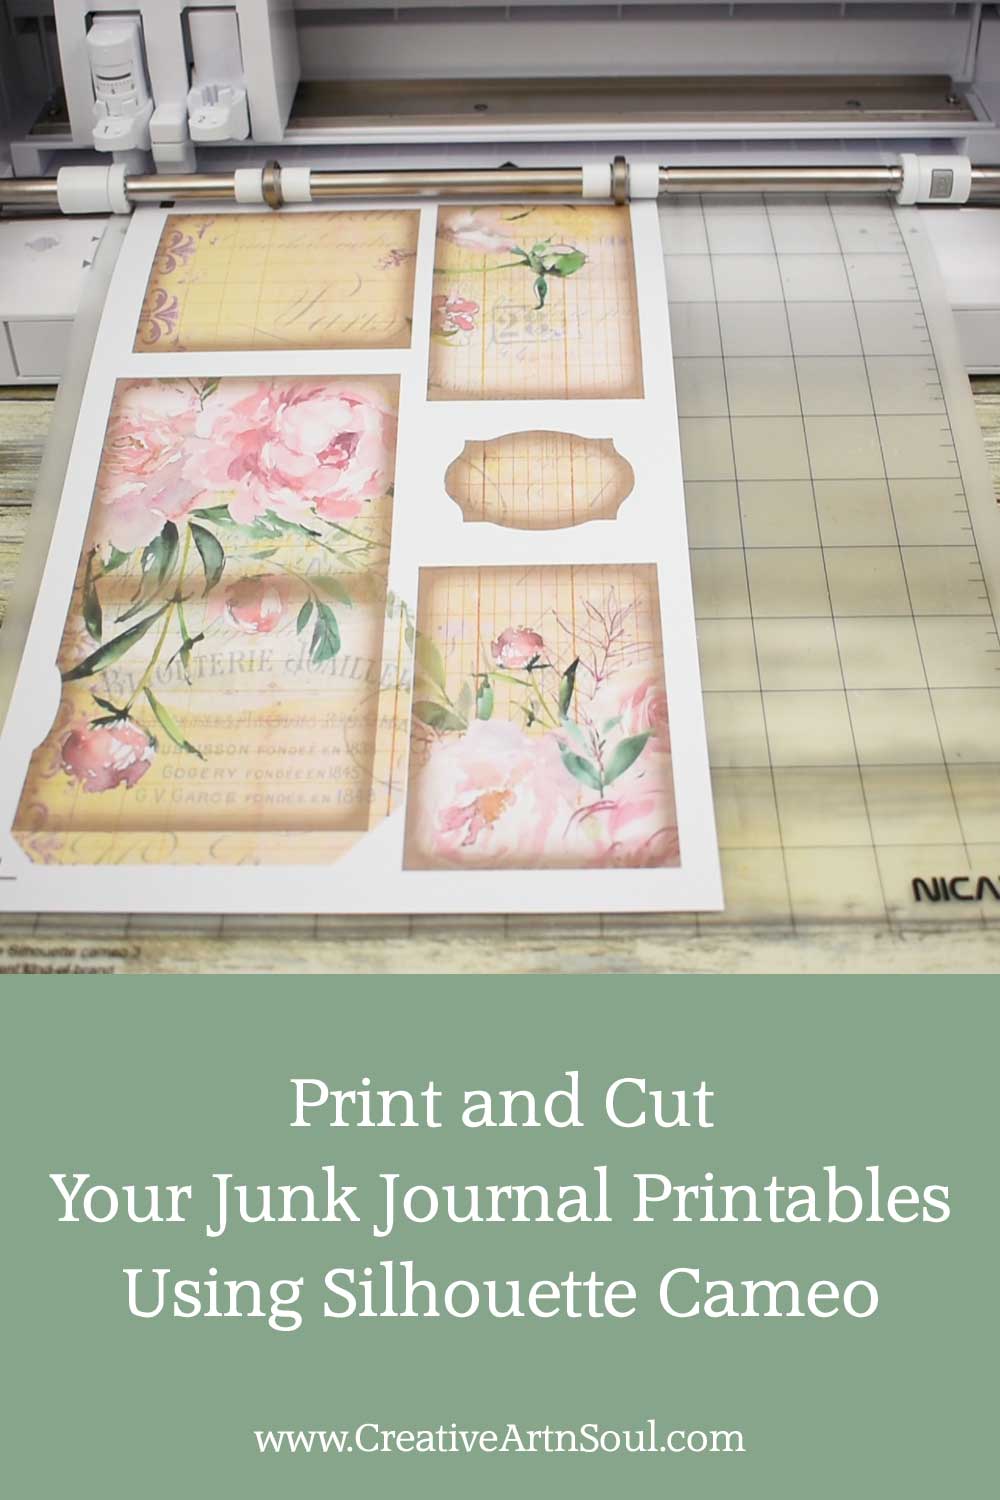
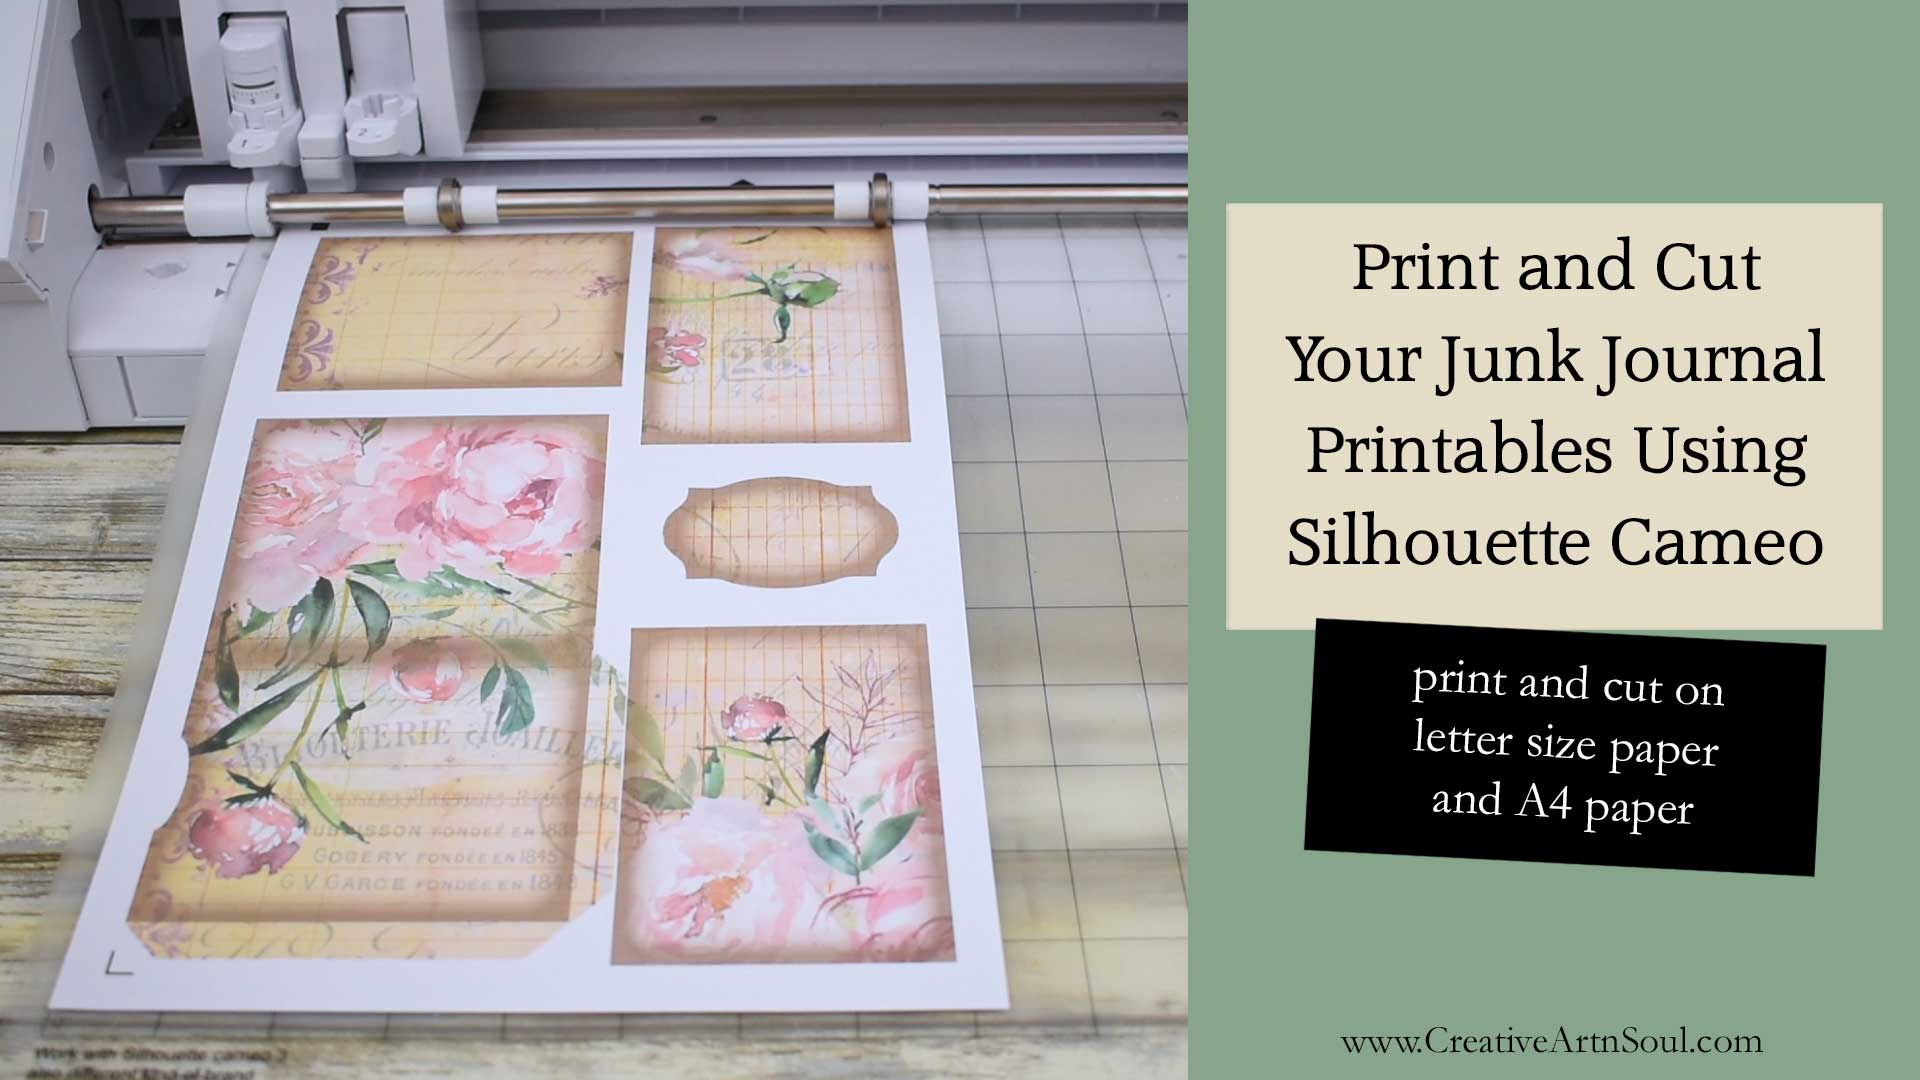
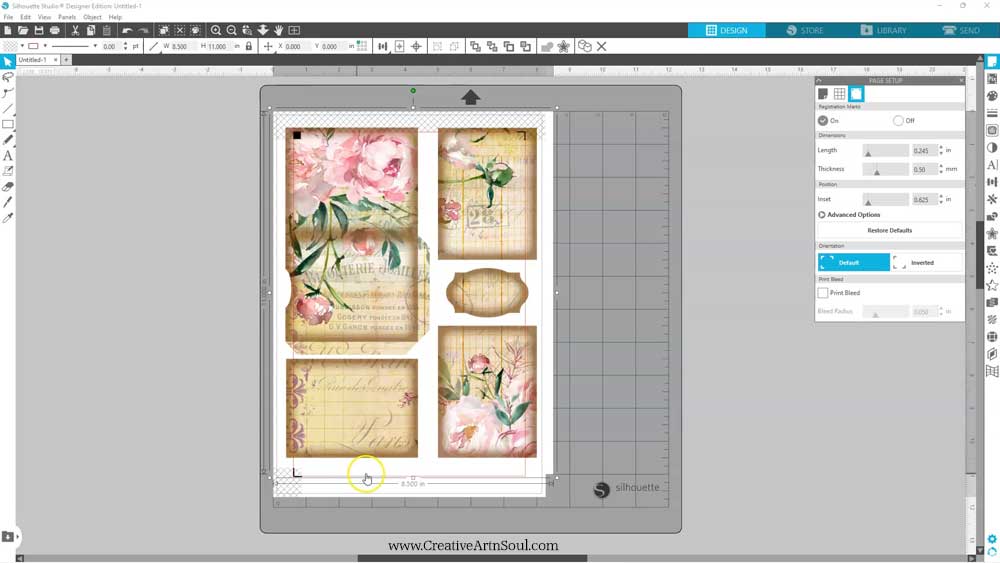
I’ve designed this page of printables using one of my printable junk journal templates which has a pocket, several journal cards and a label.
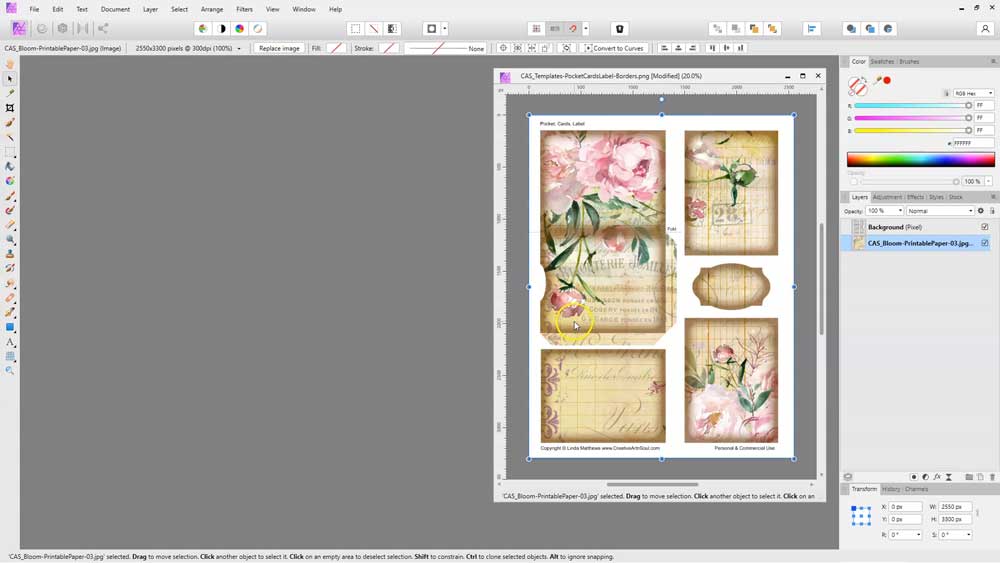
When using these templates, all you need to do is open the template in a photo editing program and simply add one or two digital papers then save the file in png format.
Setting Up for US Letter Size Paper and A4 Size Paper
As well as file formats, another thing to consider is paper size. While most junk journal printables are readily available in us letter size, it’s quite easy to set things up in your cutting machine to import a file in us letter size and then print and cut on a4 size paper.
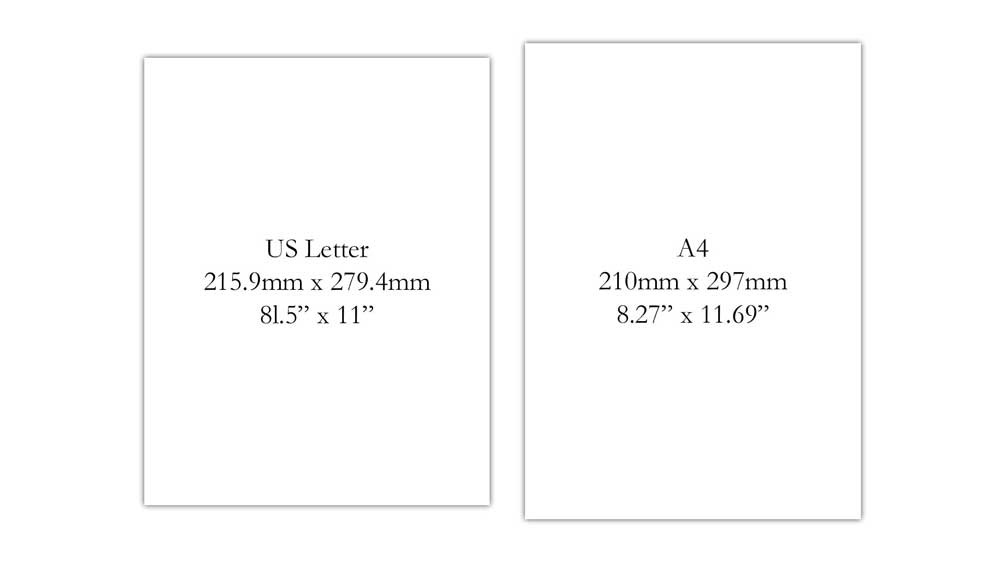
In the Silhouette Cameo, the conversion from US letter size to A4 size isn’t difficult but sometimes it needs a bit of tweaking, particularly if you are using printable pages with images that fill the page and extend close to the edge of the paper.
Unless designed specifically for print and cut purposes, there is usually not a lot of space around the edges of junk journal printables. This means that it probably won’t fit inside the cutting area of your Silhouette software without some sort of modification.

Although these types of pages are not necessarily designed for print and cut, there is a fairly simple work around.
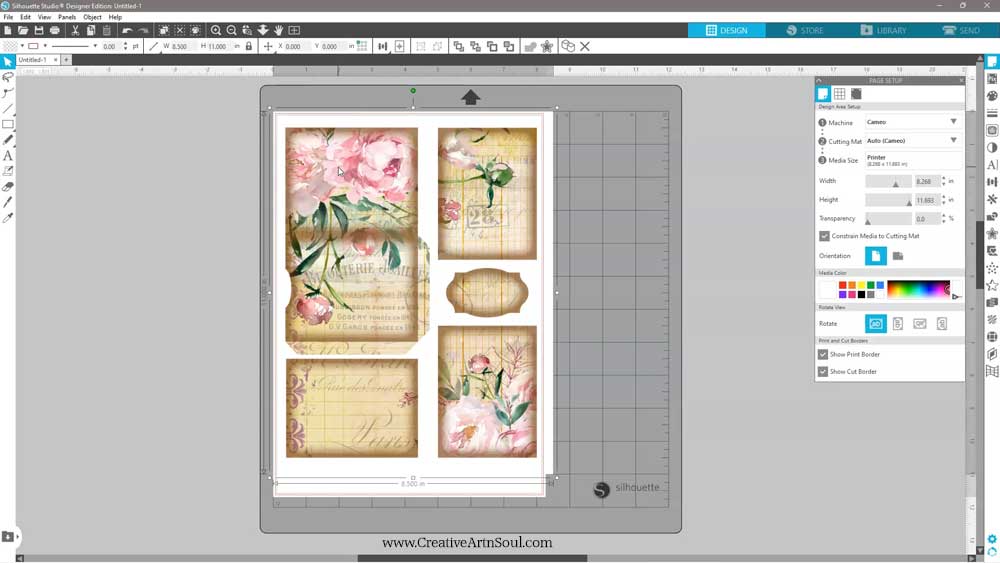
Make sure your printer is set up for the correct size paper. On the main menu select File > Print Page Setup and select your paper size. This can be either a4 or us letter.
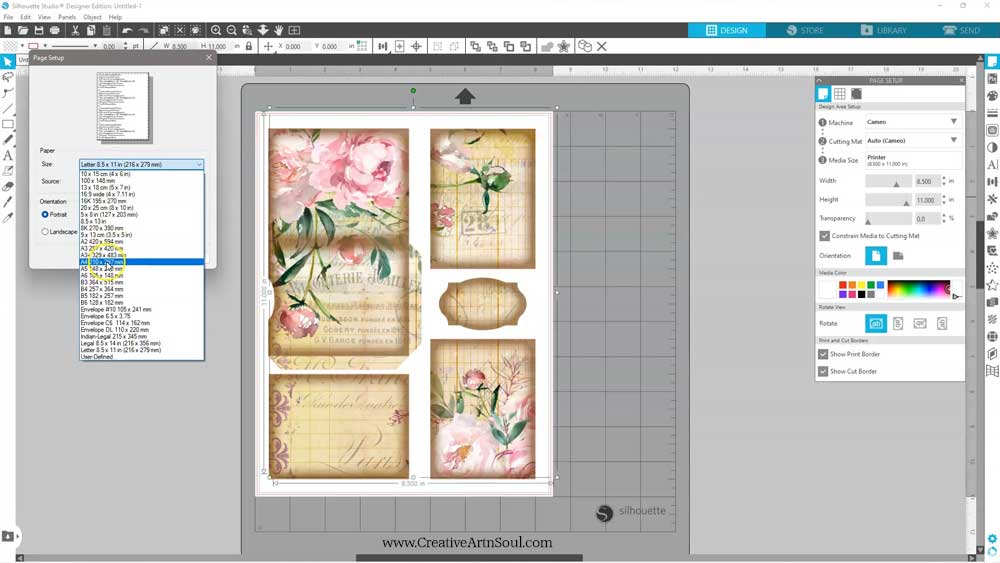
Then on the page setup panel on the right side, set the “Media Style” option to “Printer” and it will automatically default to your selected page size.
Make sure you have “Show Print Border” and “Show Cut Border” enabled.
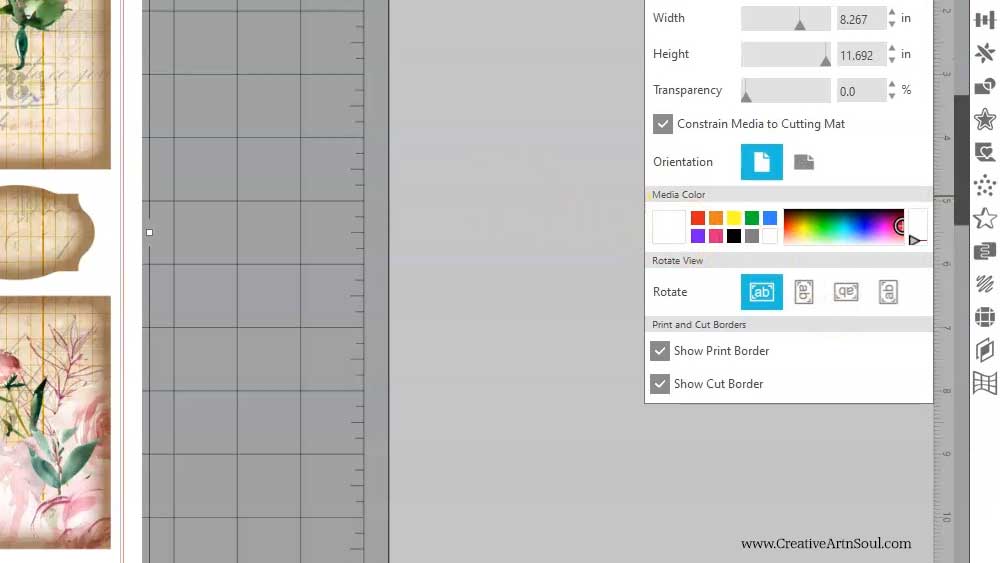
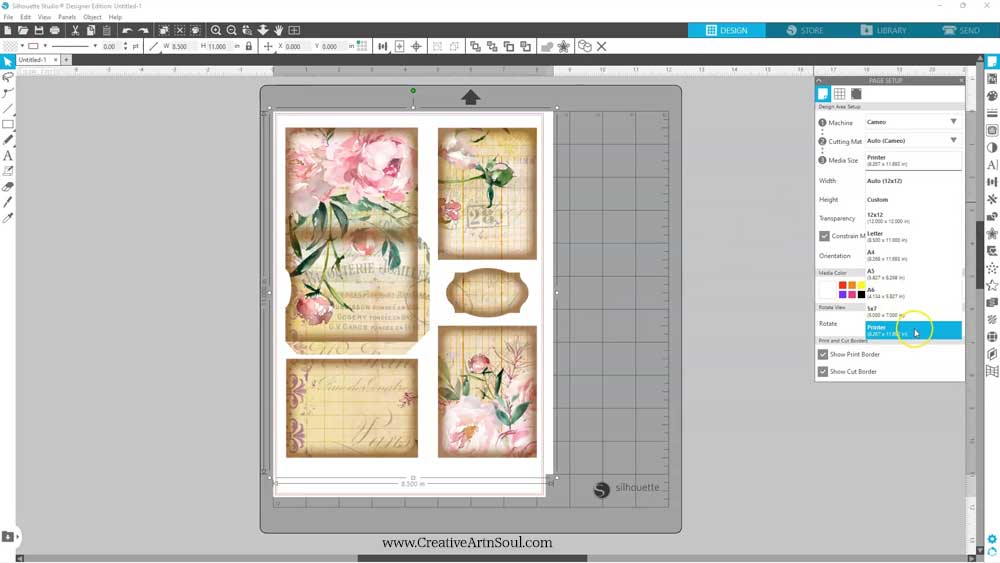
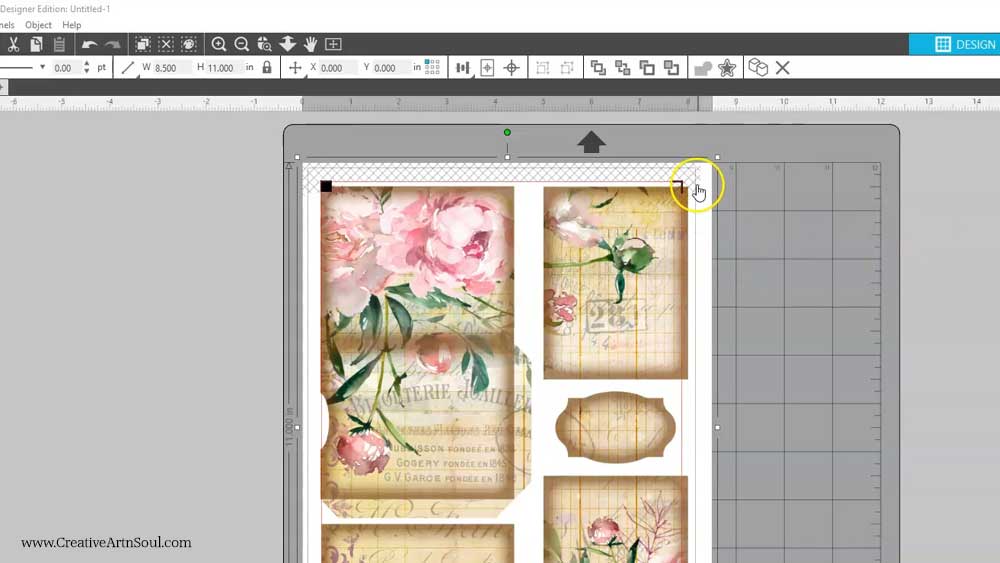
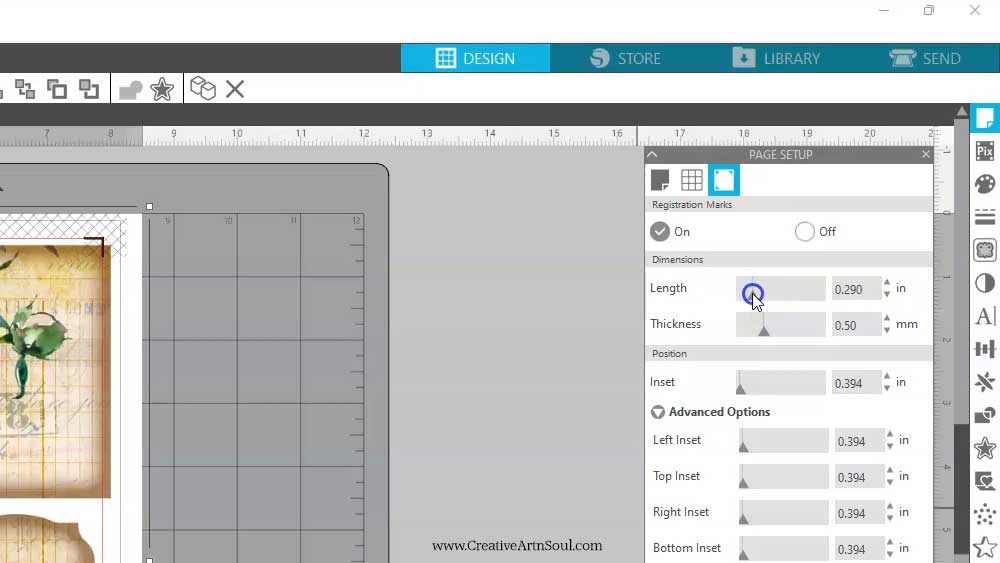
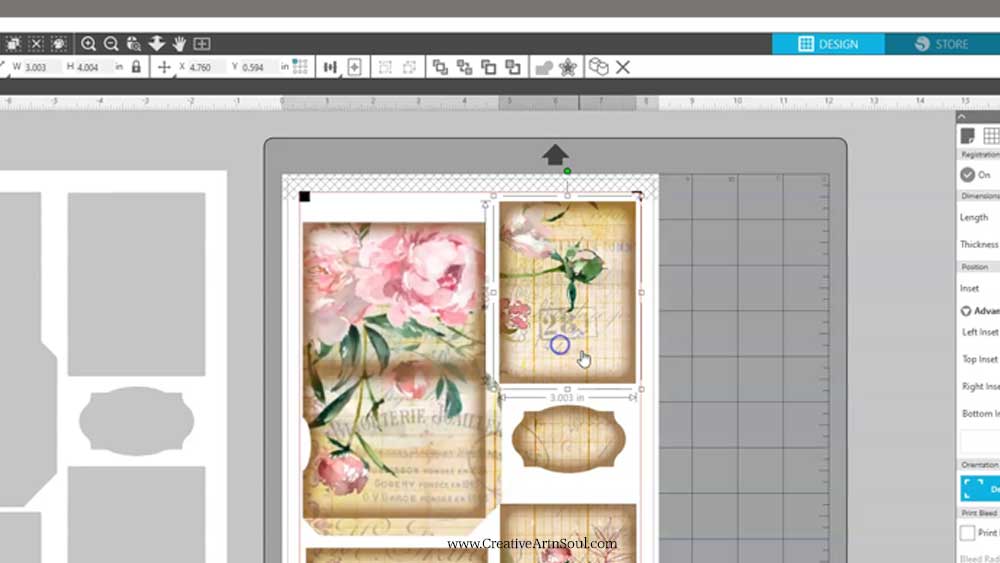
Now display the registration marks and you will see that the printables don’t fit within the cutting boundaries. However there is an option to make this area larger in size.
To make the cutting area larger, you can adjust the position of the registration marks. On the registration tab select Advanced Options.
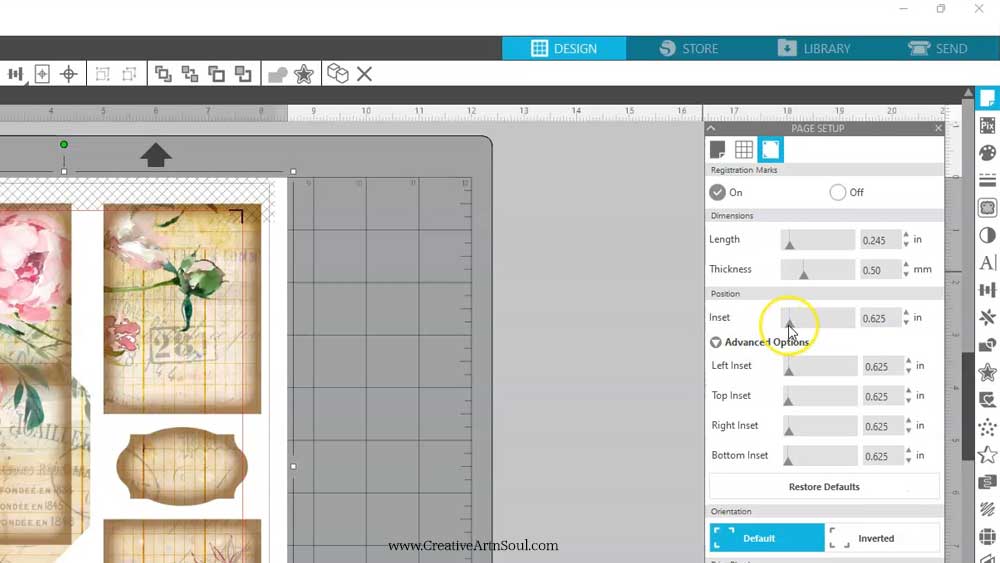
Slide the inset slider to the left and you can see that the registration marks move outward, enlarging the cutting area.
To make even more room you can adjust the width slider which adjusts the width of the registration marks.
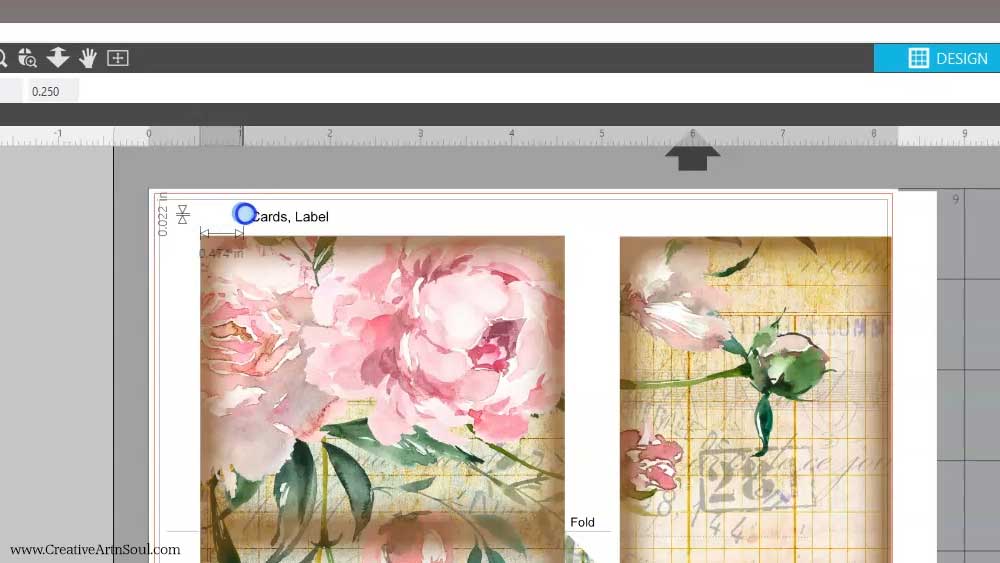
Even with these adjustments this printable page still doesn’t quite fit on the cutting area, but you can resolve this problem easily.
First of all erase any unwanted elements on the page such as product information and other kinds of marks and guides. You can do this in your photo editing program or use the eraser on the cameo software editing screen.
If using the cameo program eraser, turn off the registration marks and zoom in close to make it easier to see what you’re doing.
Once you’ve cleaned up the page, select the trace tool. Select Trace Area” and select all of the printables. Increase the threshold until all the areas are fully highlighted.
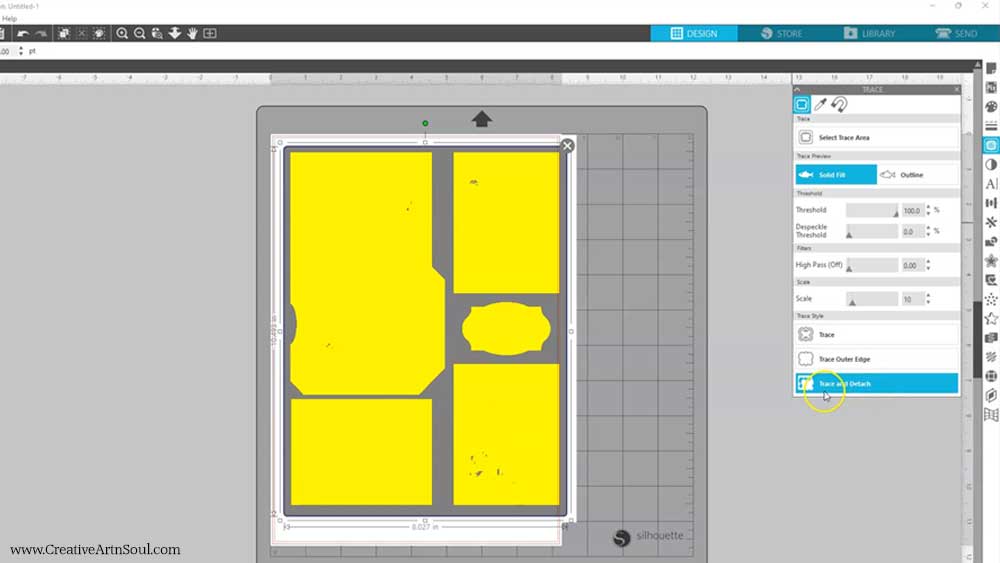
Then click “Trace and Detach”. This option separates all the pieces so that you can move each piece around individually. Click on the white background and move it out of the way.
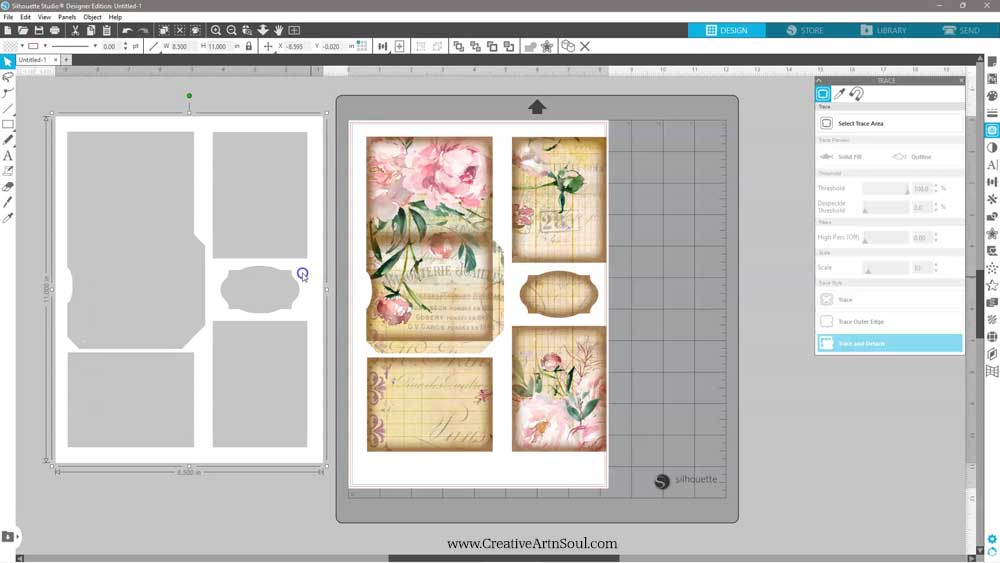
Now all you have left is the printable pieces which you can move around to fit within the cutting space regardless of whether you use us letter size paper or a4 paper.
Turn the registration marks back on and move each of the pieces around until they all fit within the cutting space.
Make sure to avoid overlapping the crosshatch areas as this is the area where the machine reads the registration marks so you don’t want anything overlapping to avoid problems with registration.
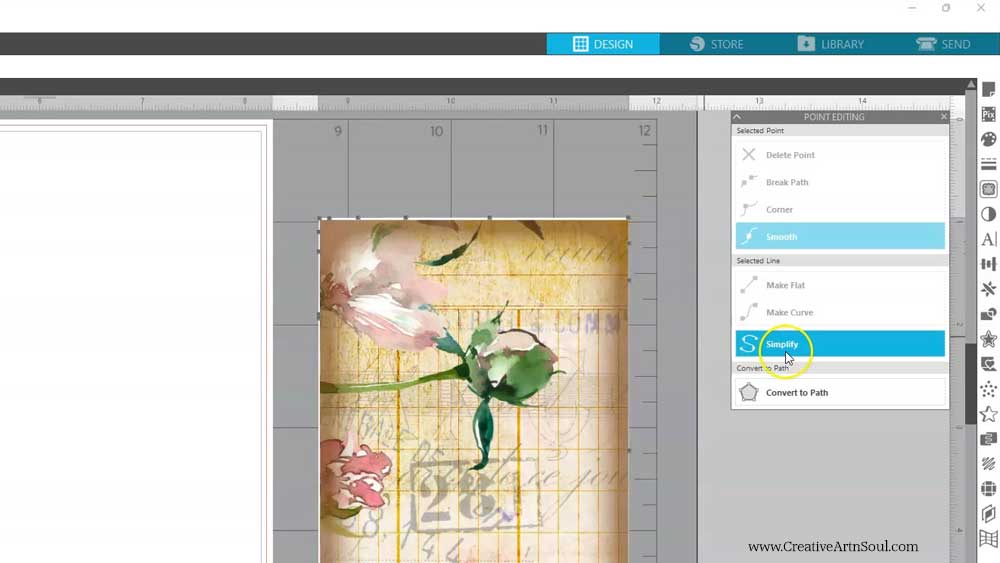
Before you go any further it’s a good idea to check if the cutting lines need any editing. To make it easy to see what you’re doing, move each of the pieces onto the cutting mat area so you have contrast and can see better, and then zoom in close.
Double click around the edge to make the editing points visible and then make any changes or adjustments.
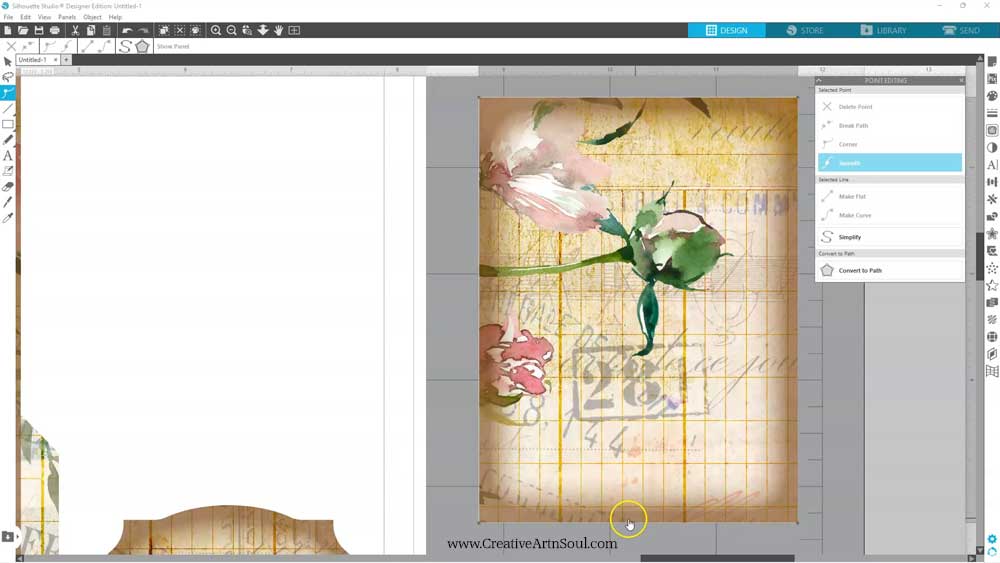
If you see any white areas around the edges, simply move or delete the edit points until there is no white showing.
If you used a png format file, you shouldn’t need to do much editing at all, if any. If you used a jpg file and you can see that the edges are a lot rougher than the png format file so this type of file will need more editing.
You can click the “Simplify” button and this simplifies the design by reducing the number of points and can help smooth things out but it doesn’t always work well. It depends on what type of design you’re editing. However for simple shapes it’s easy to delete and reposition the editing points.
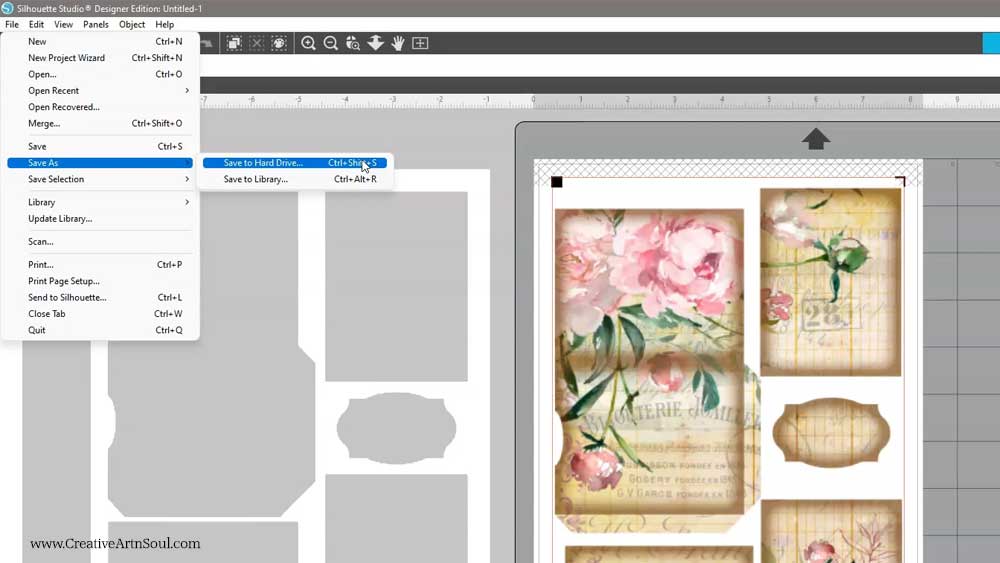
Once the pieces are edited and positioned you can save the file to your harddrive to use again in the future.
Print and Cut the Page
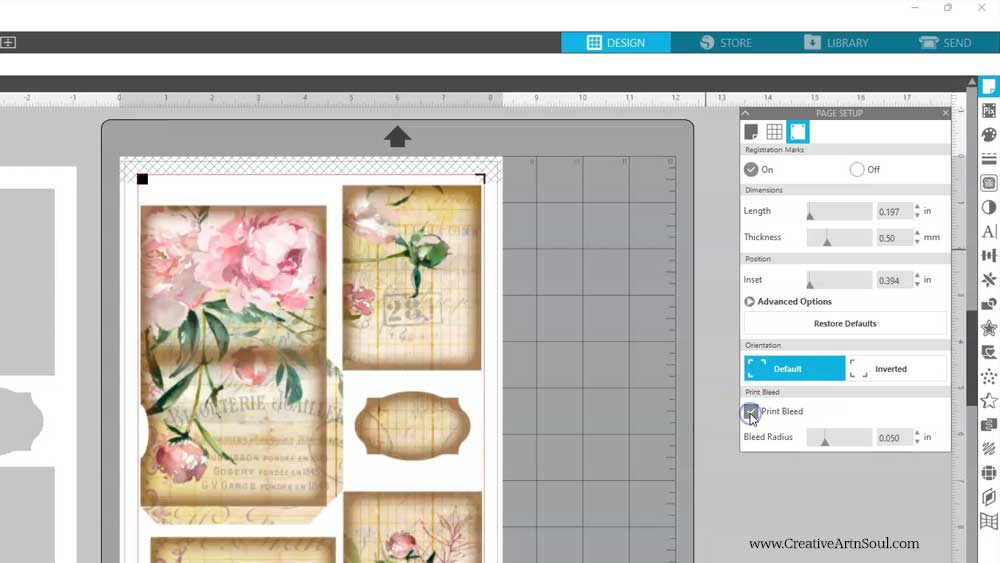
Before sending to print, I like to enable the “Print Bleed” option and set it at it’s highest setting. This setting will extend the color of the design slightly beyond the cutting area just in case the cutting line is slightly off and this prevent any white edges from showing through.
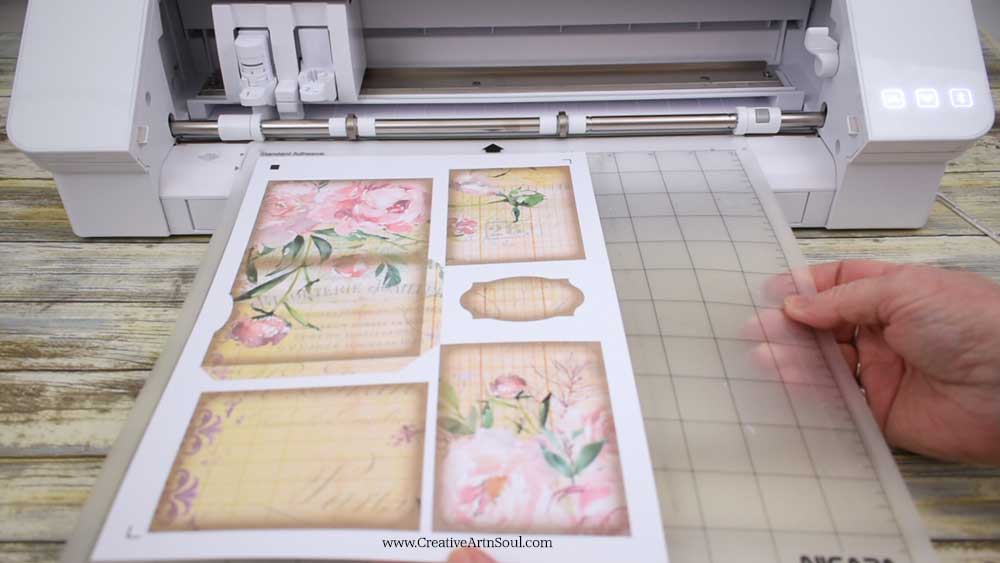
On the main menu go to File > Print. Print the page onto a piece of good quality copy paper or cardstock depending on what type of printable you’re using.

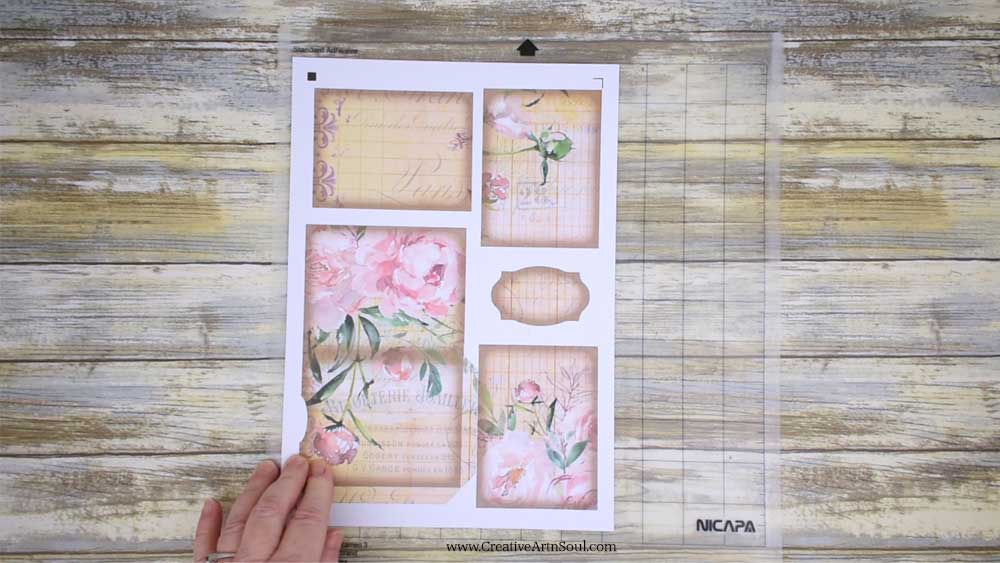
Once printed, attach the paper to the cutting mat. And then insert into your machine.
Once loaded, in your software click the “Send” tab.
Make sure your paper settings are correct. I’m printing on heavyweight cardstock and I know that my cut settings need to be adjusted. If you’re not sure about which settings work best for your paper, always make a cut test first.
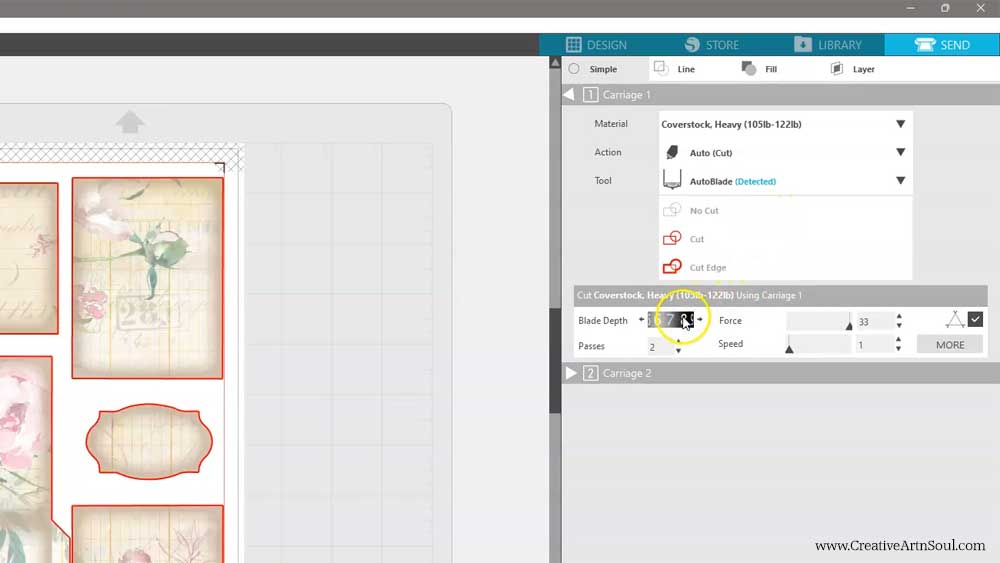
When you’re ready, hit the send button.

Save this pin to your favorite Pinterest board!