
Learn how to make a fun diy junk journal with a creatively stitched fabric cover and tea dyed paper pages.
Making handmade diy journals is a rewarding and creative hobby. It allows you to express your personal style while also providing an outlet for self-expression and individuality.
By customizing every aspect of the journal, from the cover design to the pages, you have the freedom to create a truly personal space for your thoughts, ideas, and artistic expressions.
This diy junk journal is fun to make and features a fabric cover with signature stitches hidden in the spine, together with tea stained paper pages. Using easy journal-making techniques you’re sure to enjoy making this creative project.
How to Make this Creative DIY Junk Journal with Fabric Cover and Tea Dyed Paper Pages
The cover for this diy junk journal is made from heavyweight Peltex stabilizer and fabric with an optional pocket on the inside of the front and back covers. If you aren’t able to get hold of Peltex stabilizer, you can easily make your own. The binding stitches are hidden in the spine and the blank pages are made from tea-stained papers.
Because the pages are blank, you can easily create any type of journal such as a writing journal, a junk journal, or even a memory journal.
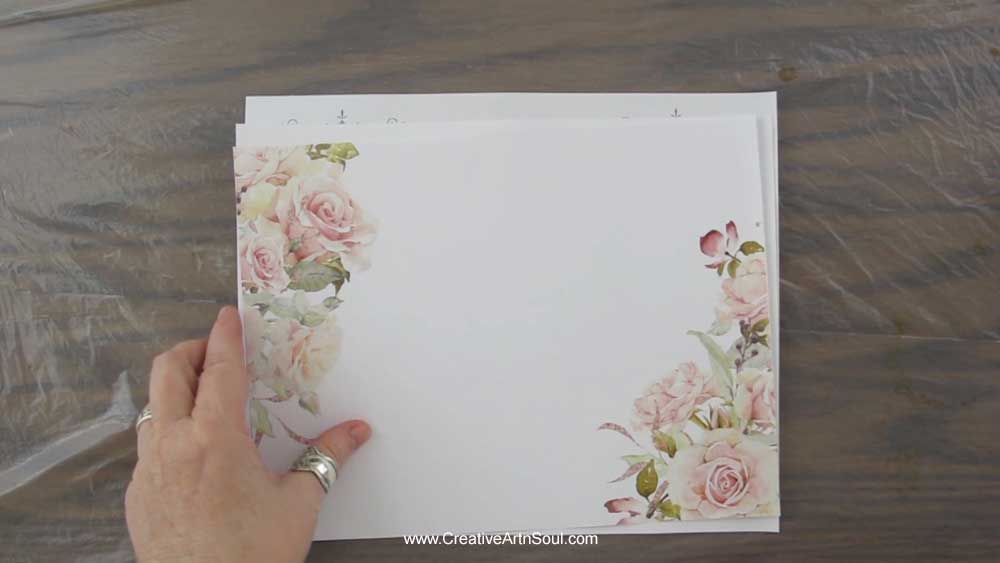
On the front cover you can use a photo or image or even a junk journal page printed onto cardstock, then embellished with fabric and lace scraps.
Supplies
- 24lb weight copy paper for pages
- black tea bags
- wide foam paint brush
- fabric for the journal cover
- fabric, lace and ribbon scraps
- strips of fabric or ribbon for tie closure
- Peltex 72F double-sided fusible heavyweight stabilizer or DIY heavyweight stabilizer
- tear-away stabilizer
- a vintage or other type of image printed onto cardstock or photo paper approx 4″ x 6″
- fabric glue or strong craft glue
- sewing machine
- general sewing supplies
- hand embroidery needle and embroidery thread
- embellishments such as beads, buttons, charms etc
- black sharpie or felt tipped marker
- a bookbinding awl
- iron
- parchment paper or teflon ironing mat
How to make Tea Dyed Paper
There are lots of different ways to make tea-dyed paper for you diy junk journal, however my favorite method is to paint the tea onto the paper and then bake it in the oven for 2-3 minutes.
This is a really quick way to tea-dye paper and you’ll end up with sheets of paper that have uneven color with lots of lovely texture.

To make tea-dyed paper, you’ll need to use black tea. I buy cheap black tea bags as there’s no need to use expensive tea for dyeing the paper.
Use four tea bags in two cups of boiling water. After you add the boiling water, let the tea bags steep for about 5 minutes until the water looks quite dark.
I like my tea stain to be a light to medium shade. To make a darker shade, simply add more tea bags to make the tea solution stronger, or for a lighter shade, add less tea bags.

The type of paper I like to use is 24lb copy paper. This weight of paper is thicker than standard copy paper and you can write on it without the ink bleeding through to the other side.
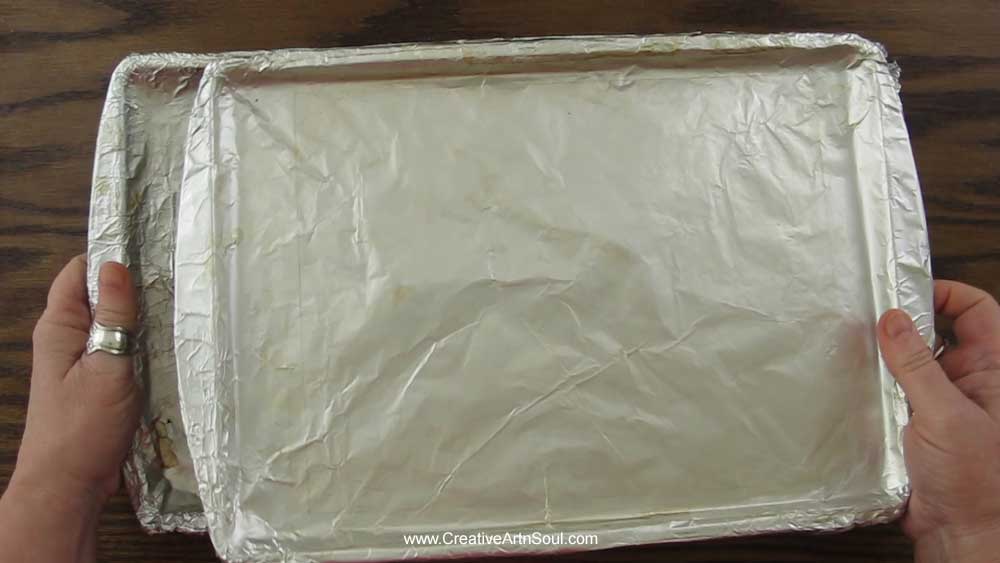
To bake the paper, I use old cookie trays covered with aluminum foil. I use two small trays that hold one sheet of paper each. However if you have a large oven, you could use larger trays that hold more than one sheet.
Once the tea has steeped, place a sheet of plastic on a flat surface and paint the paper with the tea. When painting, I like to use a wide foam brush but you could really use any type of paint brush.
Give the upperside of the paper a good soaking, then turn it over and paint the underside as well.

Once the paper is painted, carefully lift it at the corners and place it on the cookie tray. To turn the paper over, use both hands to lift the paper at the corners and then carefully flip it over. When lifting the paper, be very careful as it becomes fragile when it’s wet and it tears easily.
Before placing the tray in the oven, you can add a few more dabs of tea here and there to make darker stains. Now the paper is ready to bake. I bake my paper at 350 deg F or 180 deg C for about 2-3 minutes.
You may need to make a few test pages and adjust the heat and time settings depending on your own oven.
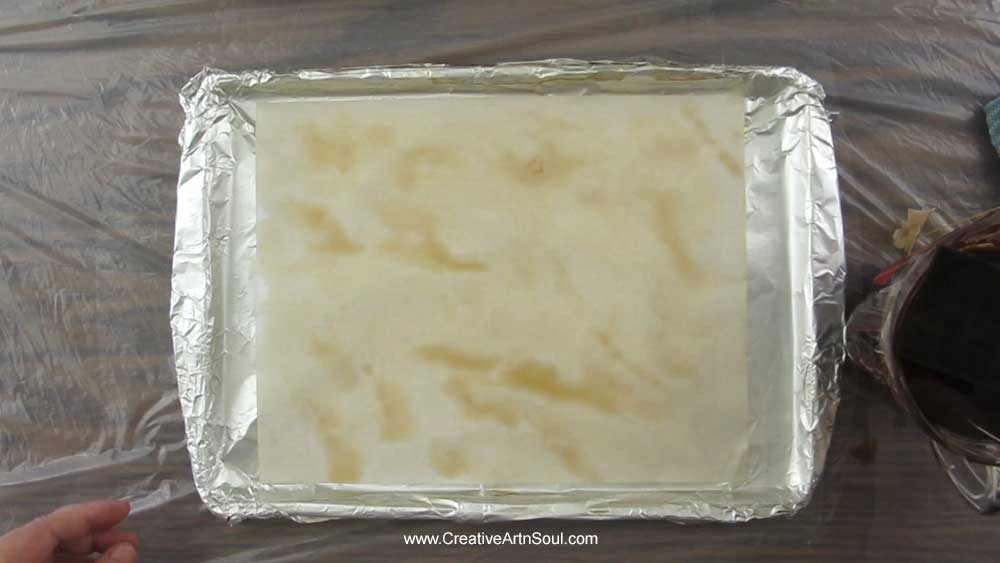
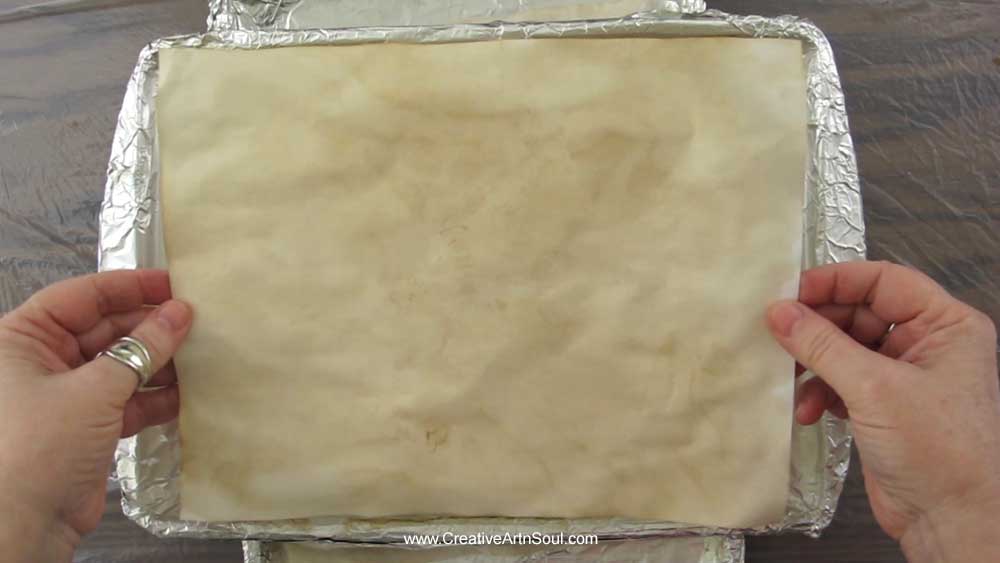
When baked, the paper should be completely dry and slightly crinkled.
While the paper is baking in the oven, paint another set of papers. Then once the baked paper comes out, you can quickly put a new set in. Doing it this way, you can get quite a lot of paper painted and baked in a very short amount of time.
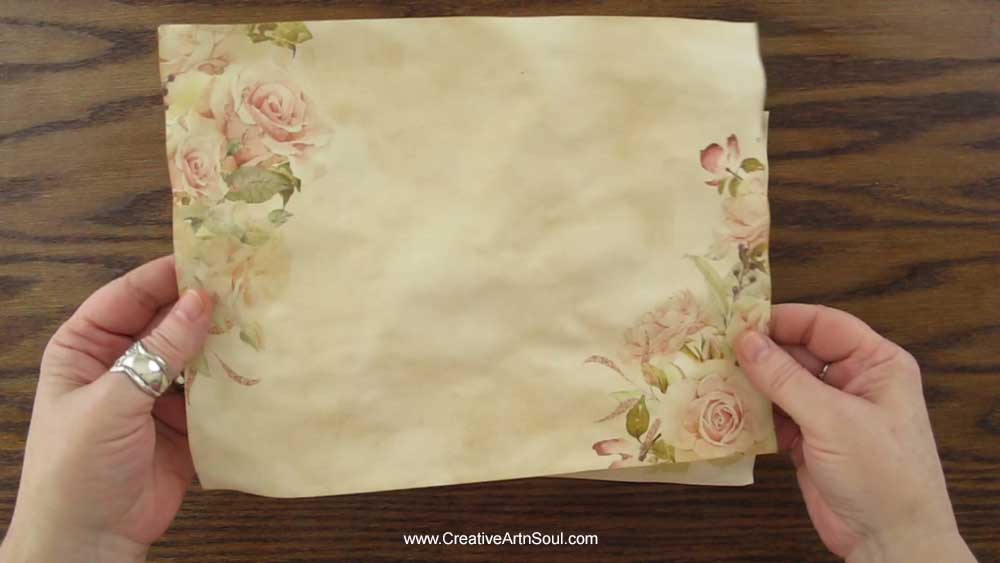
If you have a printer that makes permanent prints like a laser printer, or an inkjet printer with water-resistant inks, you can even print designs and images onto the copy paper before you tea stain it.
If you’re not sure whether your printer makes permanent prints, check the printer manual or make a small test print, allow it to dry, then dab it with water. If the ink runs then you won’t be able to pre-print your paper. However if it doesn’t run, then you can safely print designs and images before you paint the tea-stain.
If you don’t have a printer that makes permanent prints, you could get prints made at your local print shop on their laser printer.
Once the paper is printed, simply paint the tea stain on both sides of the paper, then bake in the oven. Once the paper is baked, you can see that the tea stain gives a lovely antique look to the printed pages.
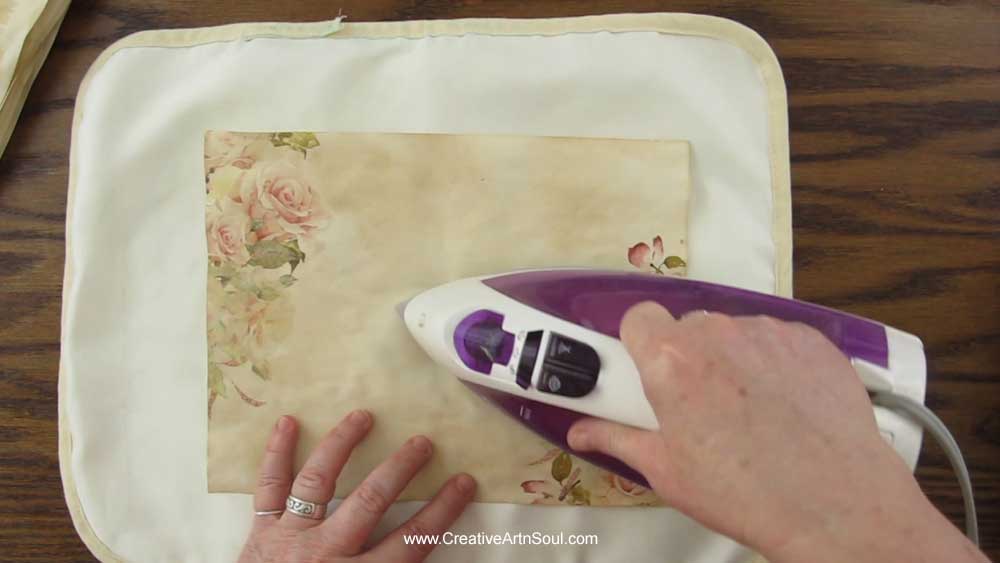
During the tea-staining and the baking process, the paper tends to become slightly warped and uneven and if you’re planning to write on the pages, this can be a problem. However you can easily flatten the pages to make them easier to write on or work with by ironing them.
Use a hot iron with no steam and iron the page on both sides until it’s flat. This makes a really flat page which is perfect for writing or sketching and drawing
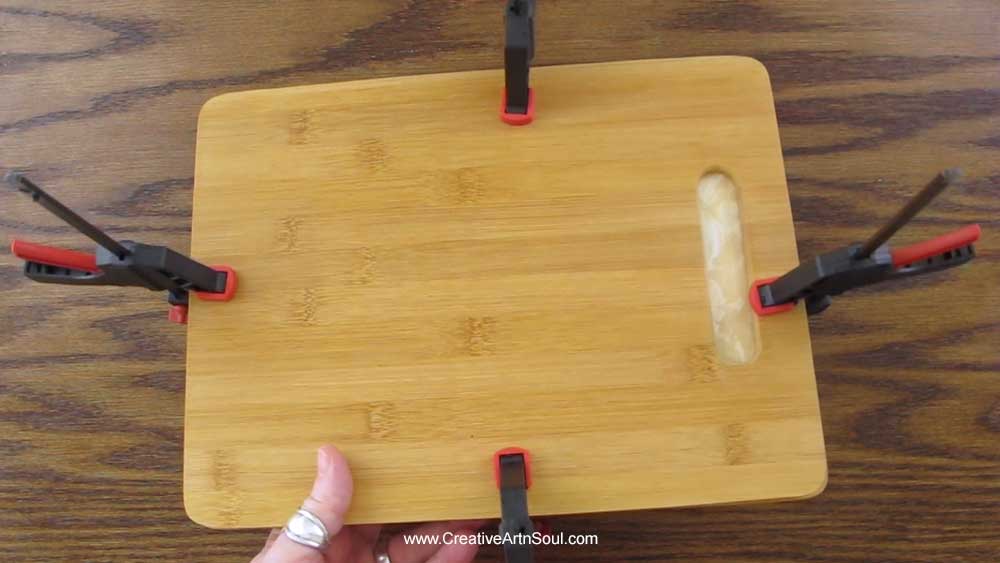
Another way to flatten the pages is to use a book press. Book presses can be quite expensive though so I made my own using two inexpensive wooden cutting boards, and four bar clamps that I found in the dollar store.
Stack the pages together between the two cutting boards, then attach a clamp to each side. After everything is clamped together, I like to leave the papers sit overnight.
You can also flatten the pages by stacking them together, then piling a heavy stack of magazines or books on top, and then leave them to sit overnight.
Using either a book press or a stack of magazines will flatten the pages a little, but they will still be slightly distorted and wavy and not as flat as when using an iron.
Make the DIY Journal Cover
For this diy journal I made 20 pages with 5 folded pages per signature which makes 4 signatures, however you can make more or less as you prefer.
The cover is made using fusible Peltex heavyweight stabilizer. I like to use this type of stabilizer because it’s quite stiff and easy to sew, and it’s perfect for making diy junk journal covers and book covers.
If you don’t have access to this type of stabilizer, you can easily make your own.
Cut the pieces for the front and back cover 1/2″ longer in length, and 1/4″ wider in width, than the journal pages.
The pages for this diy journal are sized 5.1/2″ wide by 8.1/2″ high, which is a US letter-size piece of copy paper folded in half so I cut my pieces 5.3/4″ wide by 9″ high.
Making the cover slightly larger than the pages will ensure that the pages are protected from damage because they’ll be neatly tucked inside and won’t extend beyond the edge of the cover.
The spine should be the same height as the cover, and the width will depend on the number of signatures you’re using.

For this journal I plan to set the signatures at 1/4″ apart because the tea-dyed paper is quite bulky. However you may want to set the signatures closer together if say you were making a writing journal with flat pages.
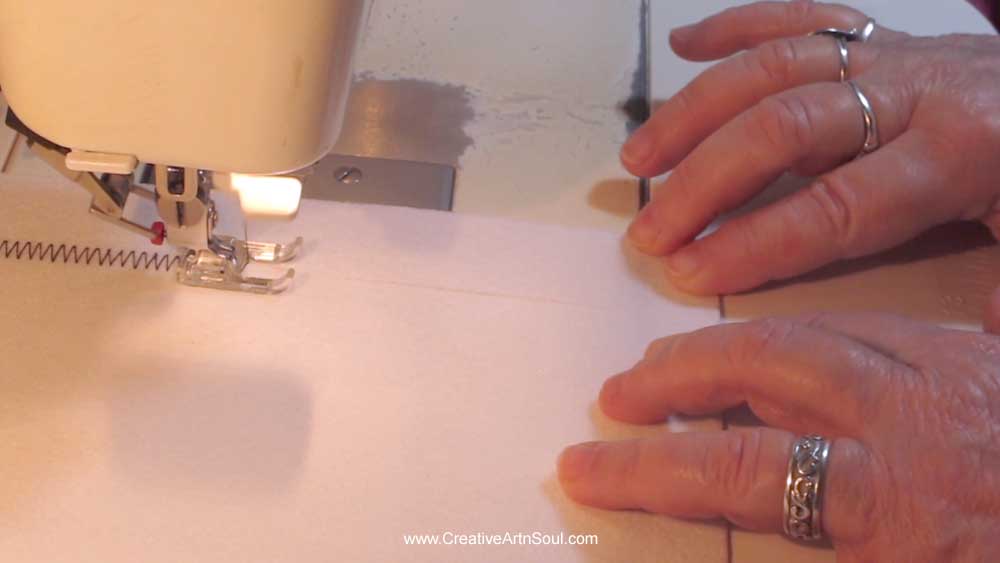
Once the cover pieces are cut, sew them together using a sewing machine and a zig-zag stitch.
Align the inside edge of the front cover with the edge of the spine, and sew all the way down. It’s best if you can loosen the tension a little when sewing so the stitching isn’t too tight. This will allow the front and back covers to fold over easily.
Also make sure that the zig-zag stitch is wide enough so that it sews the two pieces together securely.
Once the front cover is sewn to the spine, align the inside edge of the back cover and sew it to the other side of the spine.
Due to the loose tension, the front and back sections of the cover should fold over easily, and the pages of the journal should fit snugly inside.

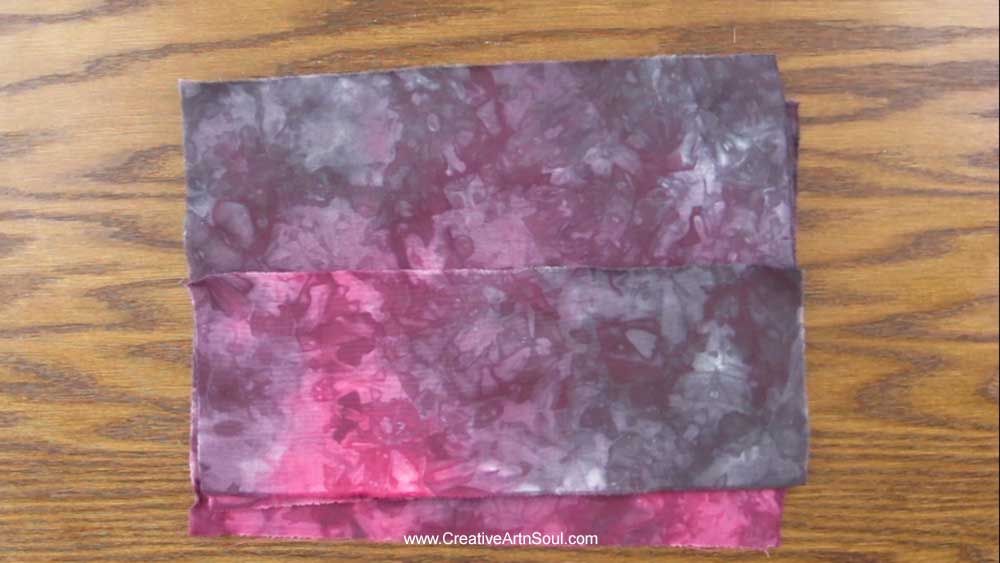
Next, cut or tear the fabric pieces for the outside cover, the inside lining, and a pocket if you want to include one. I like to tear my fabric because I like the look of the raw edges.
The outside cover and the inside lining should be about three quarters of an inch larger in height and width than the cover. The pocket should be the same width, and about half the height of the fabric cover pieces.
Before you iron the fabric to the stabilizer, place a piece of parchment paper or a Teflon ironing mat on your ironing surface. This will prevent the fusible stabilizer from sticking to your ironing board cover.
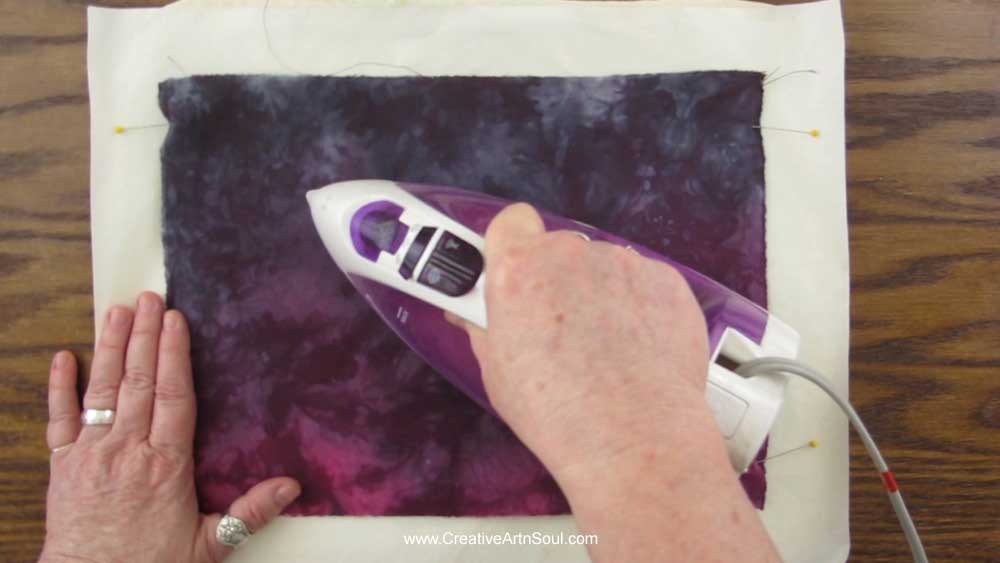
Place the fabric for the outside cover with the wrong side facing up on your ironing surface, then center the cover on top.
It’s helpful to stick a few pins into the edge of the stabilizer to hold the fabric in place. Peltex stabilizer is quite thick so you can easily insert pins into the edges.
Carefully flip the stabilizer and fabric over so the fabric side is facing up, then press the fabric with a hot dry iron. Work section by section until the fabric is completely fused to the stabilizer.
Once you’ve finished pressing, check to make sure the fabric is securely fused to the stabilizer. If not, simply press again for a few seconds.
Once the outside is done, position the lining fabric on top of the inside and match the edges of the fabric. Using the same ironing method, press the lining in place.
Once the cover pieces are ironed to the stabilizer, align the pocket along the bottom and pin in place around the outer edge.

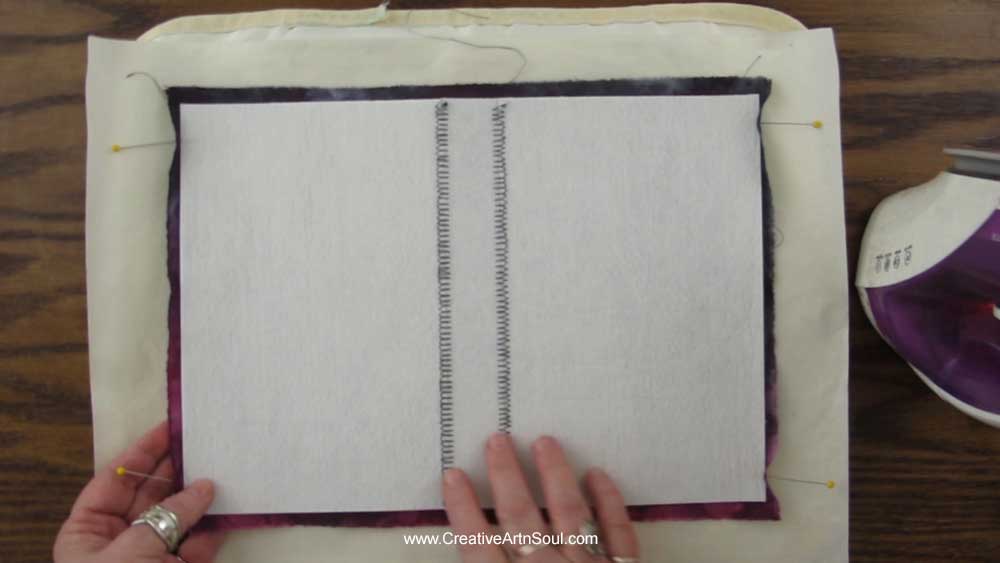
Once everything is assembled, sew along the outer edges of the cover. I like to use a stitch in the ditch sewing foot because this foot has a center guide that you can butt up against the edge of the peltex to make it easier to sew along the edge.
Alternatively, you can also sew around the edges using a standard sewing foot. To make it easier to know where to sew, use your fingernail to make a crease in the fabric right up against the edge of the peltex.
Sew two rows of straight stitch around the edges to make sure the fabric is securely attached.

Once the cover is sewn together, fold the covers over and press with an iron along the edge of the spine.
Because of the way that this journal cover is made, it will need some sort of closure to keep the book closed and we’ll be adding a tie closure after the signatures are sewn in.

Insert your pages into the cover and check to make sure that everything looks good. If something needs to be fixed or adjusted, now’s the time to do it before you sew in the signatures.

Attach the Signatures
The signatures for the diy junk journal are sewn into the spine of the cover using a pamphlet stitch. To make it easy to sew them in, it’s recommended you use a hole template.
You can easily make your own hole templates by drawing them by hand onto a piece of copy paper or cardstock, or using a drawing program to design them and then you can save them and print them out whenever needed.
To make the spine template, cut a piece of paper or cardstock the same size as the spine and mark evenly spaced holes. The holes across will be the number of signatures that you’re going to use and the holes down will be either 3 or 5 which are commonly used for pamphlet stitch.
To make the signature template, cut a piece of paper or cardstock about two inches wide. Fold in half lengthways and mark 3 or 5 holes down the center in the same position as for the spine template.
Punch holes into the templates using an awl or a large embroidery needle.

Put pin markers at the top and bottom of the cover at the points where the spine attaches to the front and back cover, then pin the cover hole template into position. Make sure this is positioned accurately.

Using a bookbinding awl, punch holes through the hole marks on the template right through the spine. Doing this will make it much easier to sew the signatures in place.
To make the holes more visible, use a sharpie or other type of marking pen to highlight the holes on the outside. Because I’m using dark fabric, I’m using a white gel pen to mark the position of the holes so I can see them better.

To mark the holes for the signatures, attach some paper clips or binder clips to keep the pages together, position the signature template in the fold, and using a sharpie, mark the holes down the center.
Punch holes through all the marks using a bookbinding awl to make it easier to sew them in.

Once all the signatures are marked, now it’s time to sew them into the cover.
Cut a length of thick embroidery thread or bookbinding thread about twice the page height plus a little extra for tying a knot. I like to wax my thread because it helps to prevent tangles.
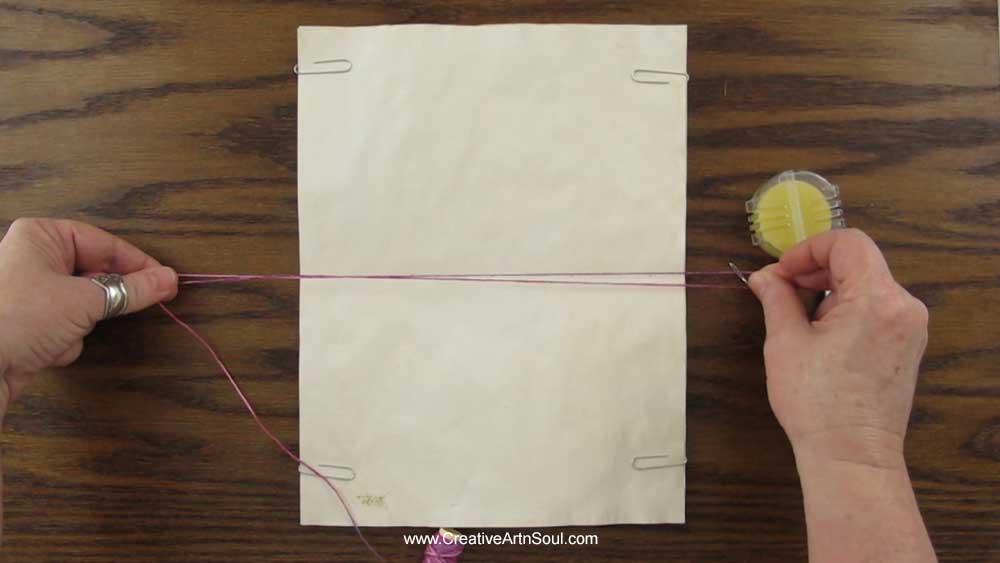
Starting with the middle hole on the inside, push the needle through the signature and through the center hole in the cover leaving about a 3 to 4 in tail of thread inside the signature. This will be used to tie off the thread once the signature is sewn in.
Push the needle through the next hole on the cover back to the inside and through the signature. Then back to the outside through the next hole in the signature.

Continue sewing in this way right back down to the other end then back to the center. Once you get back to the center, make sure the stitching is taught, then tie the thread off in a secure knot and trim away the excess.

Sew the remaining signatures into the cover in the same way.

Embellish the Spine
Now that the junk journal is assembled, it’s time to embellish the cover. You can of course embellish your cover in any way you choose, or you can add similar embellishments to the ones that I’ve used.
Before you start stitching, you’ll first need to play around with things and layout a design so you have a idea of how you want things to look and fit together.
To make it easier to work with the design process, I first like to pin the cover closed. To do this, stick a few pins through the fabric along the side of the cover and pin the front and back together.

I begin the design process by gathering the image I’m going to use on the cover as well as some fabric scraps, ribbons and other embellishments. I then pin and move things around on the cover to create a design that I’m happy with.
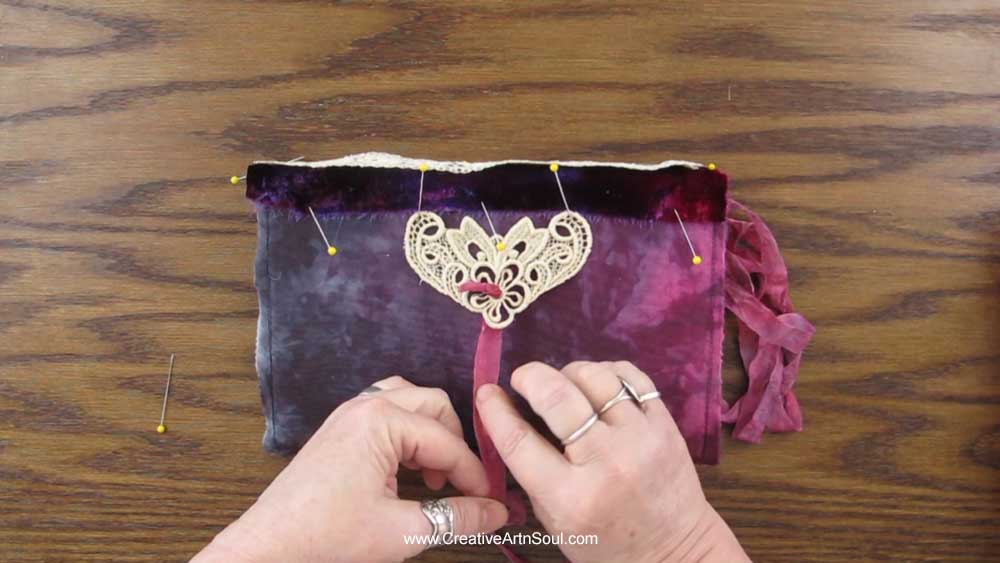
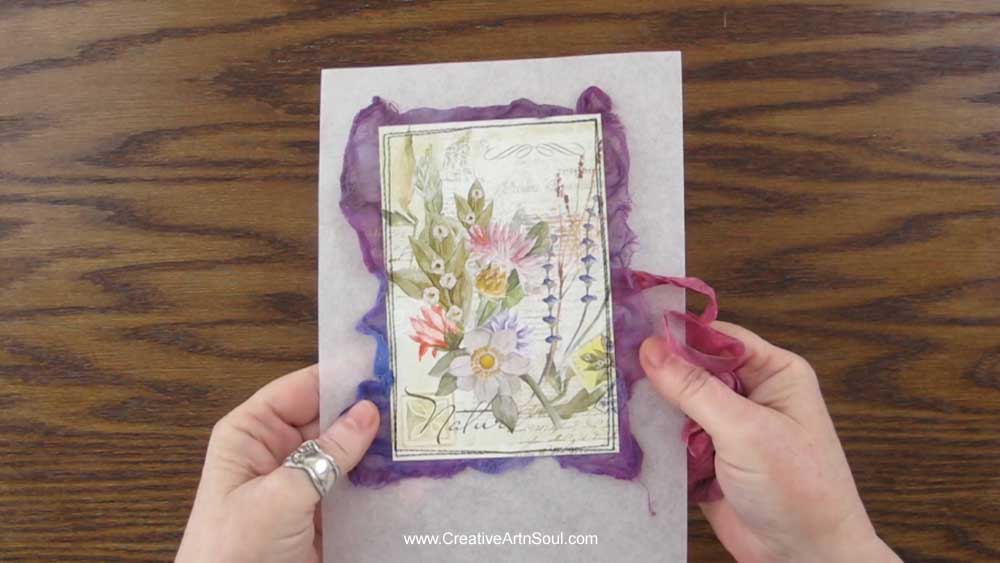
On the front, I’ve positioned some hand-dyed cheesecloth underneath the image which is a collage style image which I liked because of the colors and also because it has a slightly vintage feel to it.
At the bottom of the image I’ve added a piece of silk ribbon and a small section of fabric collage. The ribbon closure is attached underneath the image.

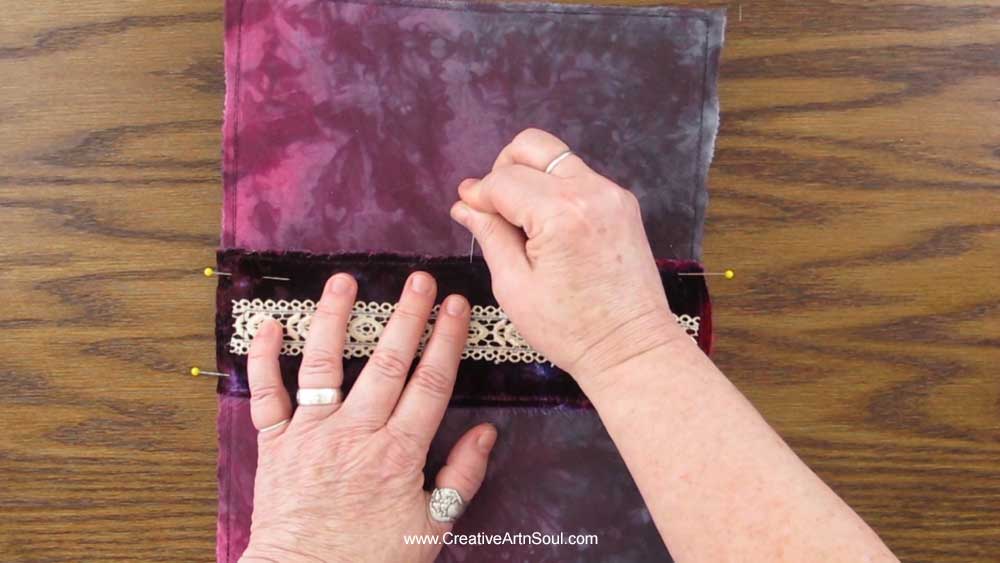
To cover the spine, I’m using a piece of velvet. The fabric should be wide enough to cover the spine then wrap around and overlap the front and back covers by about an inch on each side. I cut this piece 3” wide by the length of the spine. I’m also adding a piece of tea-dyed lace down the center of the spine

On the back cover I’m going to hand-sew a small piece of lace which I’m also going to use to attach my tie closure. I’ve threaded the end of the ribbon through one of the openings in the lace and tied it in a knot.
Once you’ve laid out your design, now it’s time to start sewing things together. The easiest way to do this is to sew the pieces onto a piece of tear-away stabilizer to make stitched sections. Then the sections are glued to the cover.
For the spine section, cut a piece of tearaway stabilizer and pin the fabric and any other lace embellishments on top.

Then sew all the pieces together on your sewing machine or by hand.

Then tear away the stabilizer from around the outside edges. To do this, fold the stabilizer to make a crease, then carefully tear it away section by section.

Place the section with the stabilizer side facing up on a piece of scrap paper. Using a strong fabric or craft glue, cover the underside with a good layer of glue. You want to make sure that the glue is evenly spread and covers the entire area.

Open the journal and lay it flat with the cover facing up. Then place the section over the spine on the cover. If you use a tacky glue like I did, then you have time to reposition things before the glue dries.
Make sure the section is set evenly over the spine. Then fold the cover closed and make any adjustments if necessary.
Once everything is positioned correctly, open the journal, put a few pins along the edge to hold the section in place, and allow the glue to dry. I like to leave it overnight.
Embellish the cover
The collage section for the front cover is made in the same way as for the spine section and all the pieces are pinned to a piece of tearaway stabilizer.
This image has been printed onto a piece of cardstock and then embellished with fabric scraps. I’m also going to sew the ribbon tie closure to this section.
I’m going to sew these pieces together on my sewing machine before I add anything further.
Now I’m going to add some hand sewn embellishments.

Once everything is sewn and glued, tear away the excess stabilizer from around the outside.
Position the section on the front cover of the journal and make sure everything looks ok, then apply some strong craft glue to the underside and glue it in place.

Finally, I glued the lace section to the back cover.

Alternative Options for DIY Journals
Just by changing the colors of the fabric and the type of image that you use you can create beautiful themed diy junk journals for all sorts of purposes such as junk journals, nature journals or simple writing journals.


Save this pin to your favorite Pinterest board!
