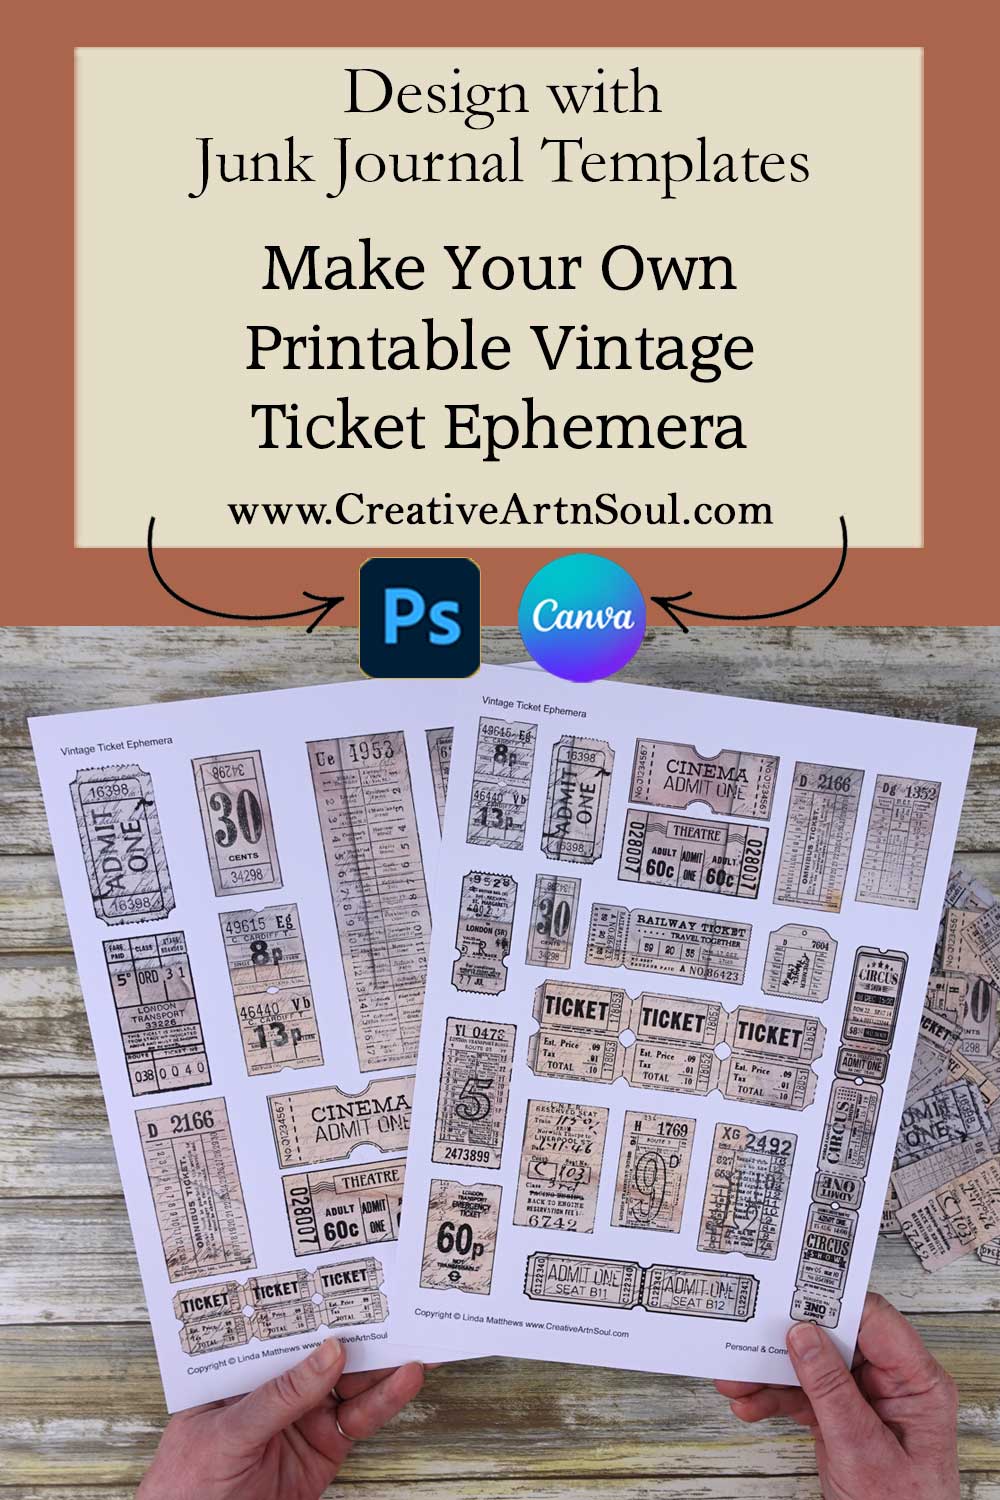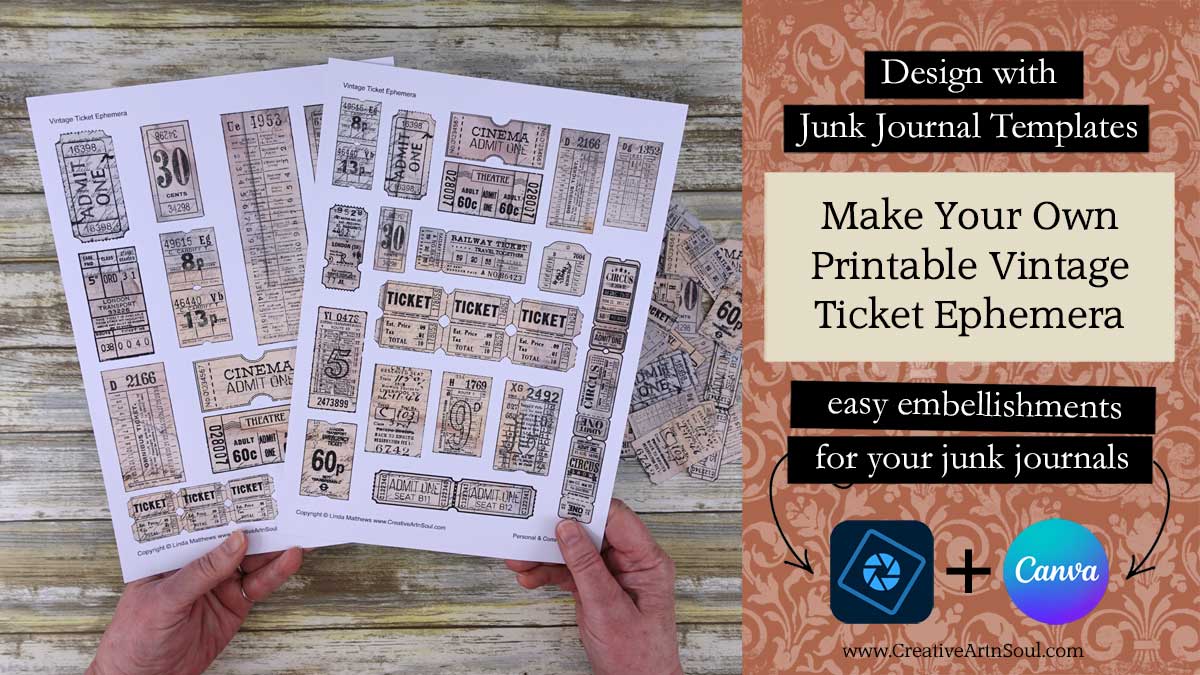
Make your own unique printable junk journal vintage ticket ephemera using easy-to-use templates.
Make your own unique printable junk journal vintage ticket ephemera using these junk journal templates. Design using easy-to-use junk journal templates in photoshop, photoshop elements, photopea or canva. Then print and cut.
DIY Printable Junk Journal Vintage Ticket Ephemera
Supplies
- Vintage Ticket Ephemera Templates
- Template Library
- Printable Papers
- Cardstock
- Epson EcoTank Printer
- Photoshop Elements
- PhotoPea
Printable Papers Used in Video
About the Junk Journal Templates
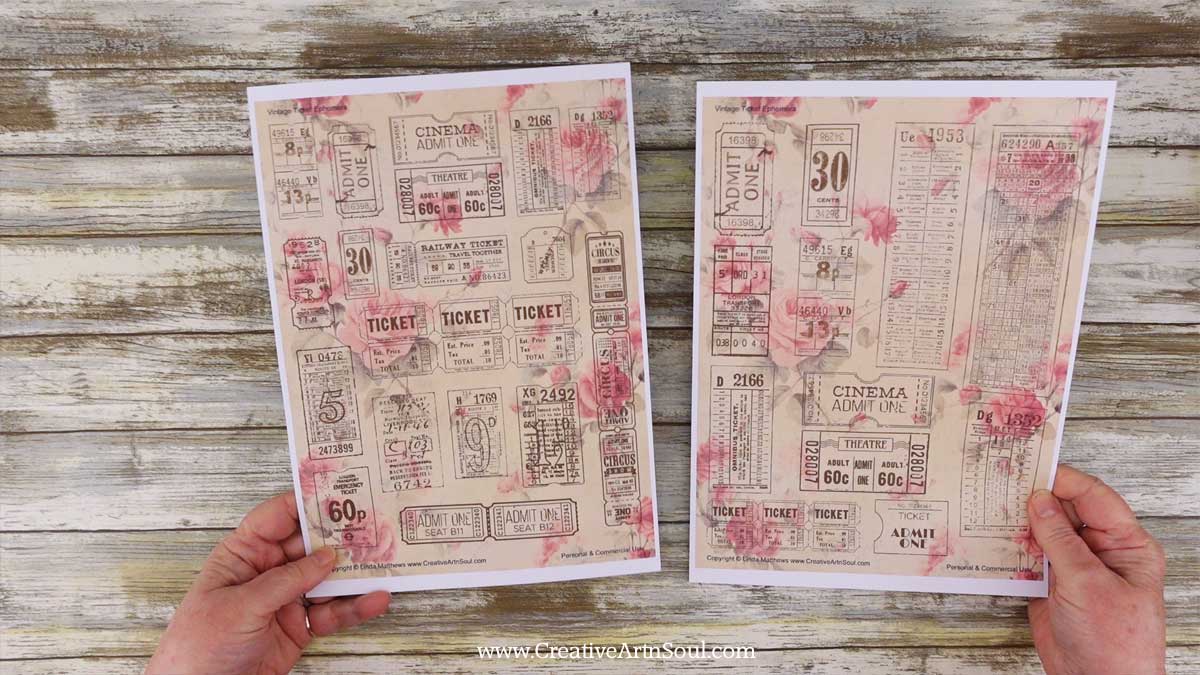
These templates can be used with a variety of different types of digital papers so you can create your own unique printable vintage ticket ephemera in no time at all.
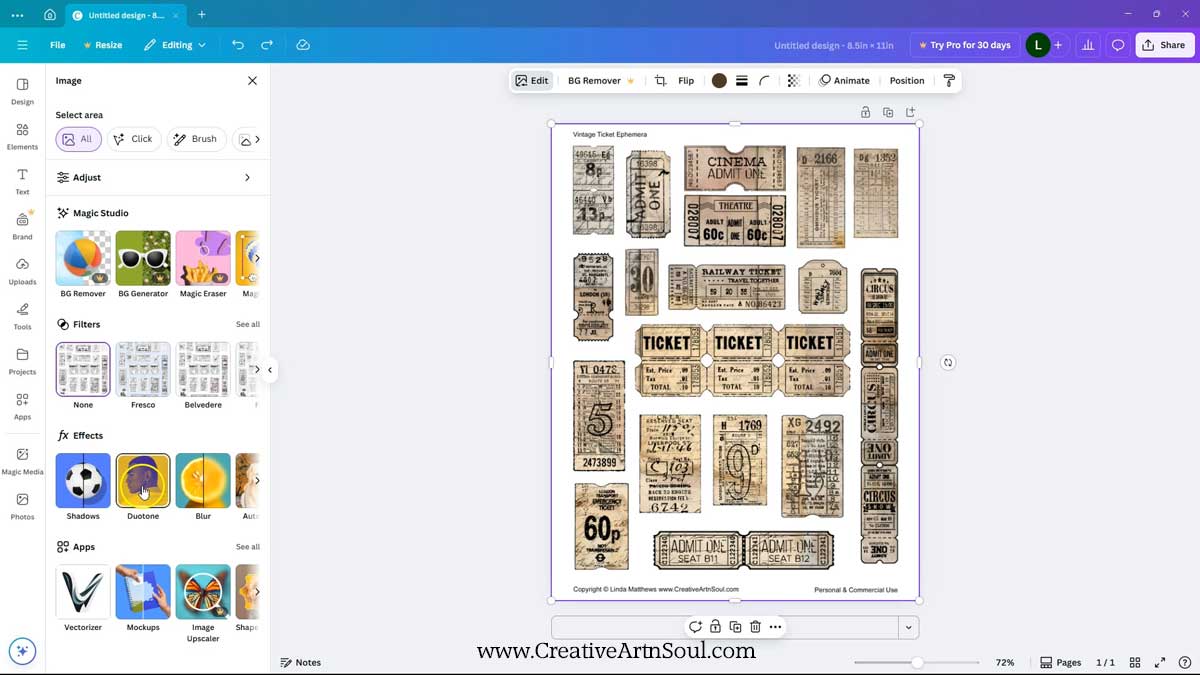
The templates include two pages of vintage ticket ephemera overlays in various sizes in colors of black and brown. Using easy techniques, you can also change the color if you prefer a different color.
The templates come in two formats. The pdf format is easy to print and can be used with your own printable papers or scrapbook papers. Or you can use the transparent png format in a photo editing program such as photoshop, photoshop elements, photopea which is a free photoshop alternative, and you can also use them in canva.
Design Printable Junk Journal Vintage Ticket Ephemera using PDF Templates
To print using your own paper, open the pdf template file. In the print dialog box, make sure the page scaling option is set to none so that the template prints at the correct size.
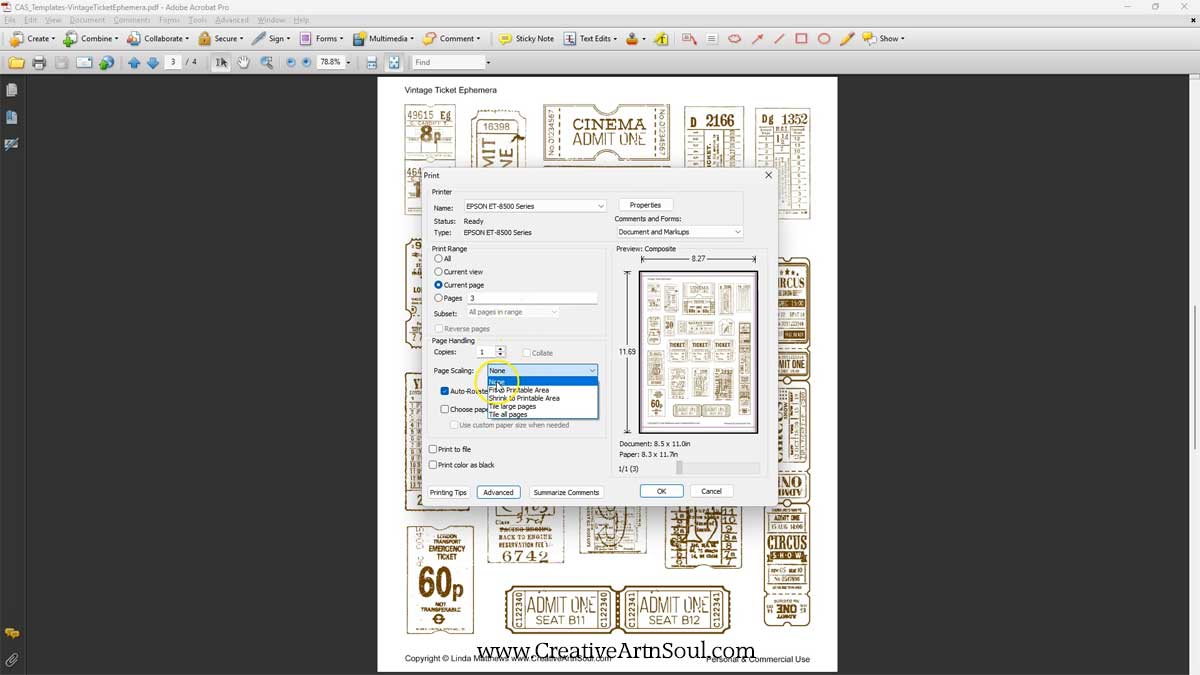
Insert a sheet of printable paper or scrapbook paper into your printer and then print the template page. You can easily see the outline to cut out the pieces.
Design Printable Junk Journal Vintage Ticket Ephemera in Photoshop
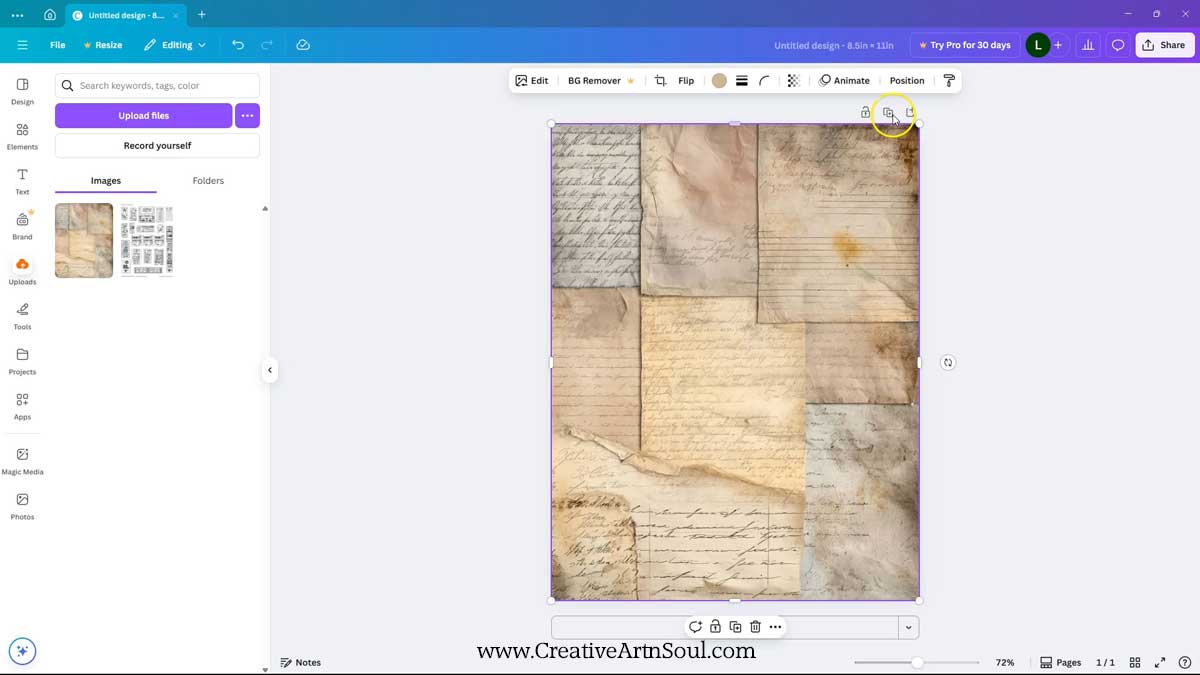
To get started designing using the png format files, open one of the templates in your photo editing program. Then add a digital paper and move it to a layer underneath the template layer.
To add the digital paper you can use the menu commands to select, copy and paste. Or simply drag the image out of the frame and onto the document.
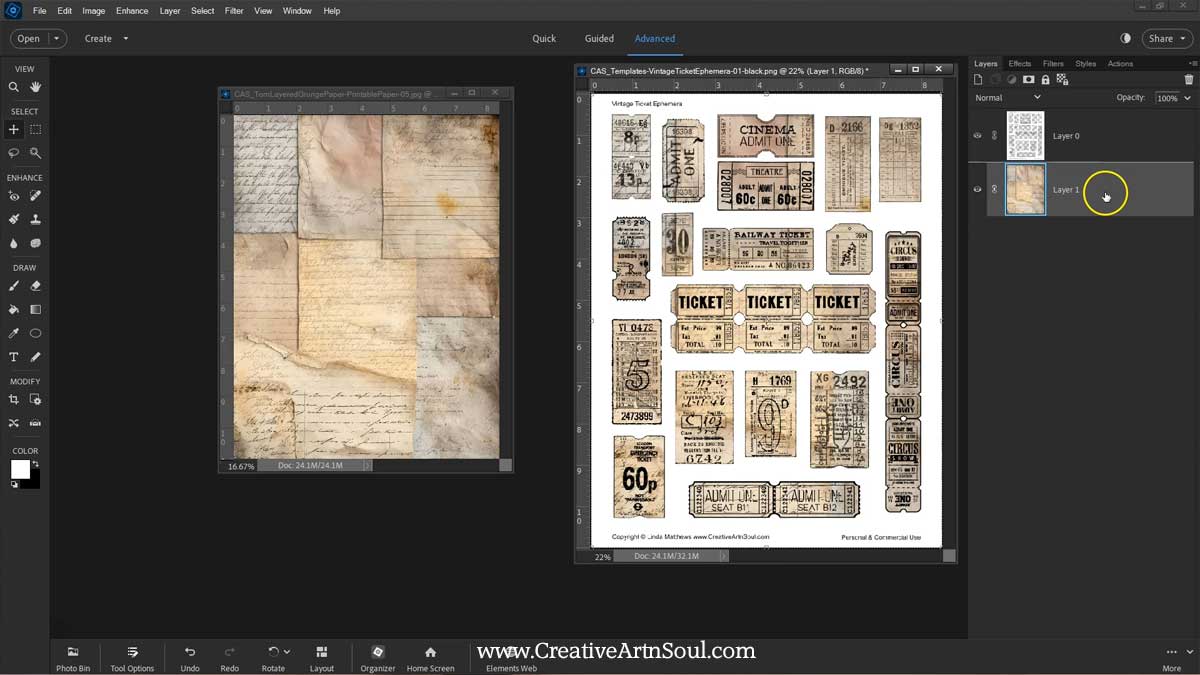
The template works with lots of different types of digital paper so you can create endless vintage ticket ephemera in no time at all.
As well as a set of templates in the color black, also included is a set of templates in the color brown which has a softer more vintage style appearance.
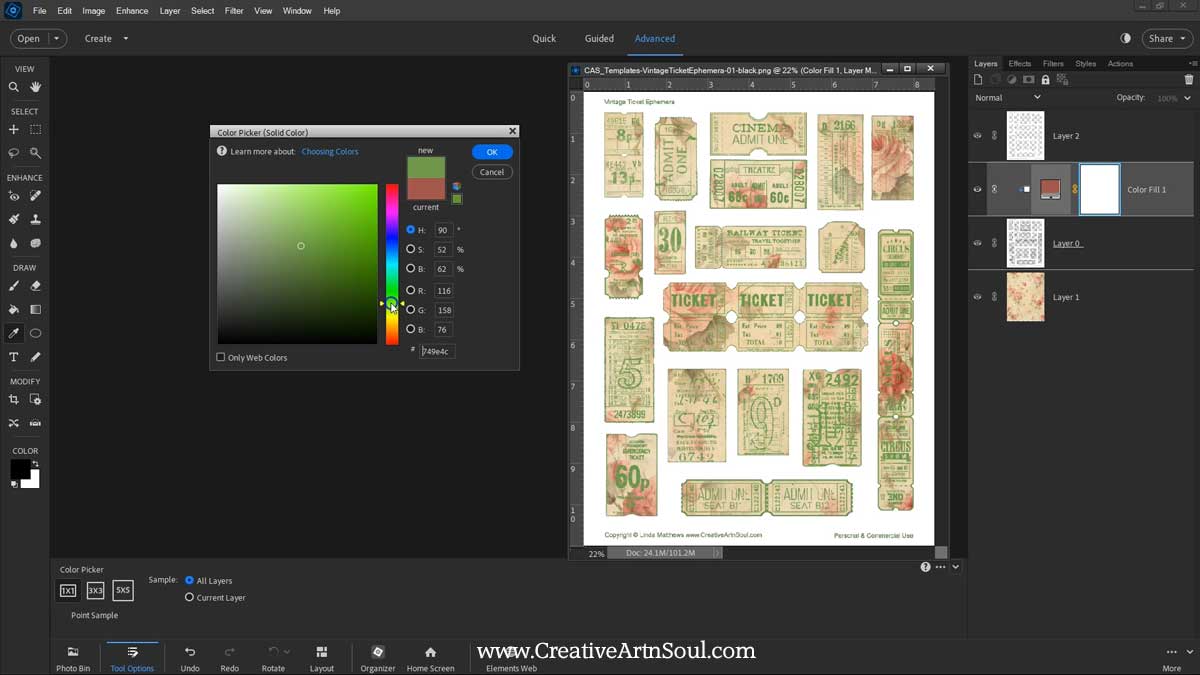
You can also easily change the color of the overlays if you prefer a different color. To do this, you need to apply a color adjustment layer to the template layer. With the template layer selected, click the “create new fill or adjustment layer” icon and select “solid color”.
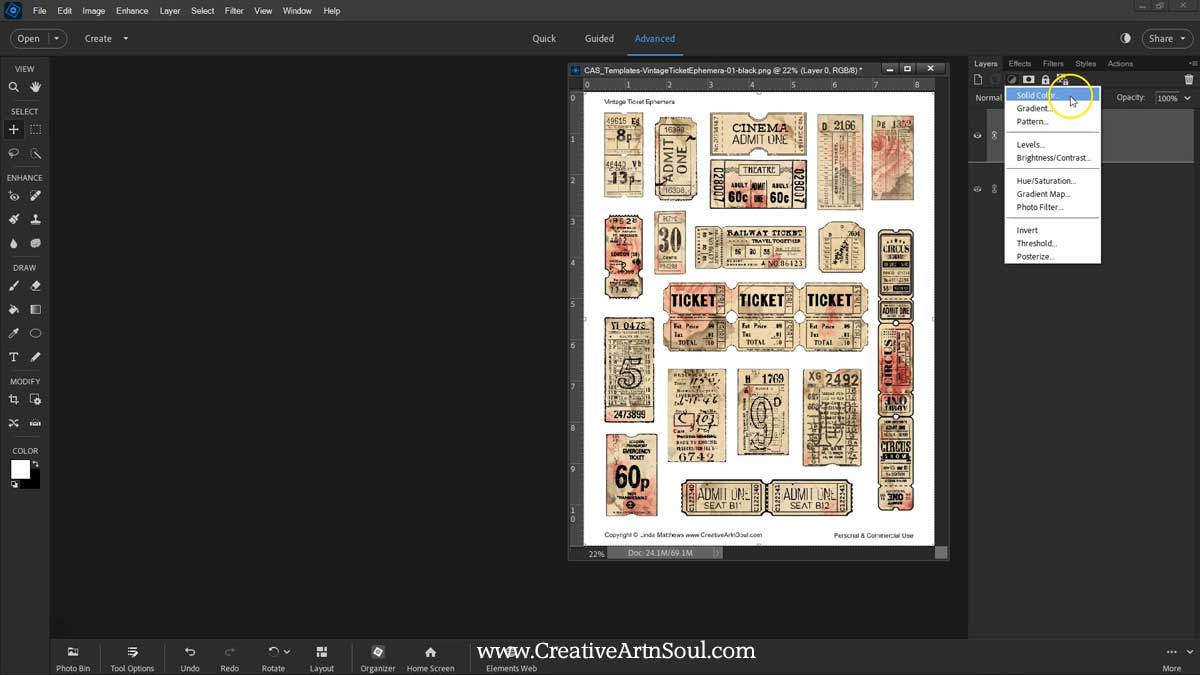
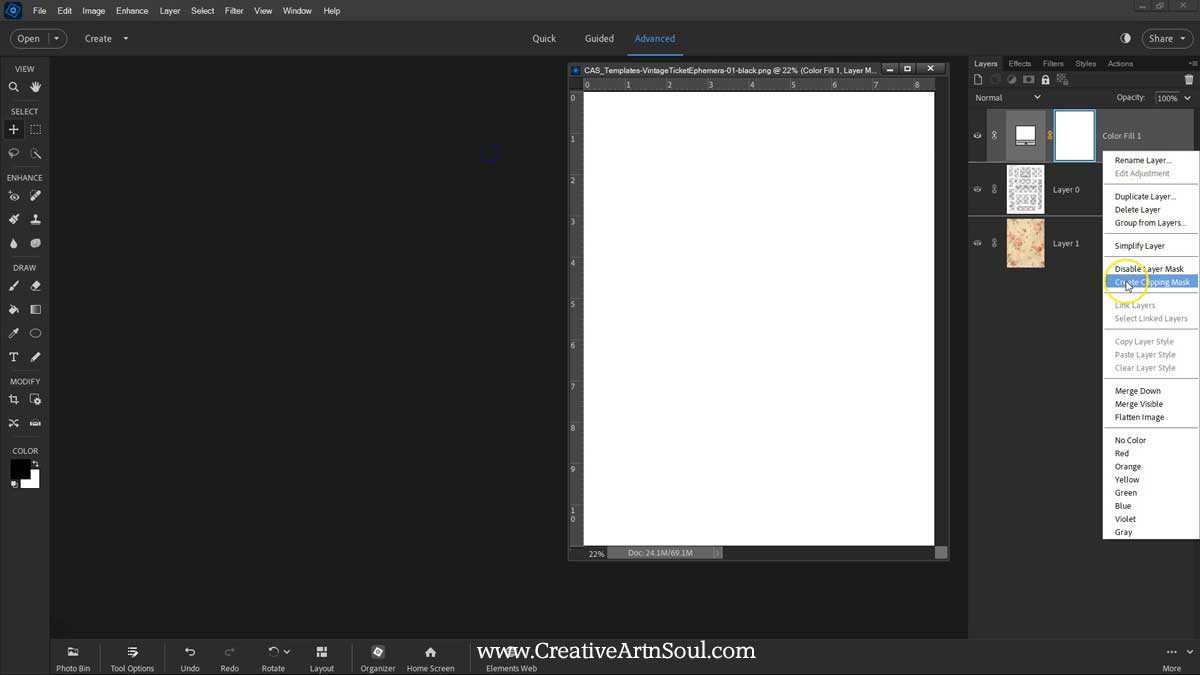
Click ok to close the dialog box, then with the color adjustment layer selected, from the right click menu select “create clipping mask”.
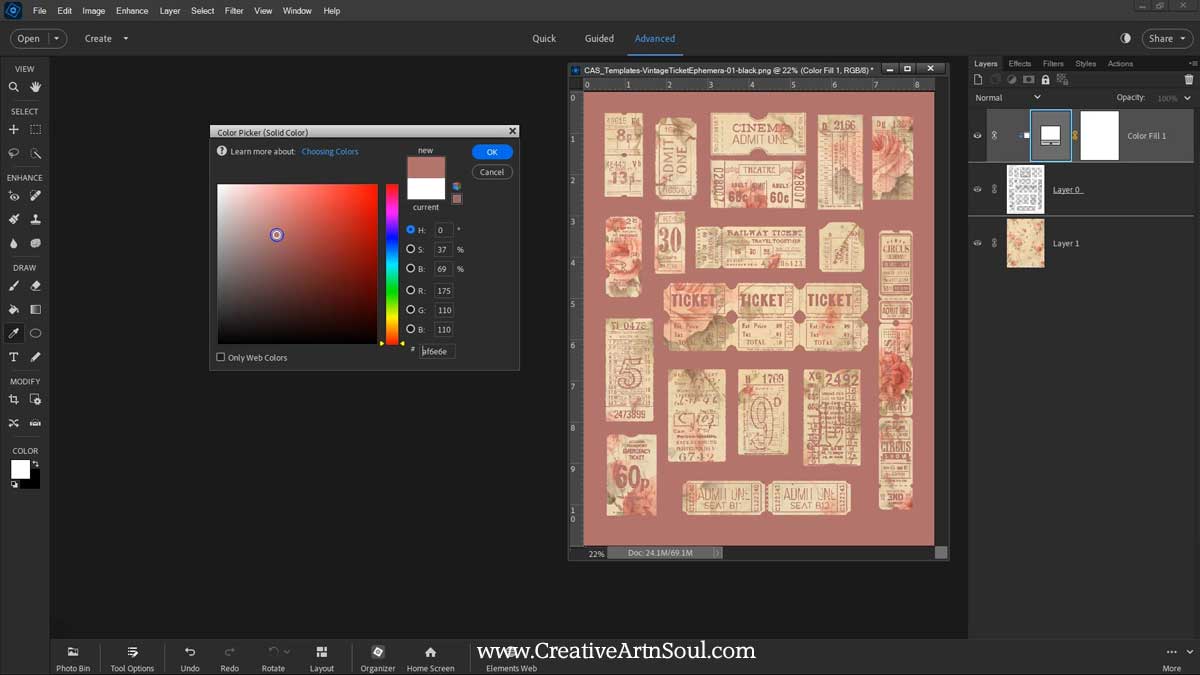
Double click on the color adjustment and change the color.
You’ll notice that if you change the color, the background color of the template also changes. To resolve this issue you can easily separate the background and put it on a separate layer above the color adjustment layer.
First select the template layer. Select the magic wand tool then set the tolerance. I’ve set the tolerance to 32 however you can adjust this setting if you need to. Click on the template background area to select it.
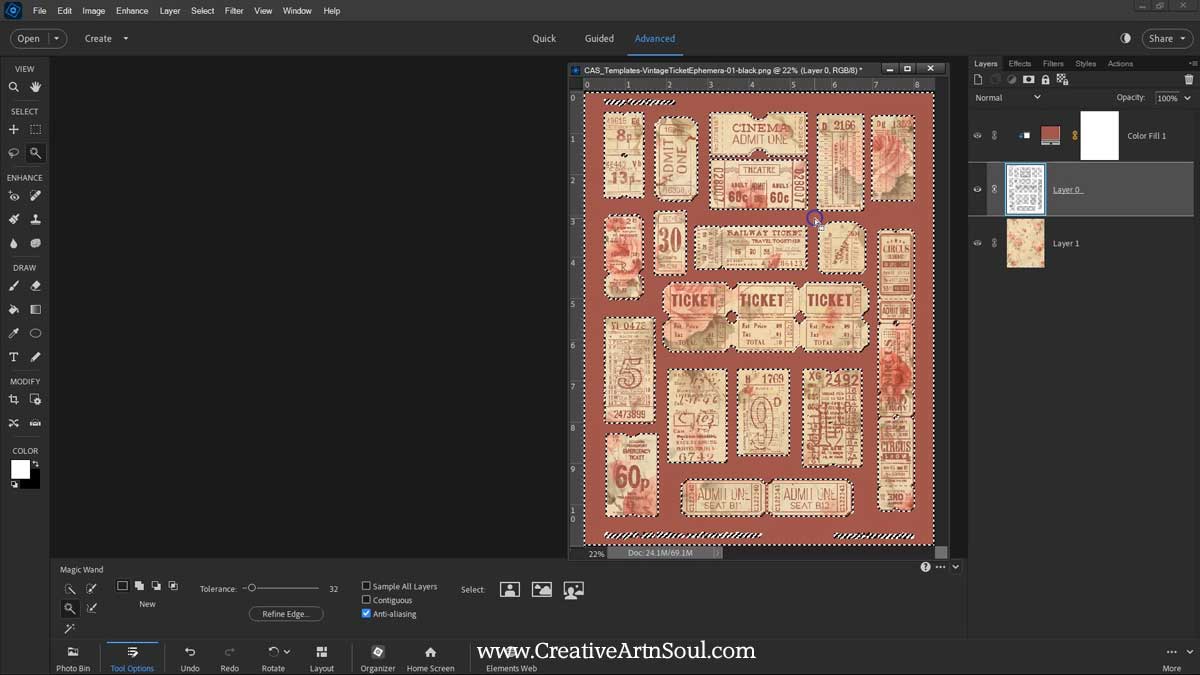
Use keyboard commands ctrl c or cmd c to copy the background selection. Select the color adjustment layer, then use keyboard commands ctrl v or cmd v to paste the background section to a new layer above.
Now you can change the color of the overlays while still keeping a white background area.
Design Printable Junk Journal Vintage Ticket Ephemera in Canva
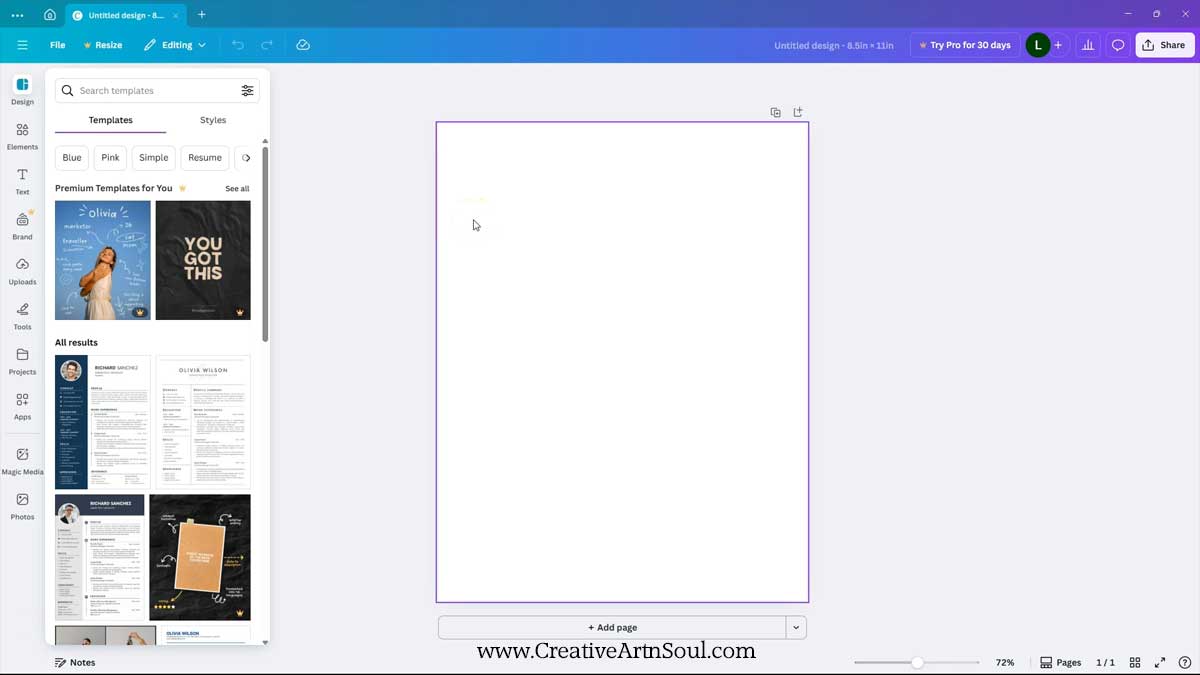
As well as designing in programs like photoshop, you can also use the templates in canva. Log into canva and create a new custom document size 8 and a half inches wide by 11” high.
Then upload the templates that you want to use together with the digital background papers. To upload, you can use the “upload files” button and select the files from your desktop. Or drag the files out of the folder and drop them onto the canva editor.
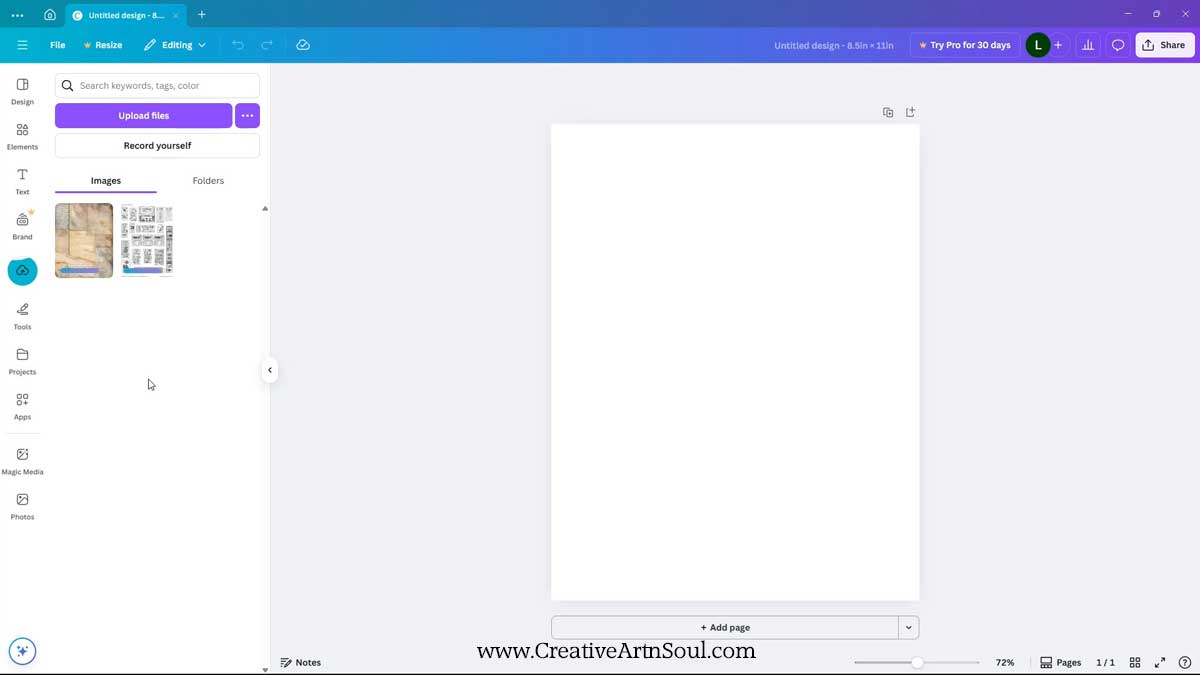
To add the files to the template, click on the thumbnail that you want to use and it’s automatically inserted onto the document. Then resize to fit.
The template needs to be on top, so if you need to rearrange the layers, click the “position” button on the top menu, then the “layers” tab and then you can drag the layers into the correct order.

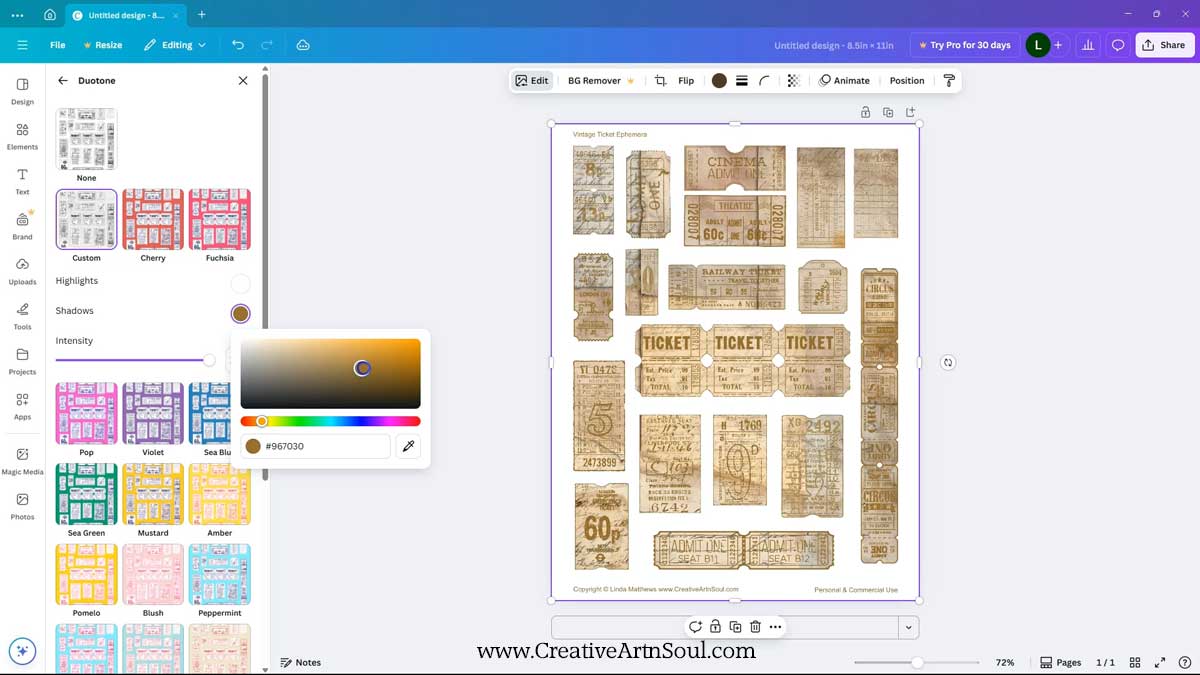
You can also easily change the color of the overlays. Make sure the template is selected then click the “edit” button on the top menu. Select the duotone tool.
Duotone is an effect that applies two contrasting colors to an image, one for the highlights and one for the shadows.
In this instance, the highlight is the template background which is white, and the shadows are the darker overlays.
Select “custom”. Set the highlight color to white. And the shadow color to whatever color you want to apply to the overlays.
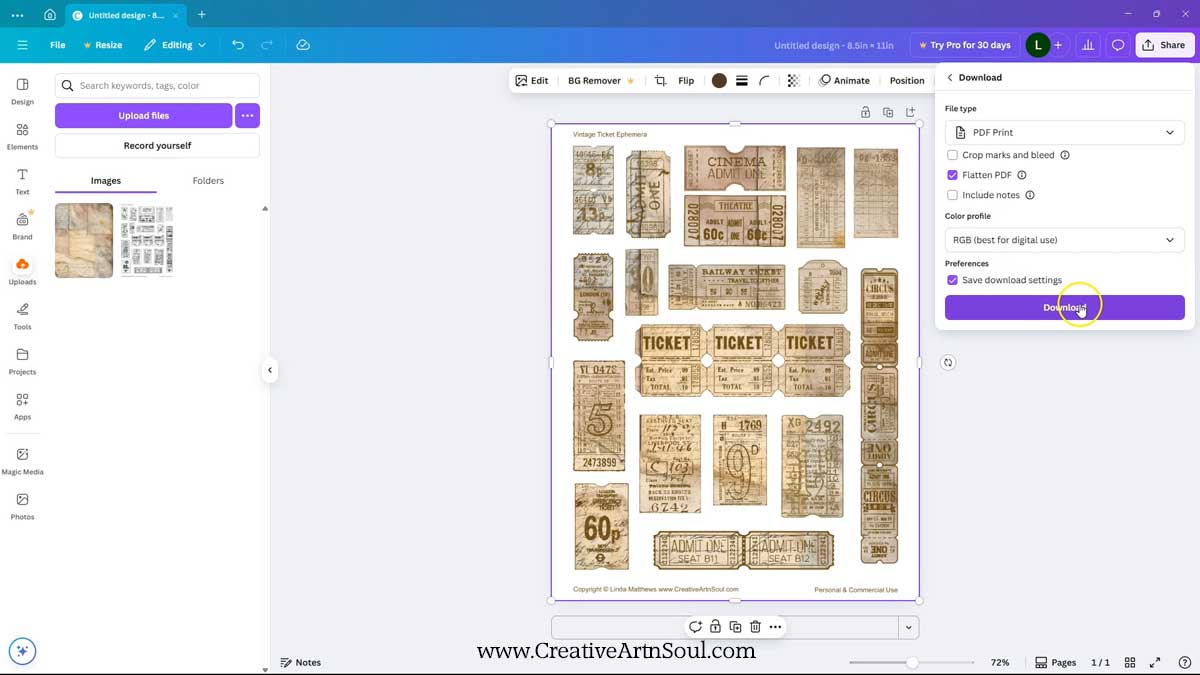
Once the design is completed you can save it for printing. Click the share button and then download. Select file type pdf print and make sure to check “flatten pdf”. Then click the download button.

Save this pin to your favorite Pinterest board!