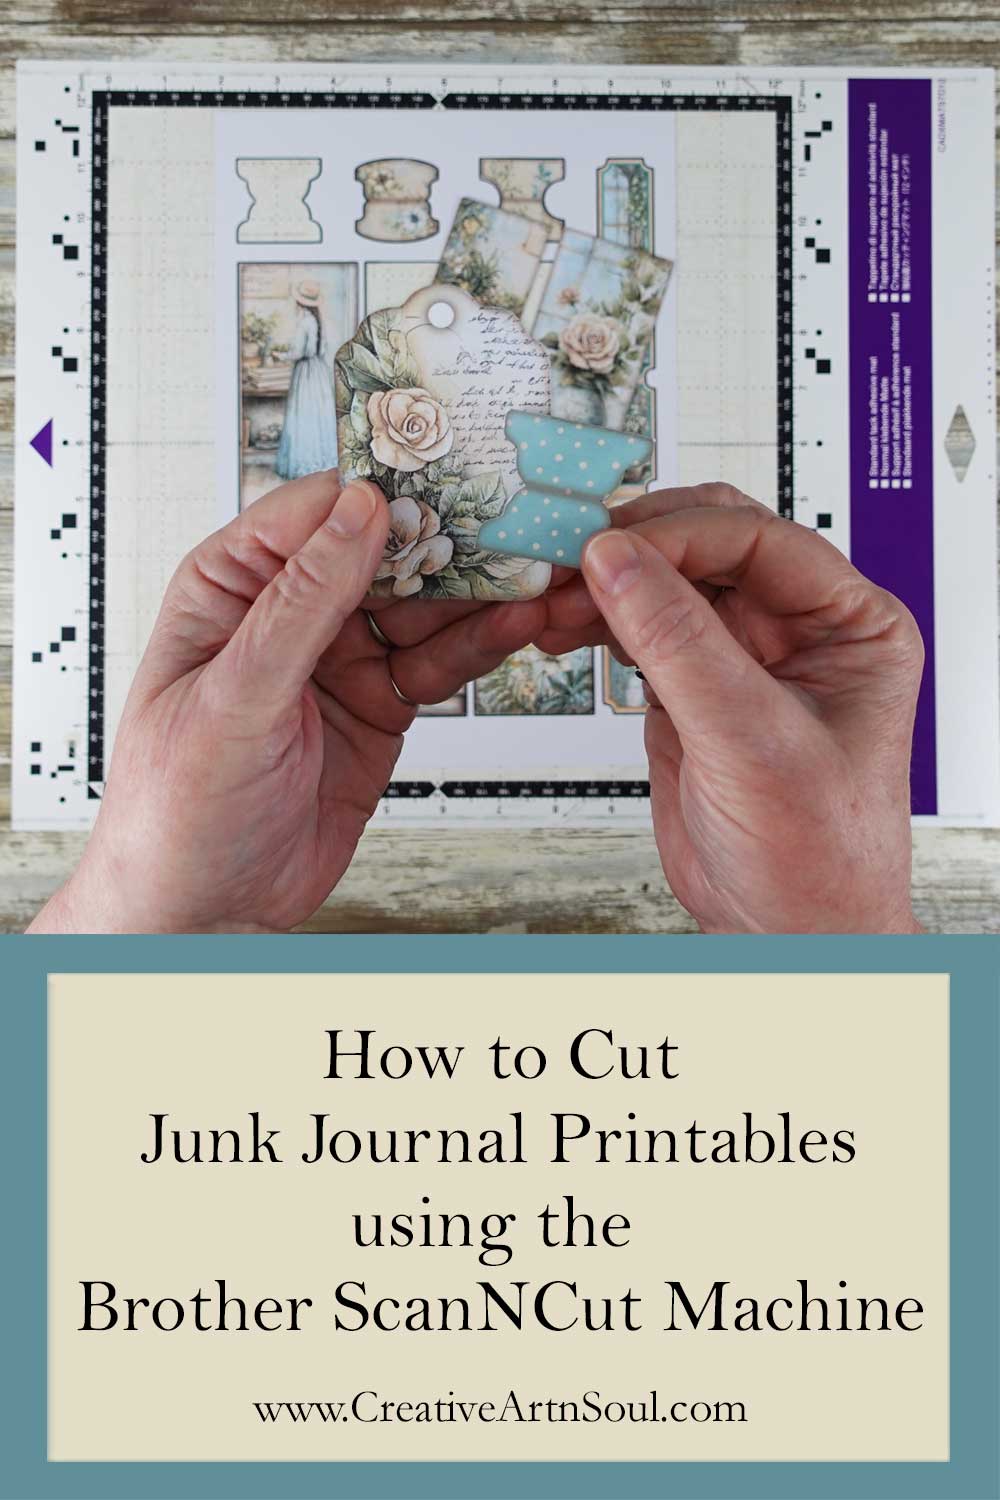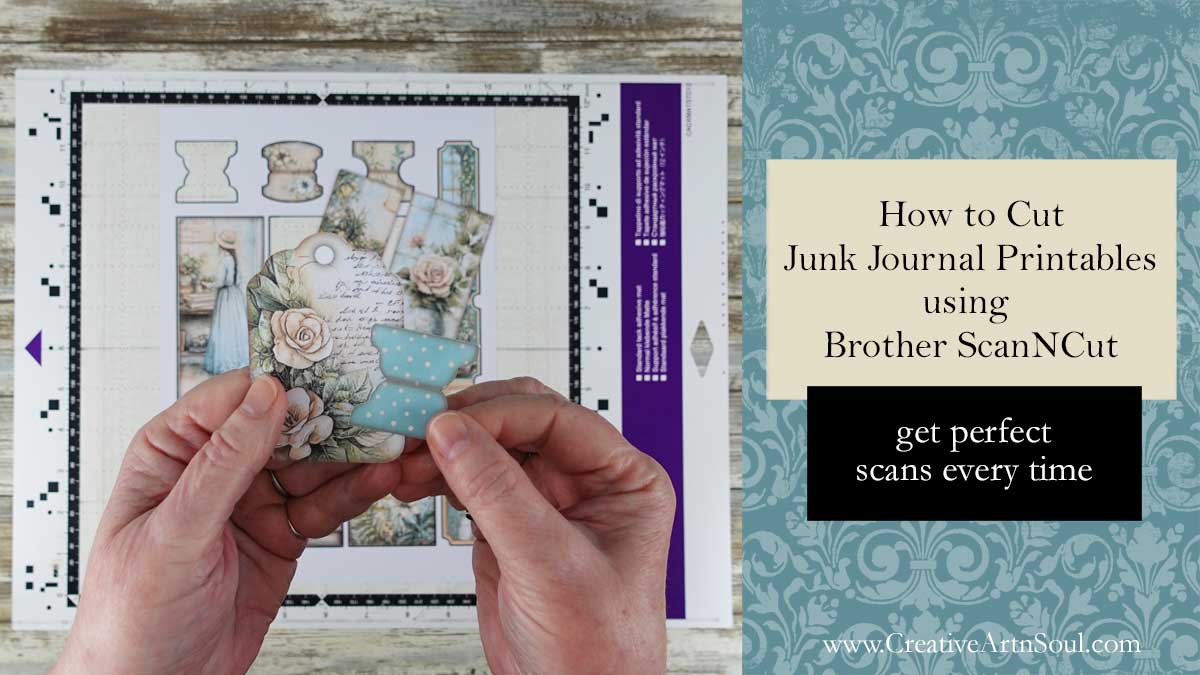
Learn how to cut junk journal printables in no time at all using the Brother ScanNCut Machine, and get perfect cuts every time.
When you cut junk journal printables using scissors, particularly printables with unusual shapes, it can sometimes be a challenge to get a perfect cut. But using the Brother Scan’n’Cut Machine makes it super quick and simple to cut these types of shapes.
The Scan’n’Cut Machine is different from other types of cutting machines in that all the steps can be done within the machine and without the need for external software. This is a huge time saver.
One of the challenges when cutting junk journal printables using the Scan’n’Cut Machine, is that unless the edges of the printables are clearly defined, the machine can sometimes have trouble scanning a perfect shape.
This, however, is easily resolved using a simple process to prepare your printable pages prior to cutting. In this tutorial I’ll show you how.
How to Cut Junk Journal Printables Using the Brother Scan’N’Cut
Supplies and Resources
- Brother Scan’n’Cut Machine
- Epson EcoTank Printer
- Cardstock
- Junk Journal Printables
- How to Convert pdf Junk Journal Printables into jpg Files
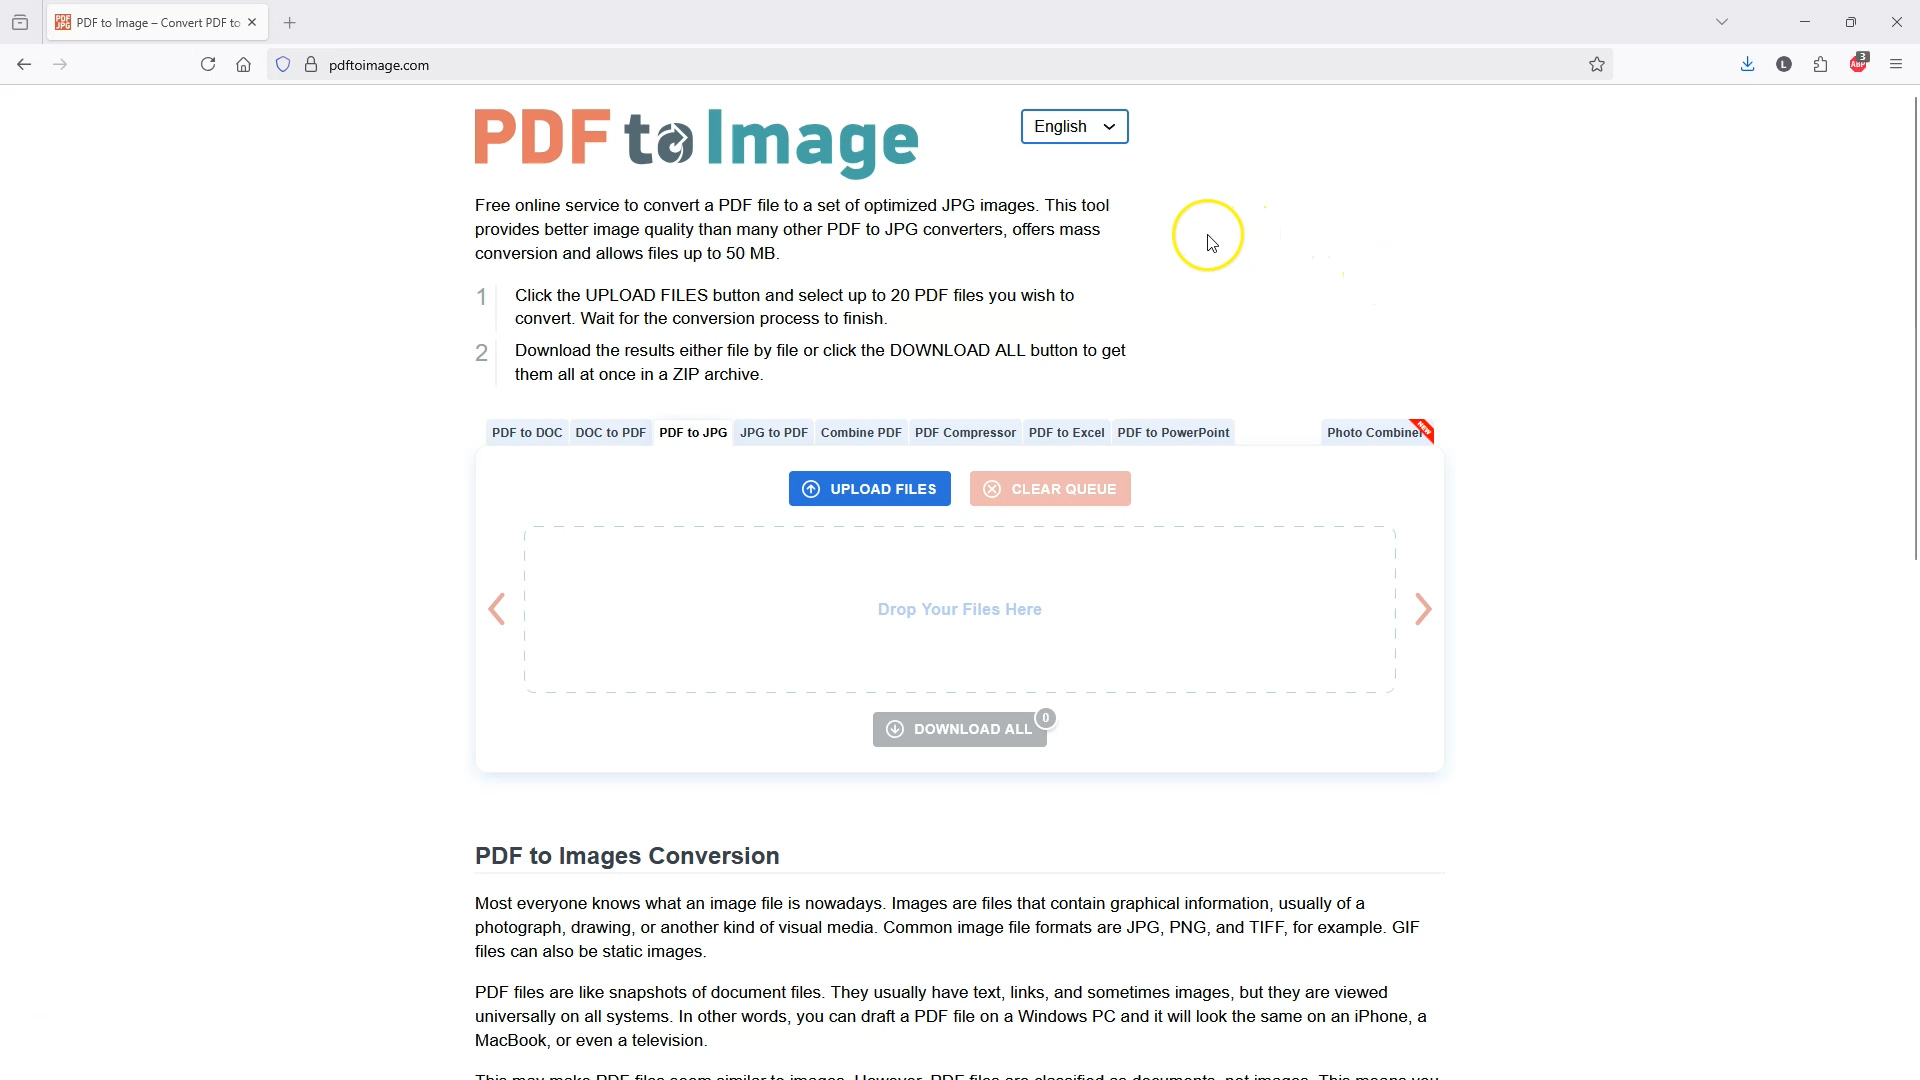
How to Convert PDF Files to JPG Format
Before you can prepare your junk journal printables for cutting, you first need to have the pages in jpg format. Which means that if your files are in pdf format you need to convert those pages into jpg files. This can be easily done using an online converter such as pdftoimage.com
To convert the files, select the pdf to jpg option, upload your pdf file and once the conversion is complete, download the jpg files.
Once the files are in jpg format you now need to remove the white background around the printable shapes. You can do this using photoshop, photoshop elements or photopea which is free photoshop software, or similar types of photo editing software. You can also do this process in canva pro.
How to Prepare the JPG Files in Photoshop
To do this process in photoshop or similar software, first open the printable page file. If the background layer is locked, unlock it by clicking on the icon.
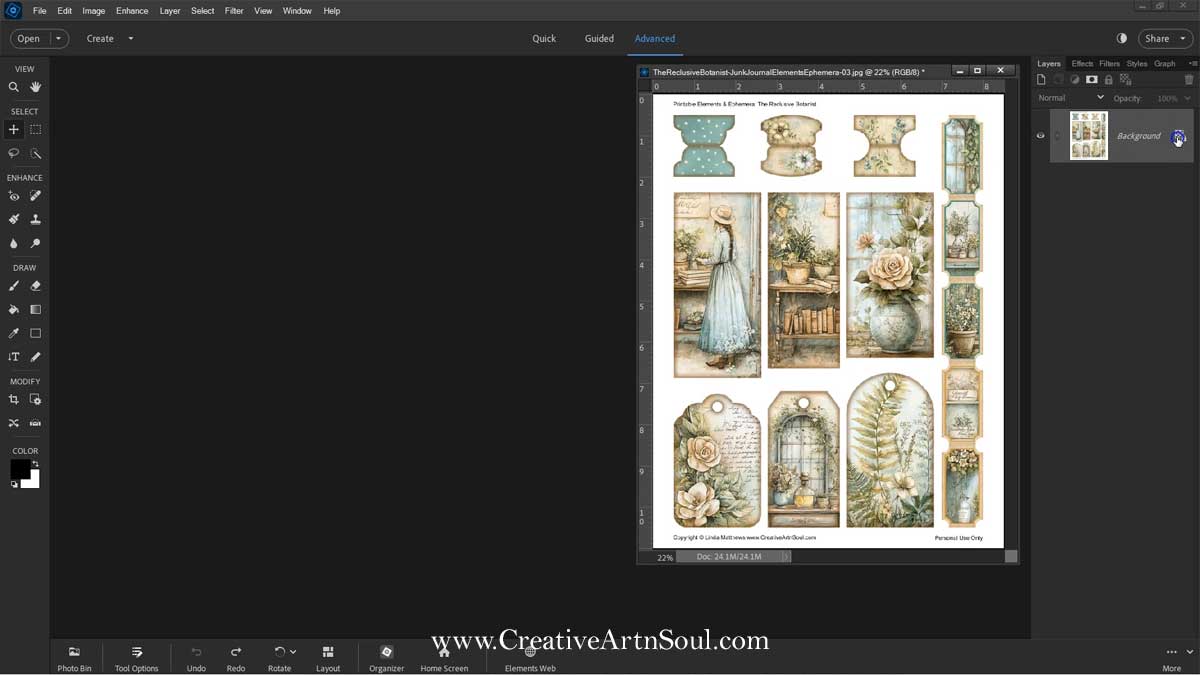
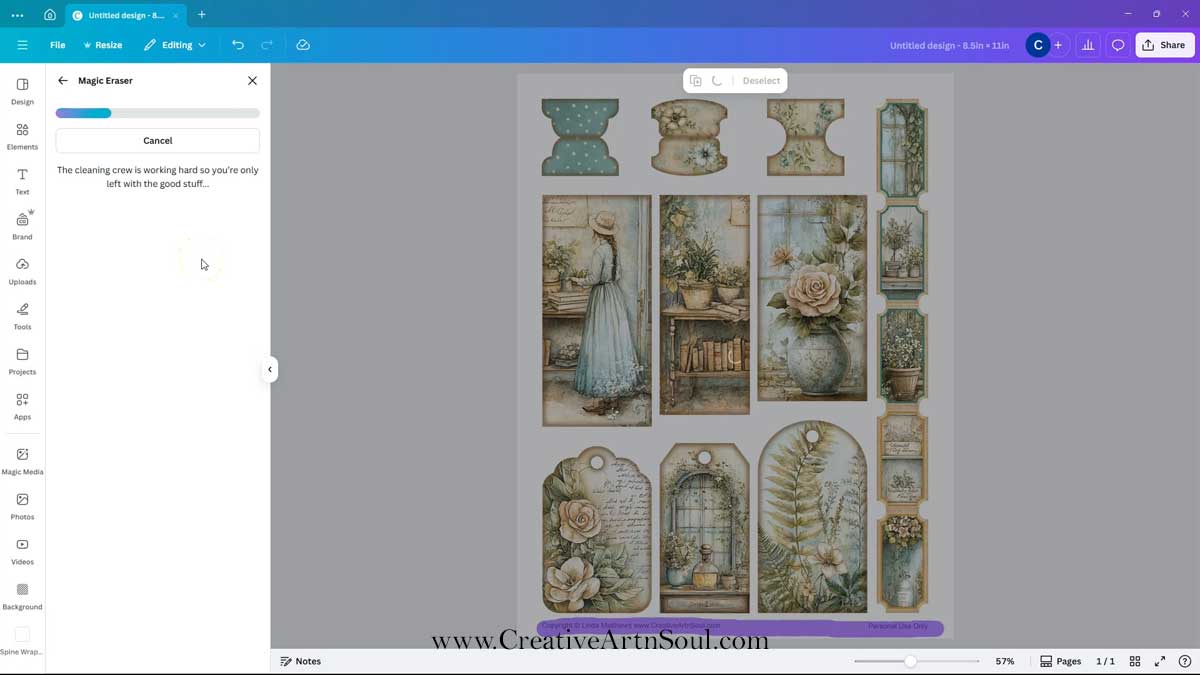
Remove any text and copyright information by brushing over it using the brush tool and the color white. Then select the “magic eraser” tool. Make sure “contiguous” and “anti alias” is selected. Then set the tolerance. I’ve set mine at 18, but you may need to adjust this depending on your image.
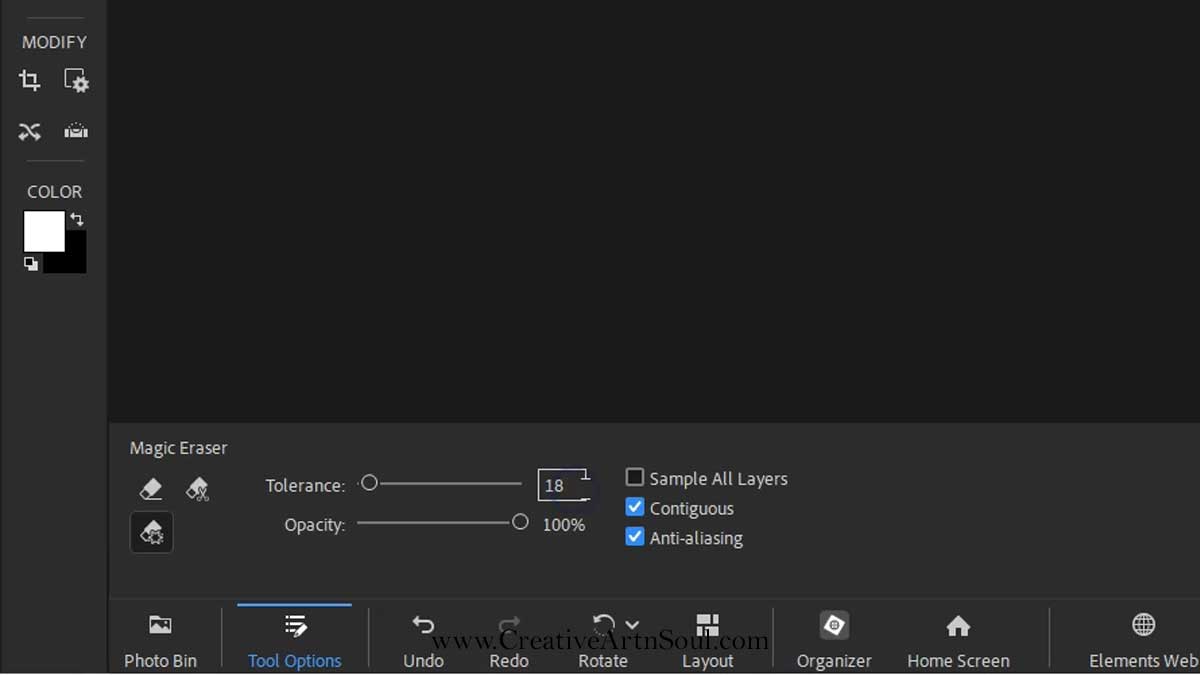
Click in the white background area to remove it. Select the styles panel and from the drop down menu select “stroke”. Set the stroke to 5. Make sure the outline is black.
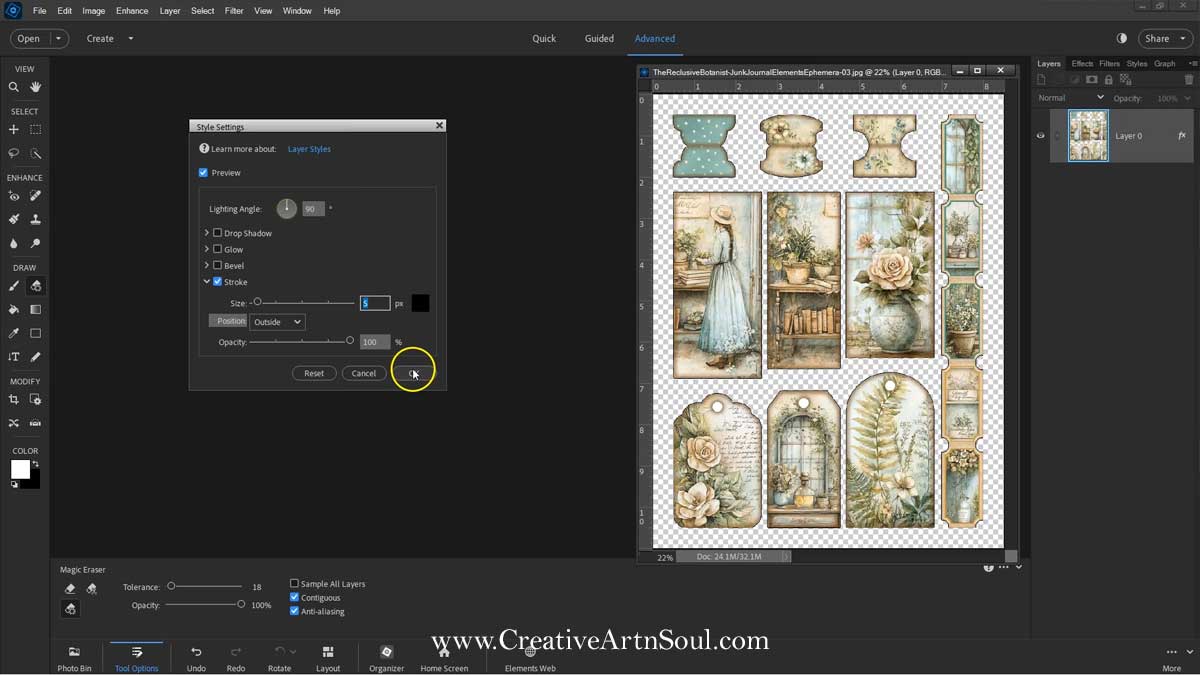
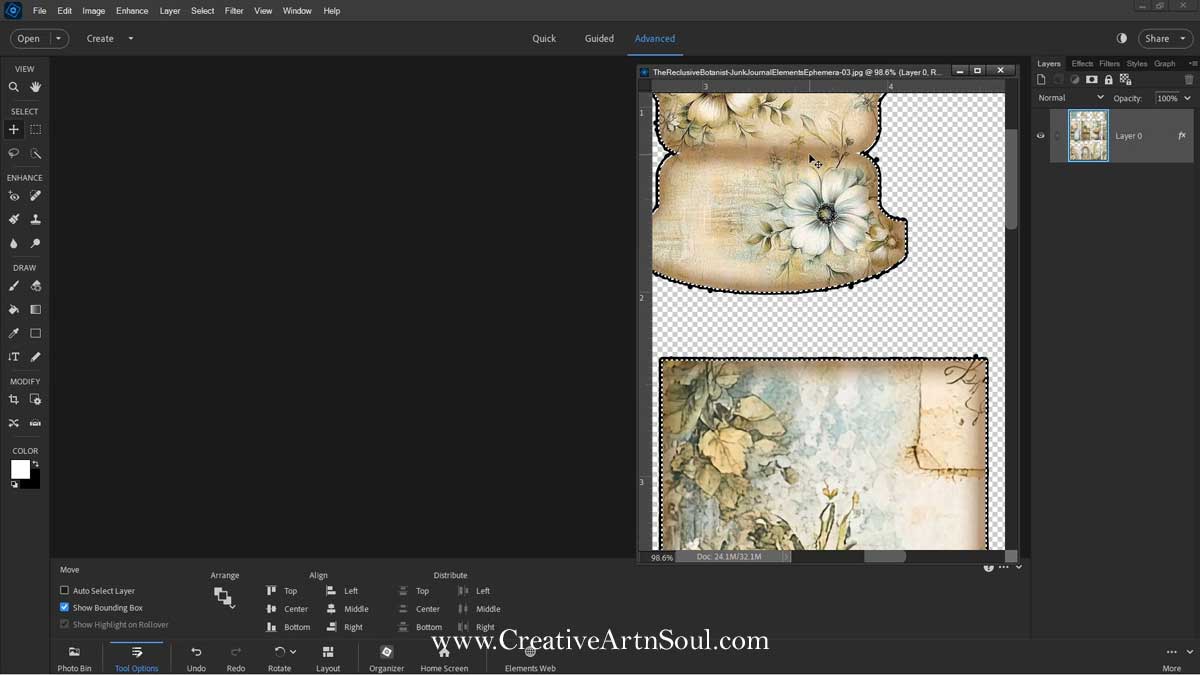
If you look close up you may see some extra pixels that were missed during the erasure process. Photoshop is not always 100% accurate in removing backgrounds. To remove these extra pixels, use the control (win) or command (mac) key on your keyboard and click the thumbnail in the layer to select all the shapes.
Use keyboard shortcut “ctrl i” or “cmd i” to invert the selection then hit the delete key on your keyboard once or twice. Use the escape key to deselect. This should delete any extra pixels.
Once this is complete, you can print the file directly from your software or save it as a jpg file for printing at a later time.
How to Prepare the JPG Files in Canva Pro
You can also do this background removal process in canva however you do need a pro account in order to access the eraser tool and the background removal tool.
Log into your canva account and create a new custom design the same size as your printables page. My page is 8 and a half inches wide by 11 inches high.
Then upload the page. Click the upload button and you can select from the upload files option to select the files from your desktop, or drag the file out of the folder and the editor. Click on the thumbnail to add it to the document and then resize it.
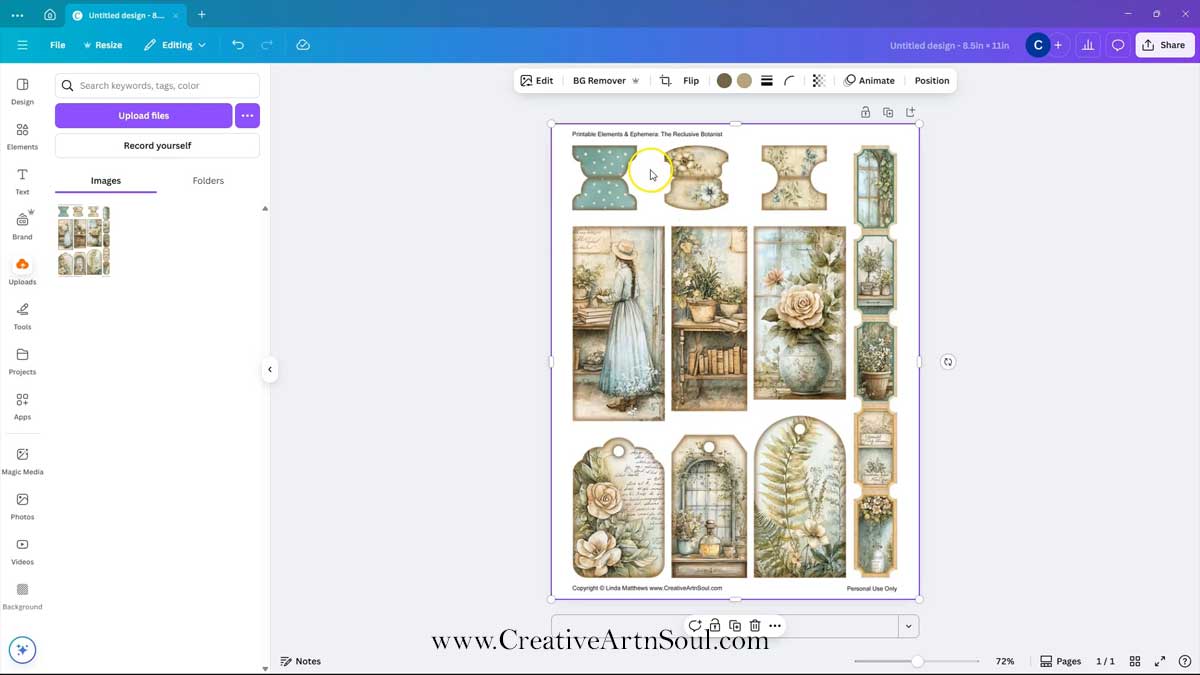
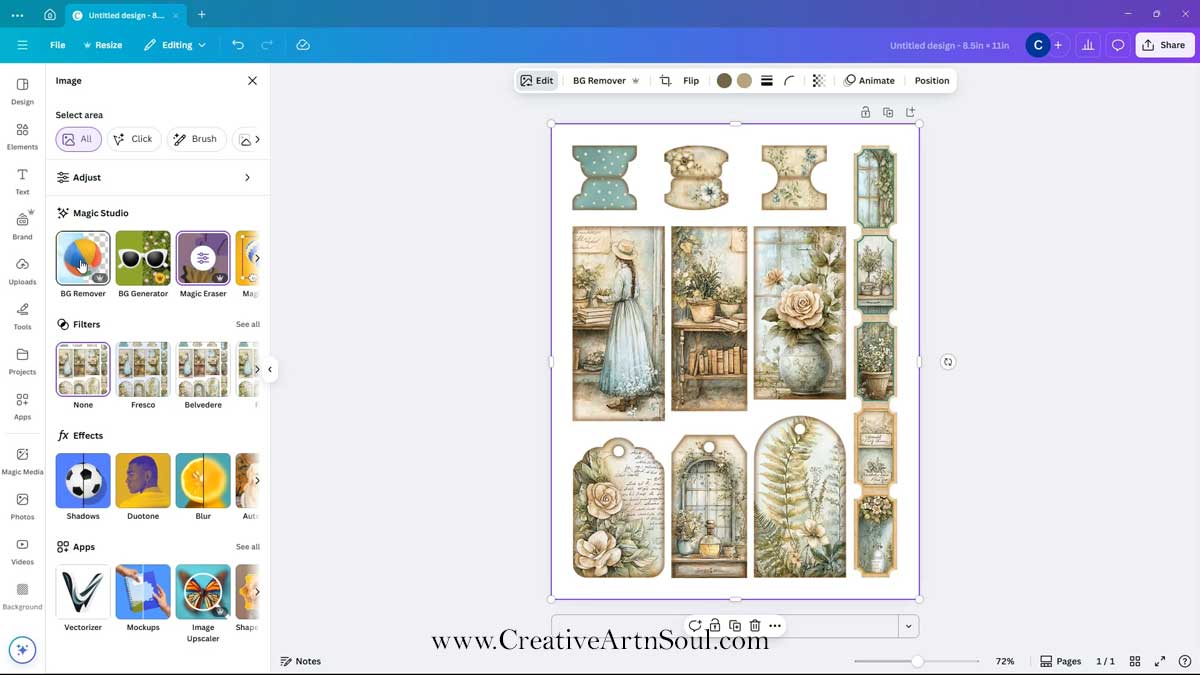
Click edit, then from the magic studio section, select “magic eraser”. Reduce the size of the eraser and erase any unwanted text.
Select the background remover tool and the white background around the printable shapes will be automatically removed.
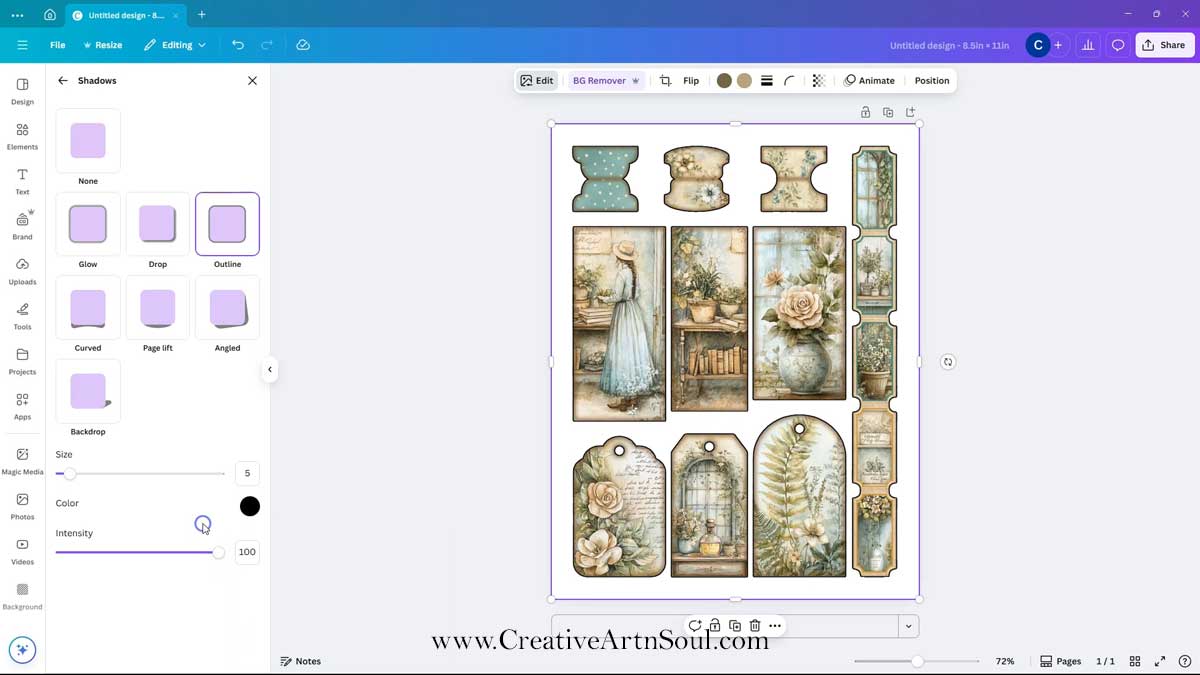
Once the background is removed, select the shadows option in the effects tools. Then select outline. Set the size to 5 and select the color black.
Click the share button and then download. Select file type pdf print and make sure to check “flatten pdf” then click the download button.
Scan the Junk Journal Printables Using the Brother Scan’N’Cut Machine
Once the page is prepared with the black outline, print it out onto cardstock or copy paper, then attach the page to the cutting mat. After attaching the paper to the cutting mat, load the mat into the machine.
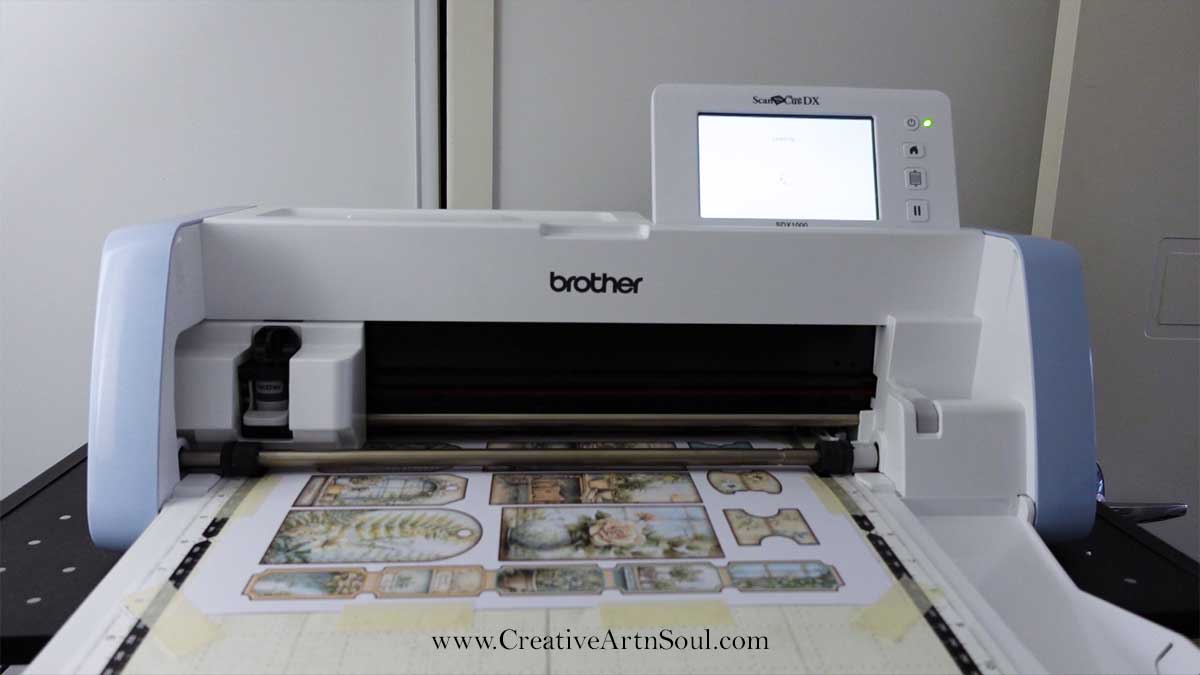
Once the mat has loaded, press the scan button, select direct cut, then press the machine icon. Press the start button to start the scan.
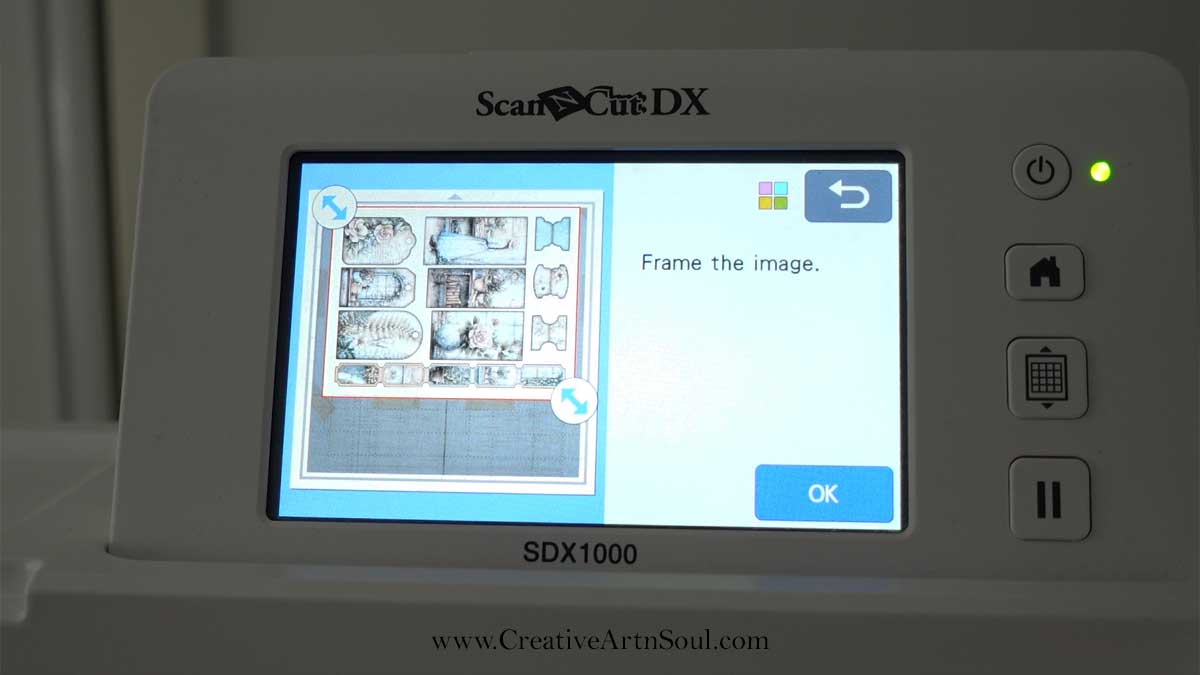
Once the page is scanned, adjust the framing close to the outer edges of the images so that the edges of the masking tape are excluded from the cutting process.
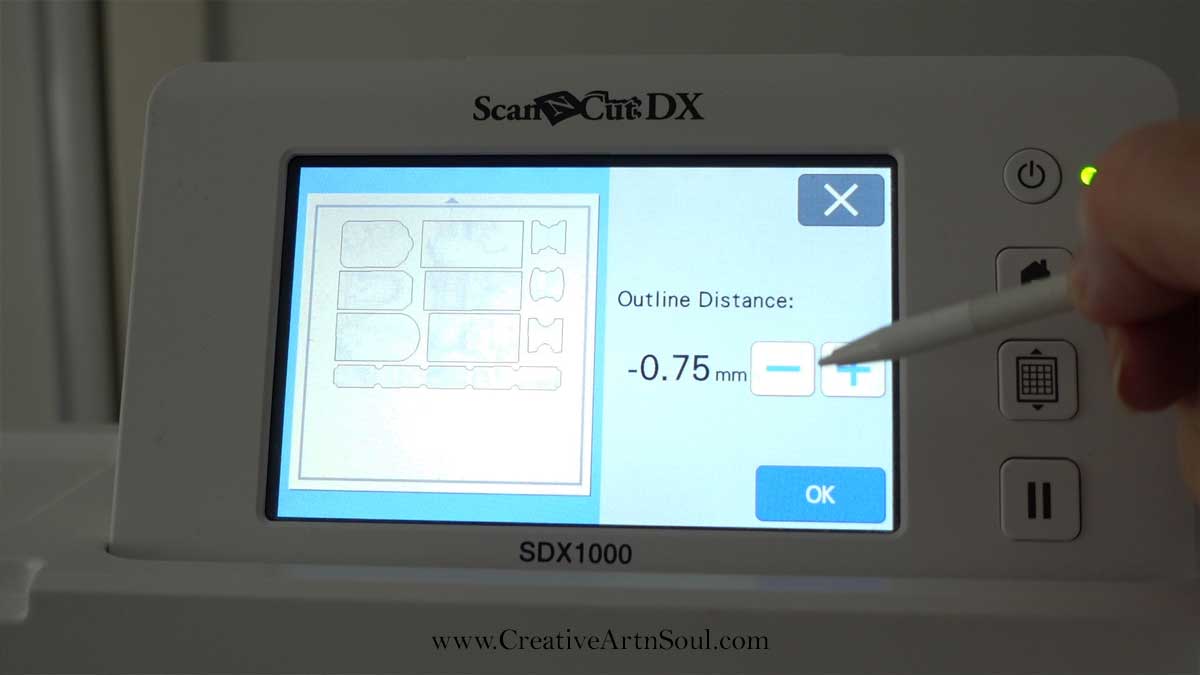
To make sure that the black outlines around the outside of the shapes are completely removed, you need to set the “outline distance”. This is the button with the circular lines on it. I always make this setting -.75mm, which is about .04 of an inch.
This setting will ensure that the machine will cut .75mm in from the outer edge and will cut away the black outlines.
Press ok to exit and then select the cut option to start the cutting process.
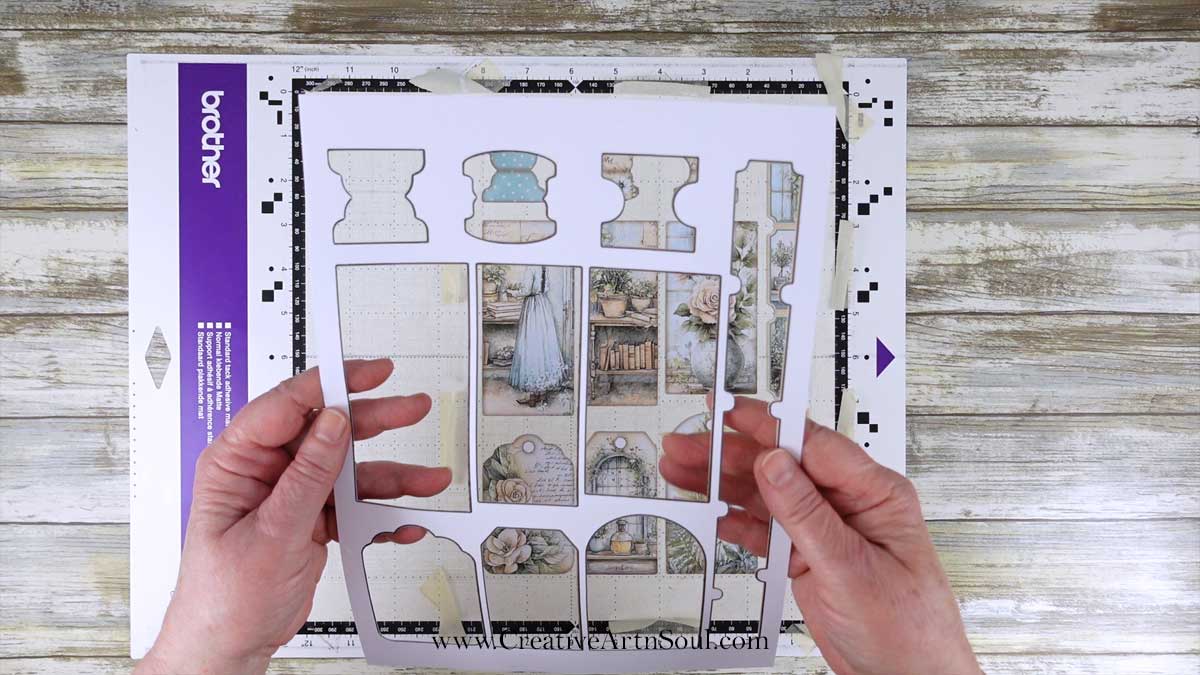
Once you peel away the background paper, you can see that all the black outlines have been cut away and your printable sections should have perfect cuts all around.

Save this pin to your favorite Pinterest board!