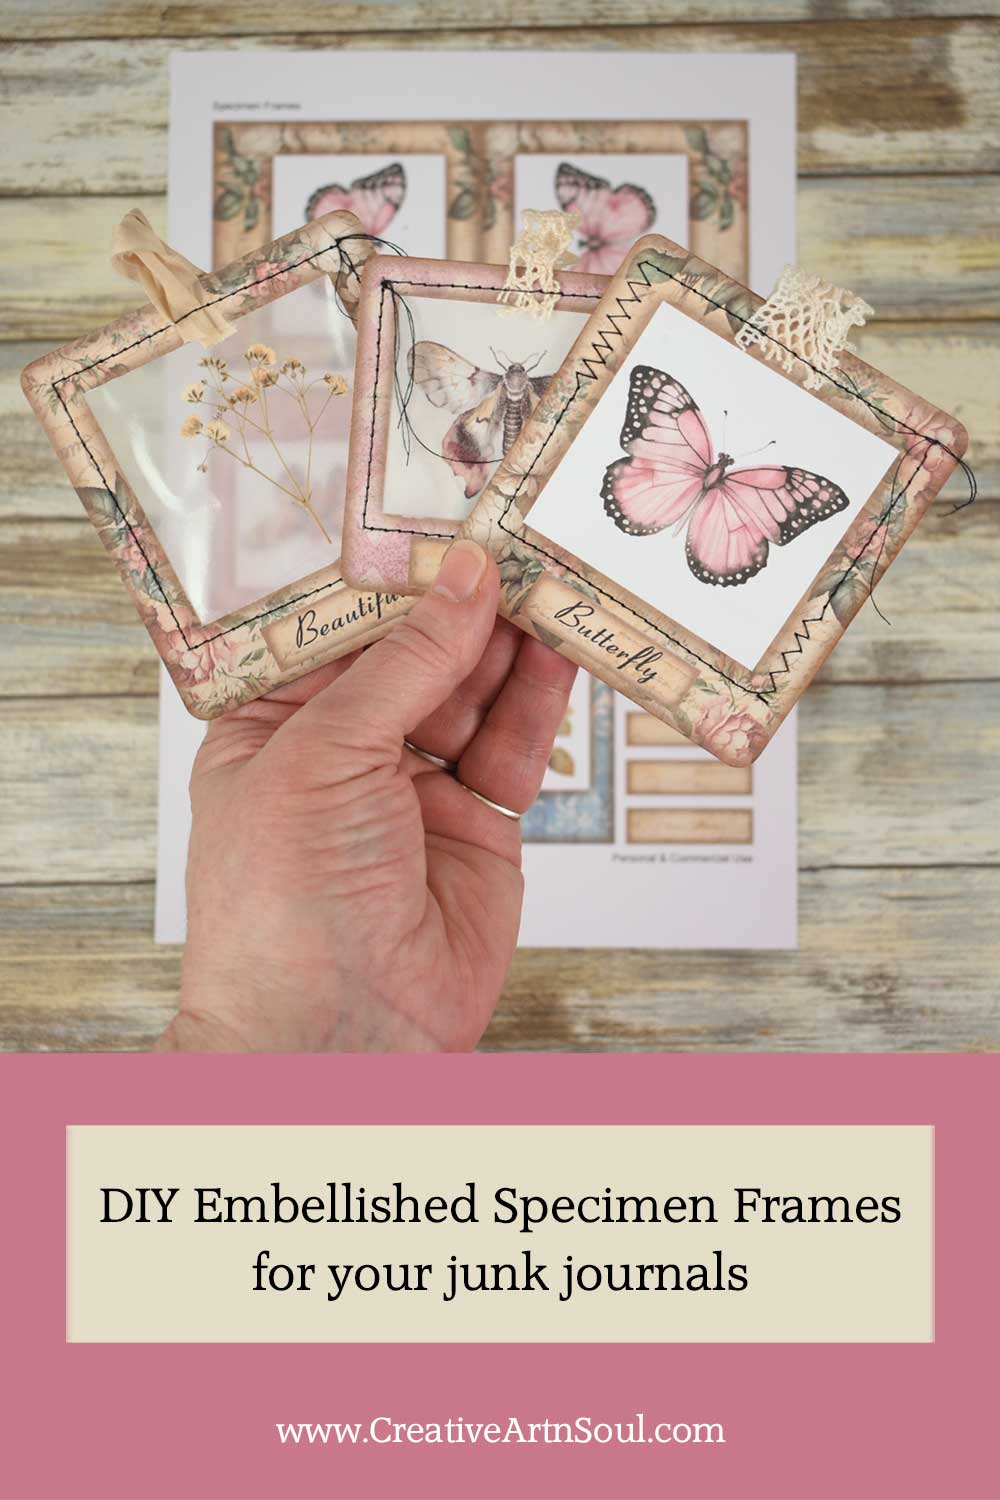
Make these cute printable specimen frames that are ideal to use as embellishments in your junk journals and other creative journals.
These printable specimen frames are fun and easy to make. You can insert all sorts of clipart and dried flowers, or even quotations and phrases into the frames.
In this tutorial I’ll be making these printable specimen frames using this template, however you could also make your own frames by cutting out pieces of printed cardstock or thick scrapbook paper that you already have in your paper stash.
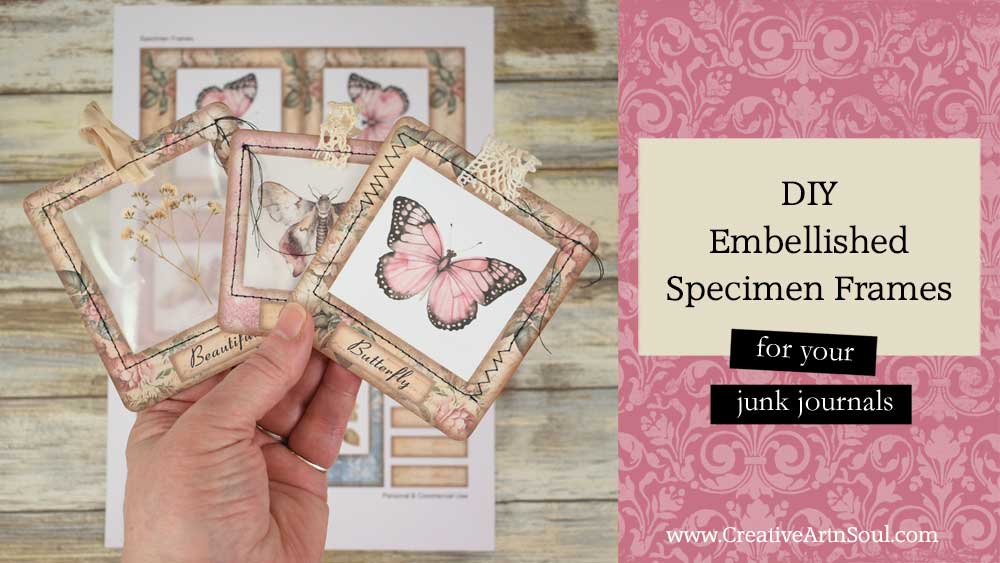
DIY Printable Specimen Frames for your Junk Journals
Supplies
- Printable specimen frames template
- Junk Journal Printables Club
- Epson EcoTank Printer
- Cardstock
- Corner cutter punch
- Ruler
- Craft knife
- Scissors
- Bone folder
- Ink pad
- Ink pad applicator
- Sheet protectors
- Translucent vellum paper
About the Templates
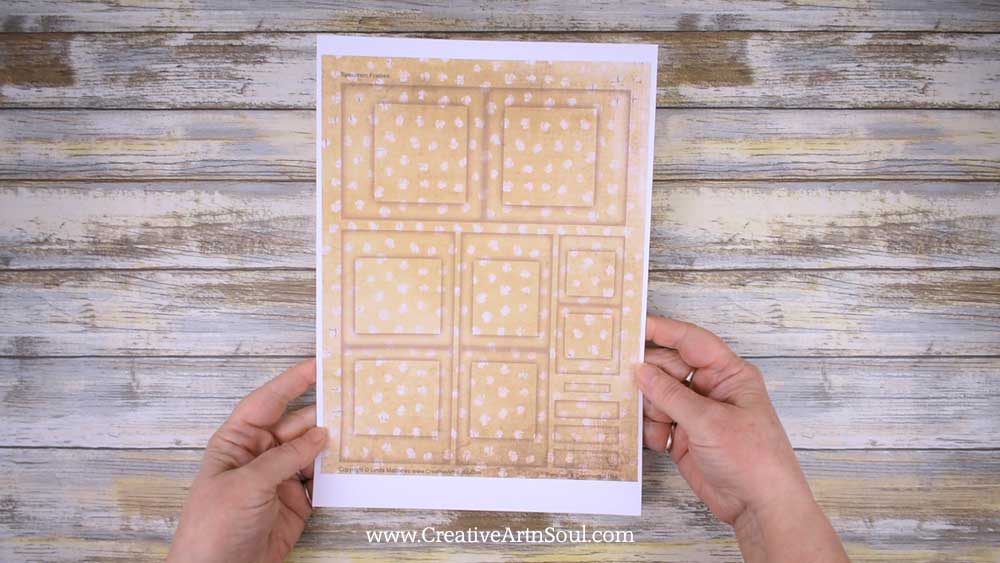
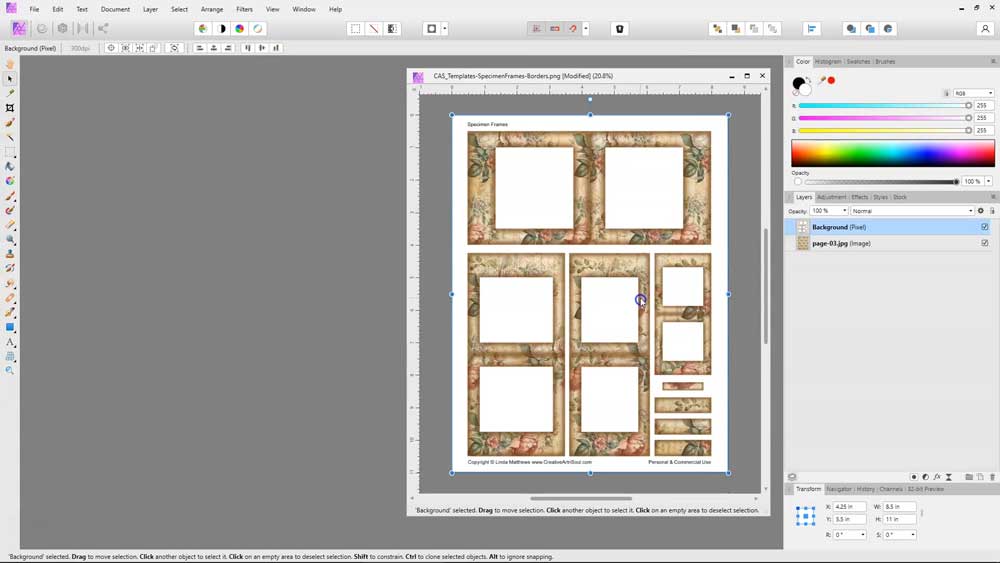
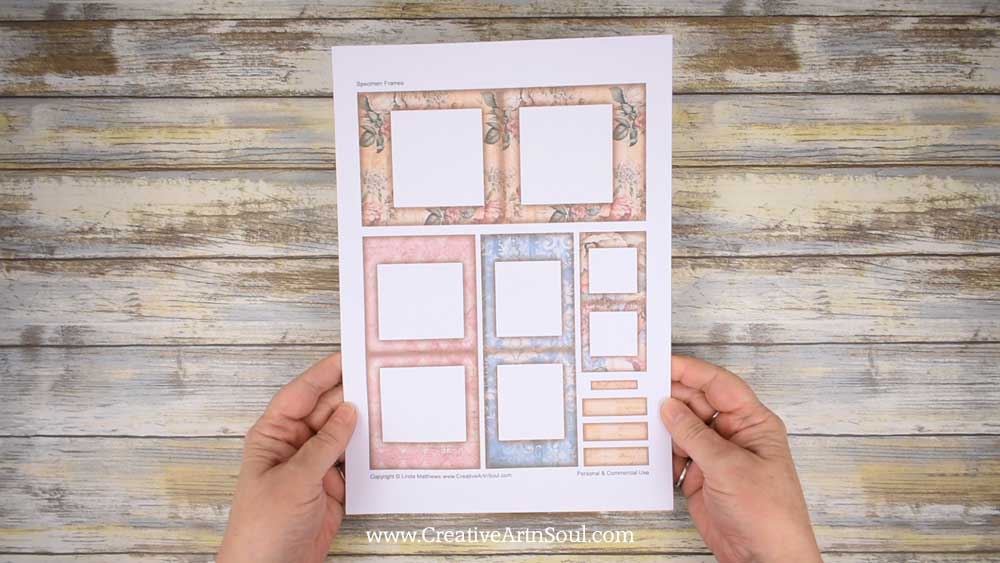
The printable specimen frames template include four printable specimen frames in different sizes as well as a set of labels. The set comes in two formats, pdf format so you can print and use with your own printed papers, and png format which gives you more options for designing in a photo editing program.
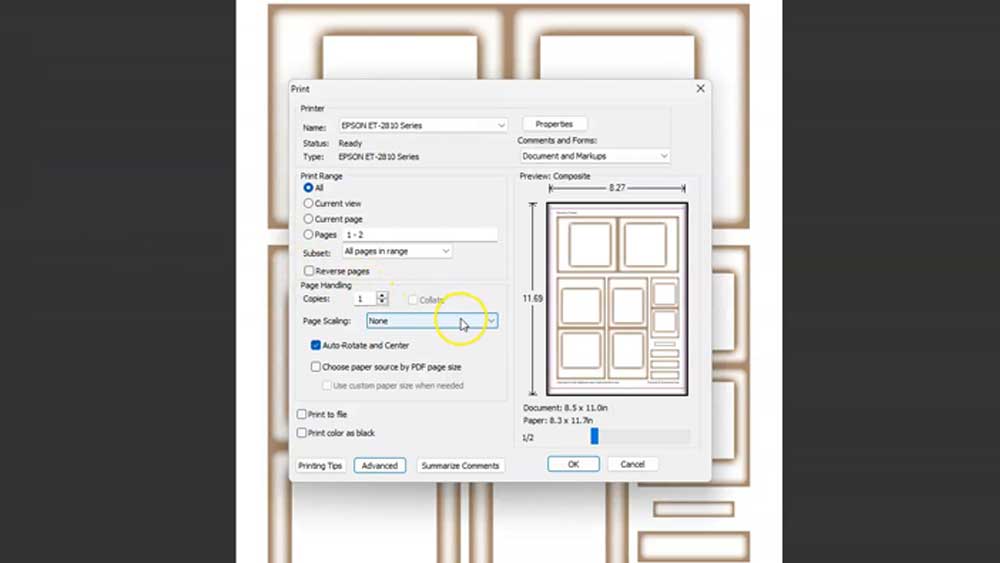
To use the pdf format, put a piece of printed cardstock into your printer, and open the pdf file in a pdf reader. Make sure the “page scaling” option is set to “none” so it prints at the correct size, then print.
I’ve printed these frames onto cardstock using some of the printable papers included in the Junk Journal Printables Club.
To use the png format, open one of the files in a photo editing or graphic design program such as photoshop, or canva. I’m using affinity photo.
Once the template file is open, simply add a digital paper and move it to a layer below the template.
You can use one digital paper or several if you want your frames to have different colors and designs.

Once you’ve added the papers, move them to a layer underneath the template and position them where you prefer. You can move the files around and resize them to make them fit better.
Once you’ve completed the design, save it as a jpg file and print it out.
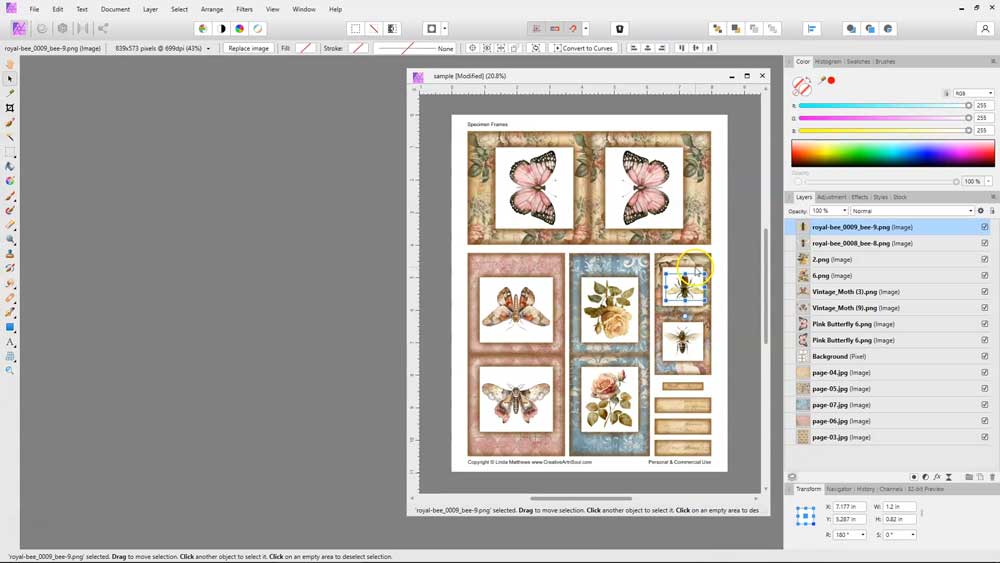
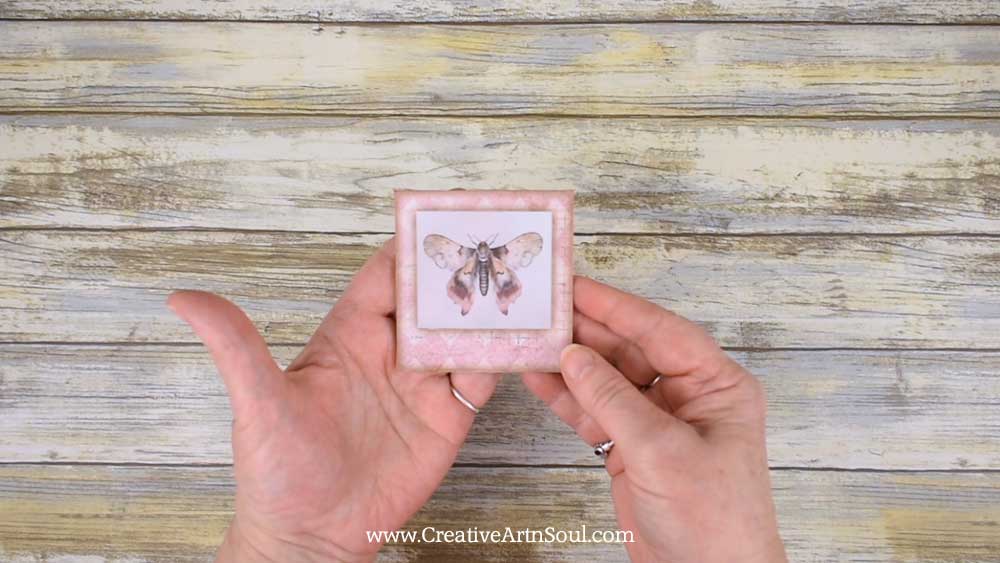
Add Digital Clipart to the Designs
During the design process, you can also add digital clipart which saves you gluing clipart on once the frames are printed.
Add a piece of clipart, position it on one side, then copy and flip it horizontally for the other side.
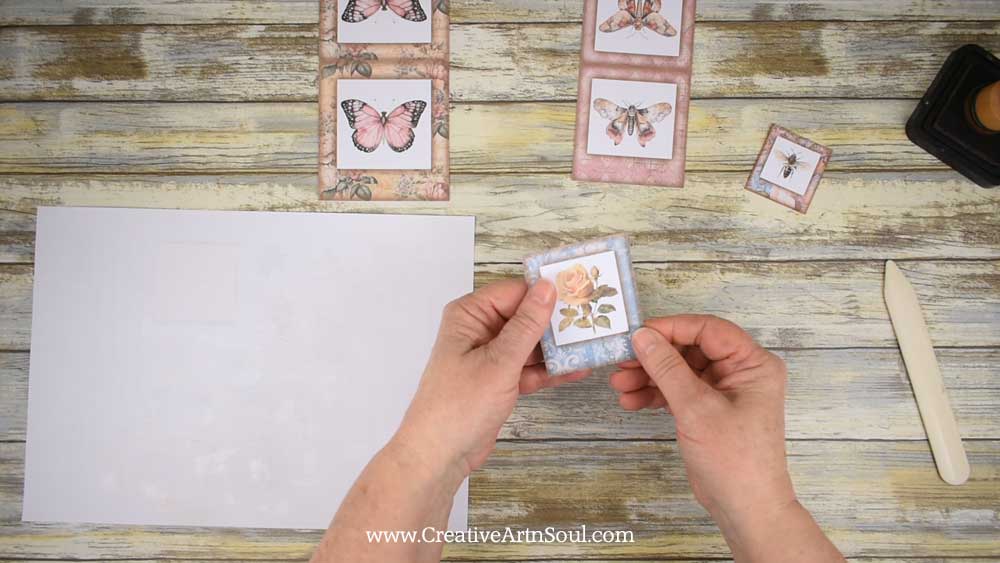
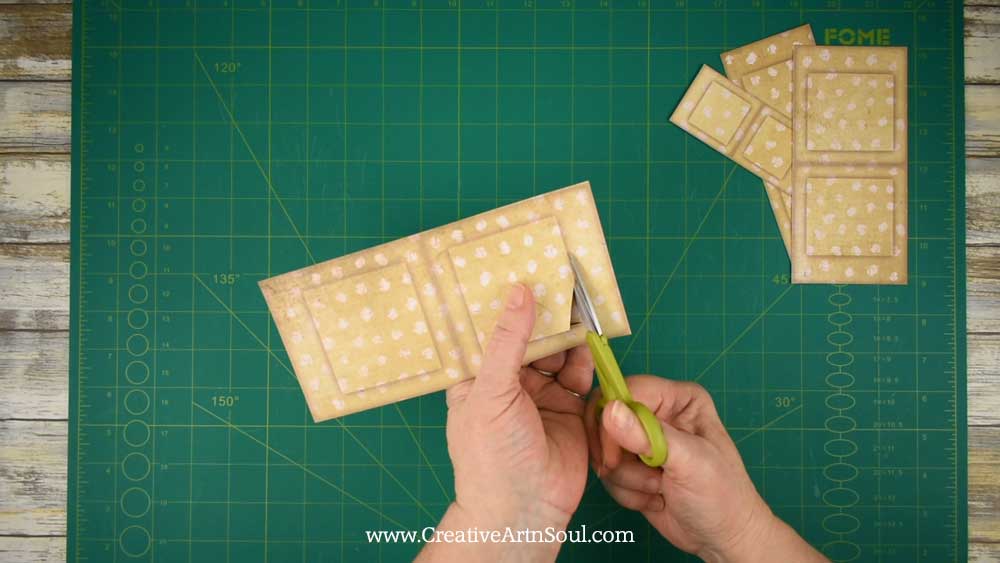
Once you’ve finished designing, save it as a jpg file, print it out, and cut out the pieces.

Assemble the Frames
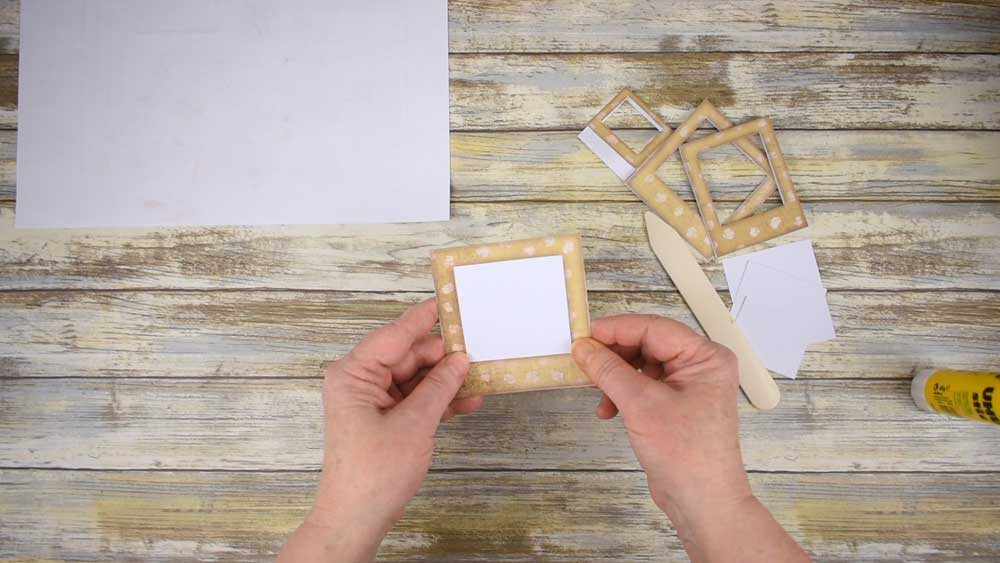
To assemble the printable specimen frames, fold them in half and glue the pieces together. Use a bone folder to make sure the creases are sharp so the frame lays flat.
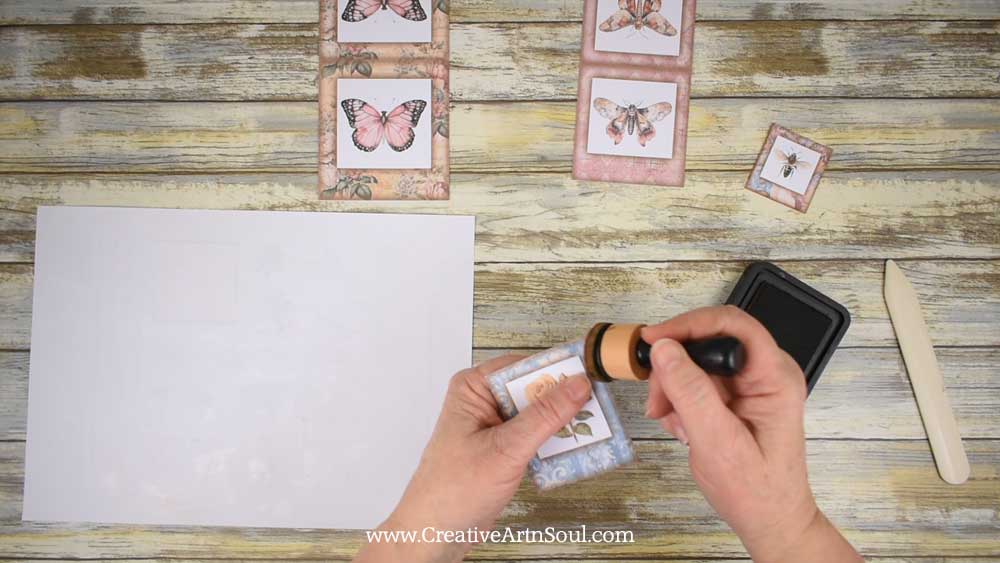
If there are any white edges showing, you can hide them by running an ink pad and applicator around the edges.
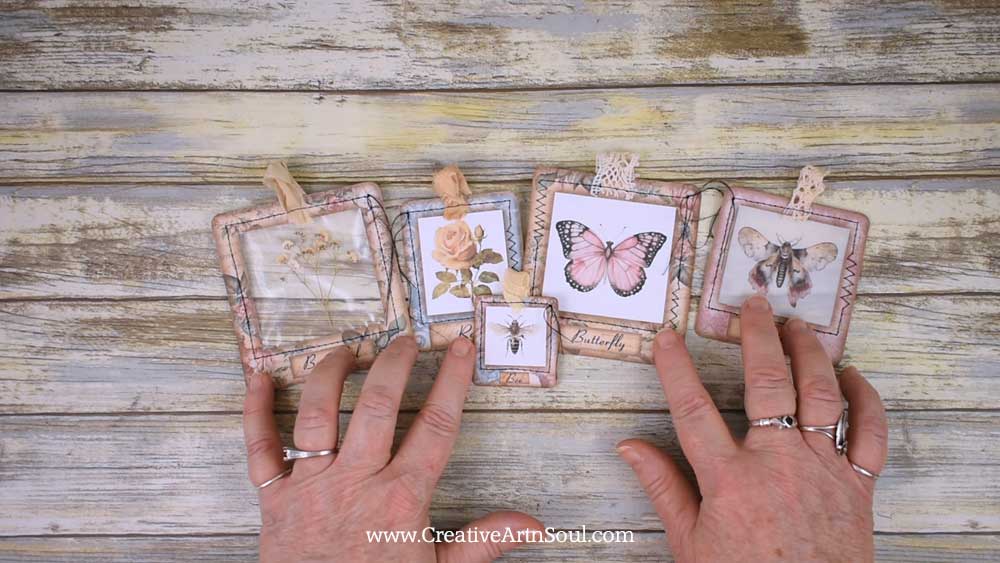
Designing and printing them out this way, is a quick and easy way to make your specimen frames. Once they’ve been folded and glued, you can add a label to the front.

If you already have cut out clipart that you want to use, you can print out a set of blank specimen frames and then glue the clipart pieces to the background.

Using the Frames Printed Using the pdf Template
If you use the pdf template you’ll notice that the inner section of the frame will need to be cut out. This is because your printer isn’t able to print the color white.

This process is the same if you’re making your own frames from cardstock or other types of decorative paper that you already have in your paper stash.
To cut the inner frame sections out, first fold the frames in half and press the crease with a bone folder.

To cut using scissors, first cut a cross section using a craft knife so you can insert your scissors easily and then carefully cut away the inside.
For a more accurate cut, you can use a craft knife and a ruler.
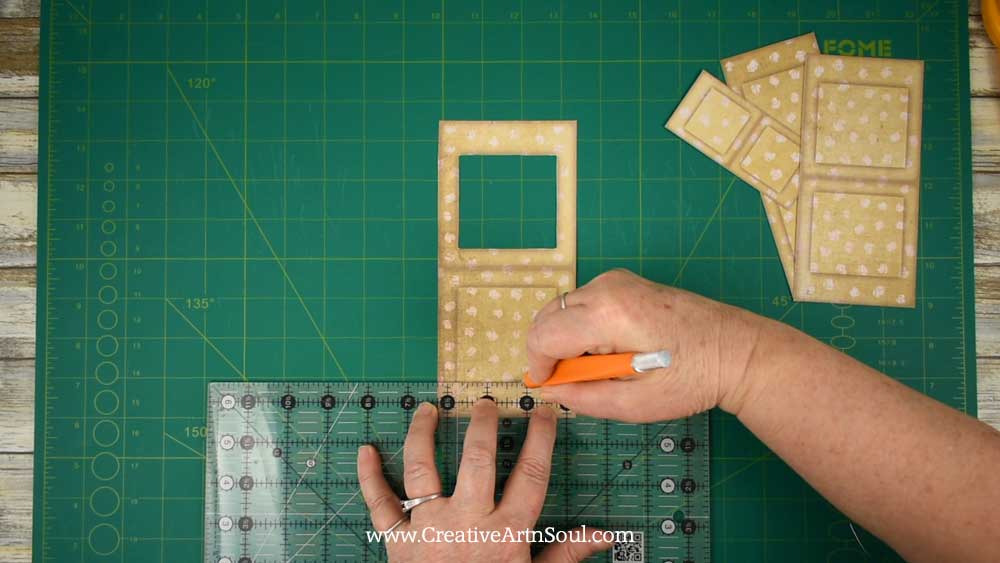
Using scissors is a bit safer than using a craft knife, but a craft knife and ruler will give you a straighter cut.
If using a craft knife, you can fold the frame in half and cut through both sections at the same time for a more accurate cut.
Once the inside sections are removed, cut some white cardstock pieces that are slightly larger than the inside frame area.
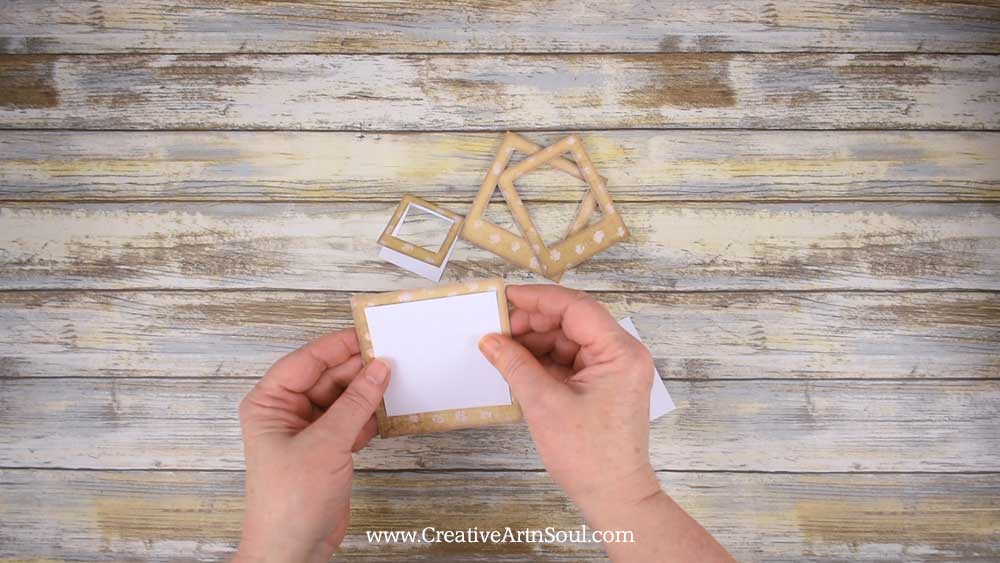
Apply glue to the inside of the frames, insert the white cardboard section, then fold the frame over and press together.
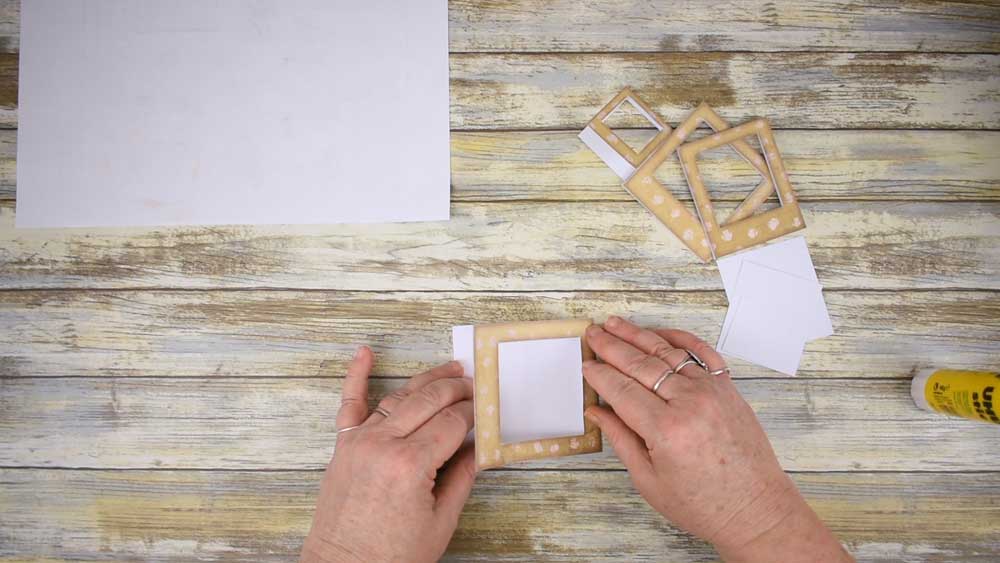
If there are white bits showing along the edges, either cut them away with a small pair of scissors, or use a stamp pad and applicator to color them.
Make Specimen Frames with Transparent Inserts
You can also add clear inserts inside the frames. Using transparent inserts gives a fun floating appearance to clipart and whatever else you want to insert into your frame.
For clear inserts you can use any type of transparent material such as cellophane bags, sheet protectors, clear sticker sheets or even hot or cold laminating sheets. Cold laminating sheets are pretty much like clear sticker paper. Or you could even print some clipart images onto a sheet of vellum which is frosted rather than a transparent.
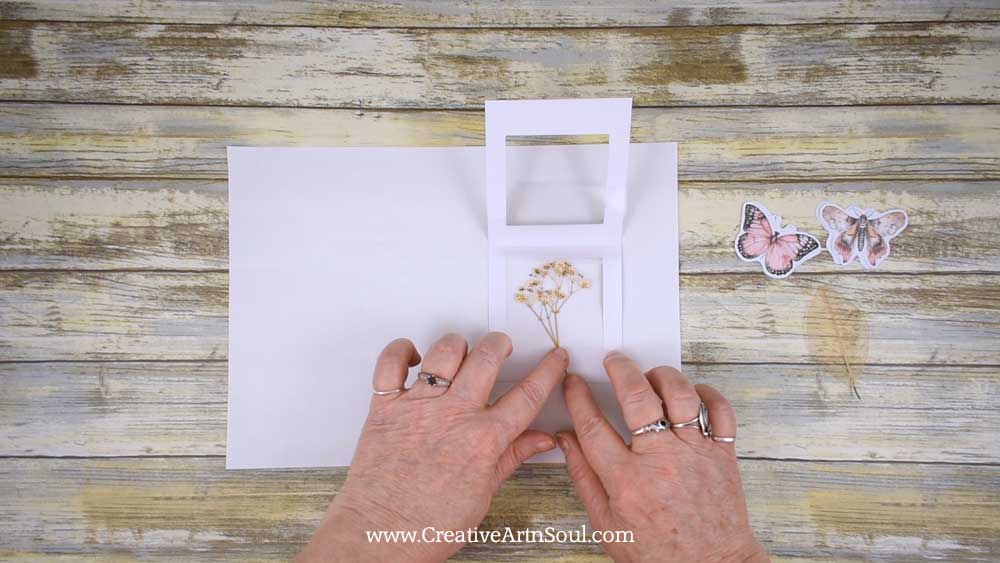
To insert a piece of printed vellum, use a frame with the inner section cut out, then position the frame over the image.

Using a pencil, trace around the outside of the frame and cut out the vellum section, then trim the sides so that the vellum sits neatly inside the frame.

Apply some glue to the inside of the frame, position the vellum section, then press the pieces together.
If there are any white bits showing around the edges, cut them away or hide them using an ink pad and applicator.
To make a transparent frame, I’m using a piece of sheet protector slightly larger than the inner frame area. I’ve cut it on the fold to make it easy to handle, however you could use two single pieces.
To attach it to the frame, run some glue around the edge of one of the cutout sections and press the transparent sheet into position.
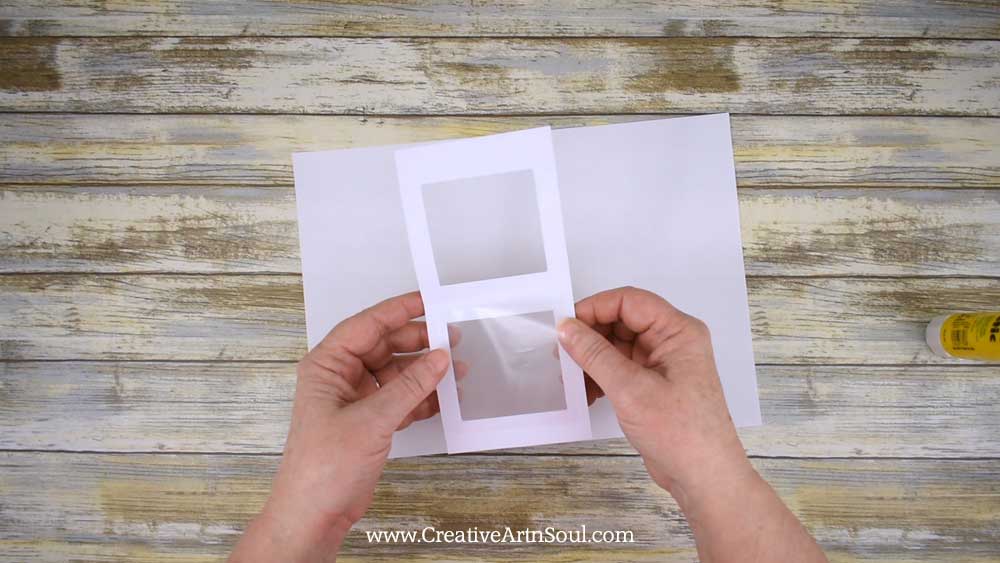
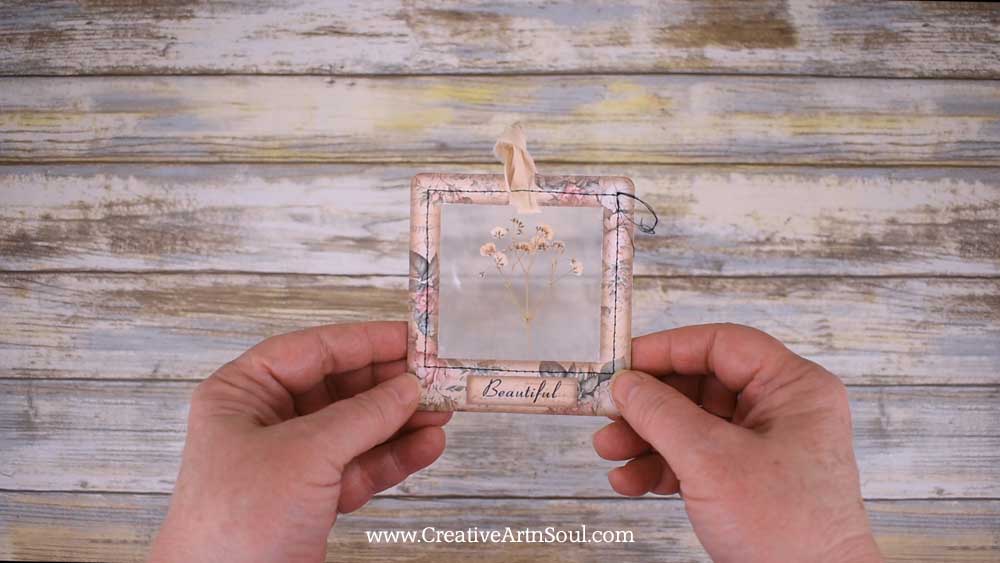
Transparent sheets can be used for things like pressed flowers and leaves and even clipart.
To attach the item to your transparent section, add a touch of glue to both sides, and then position it on the frame. Glue around the edges, fold the frame over, and press in place.
You can finish off the frames with embellishments such as gluing on labels. Make the corners round using a rounded corner punch.

And if you like to sew, attach a piece of lace or ribbon at the top to make a loop and then add some stitching around the edges.
Save this pin to your favorite Pinterest board!